Monthly Archives: June 2016
Dress for Liz part 4
Hi, I’ve done the alterations discussed in the previous post, Simon and I spent one evening trying to turn the bodice inside out through the shoulder seams, before I realised I had to undo the side seams doh.
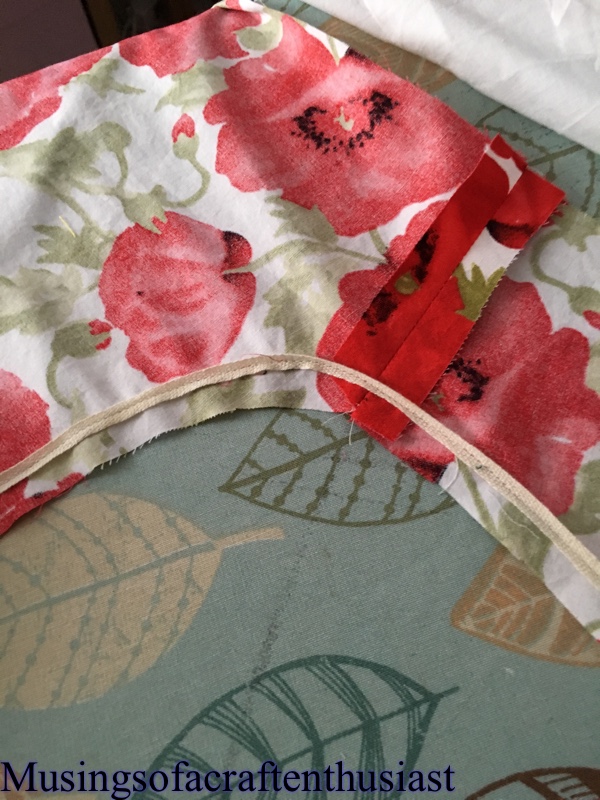
I took the sliver off the back shoulder seam, and cut 5/8 inch off the front. I stitched the bodice to the skirt,but this time I just stitched the fashion fabric, as I am going to slip stitch the lining to the waist seam. I also put in the invisible zip.
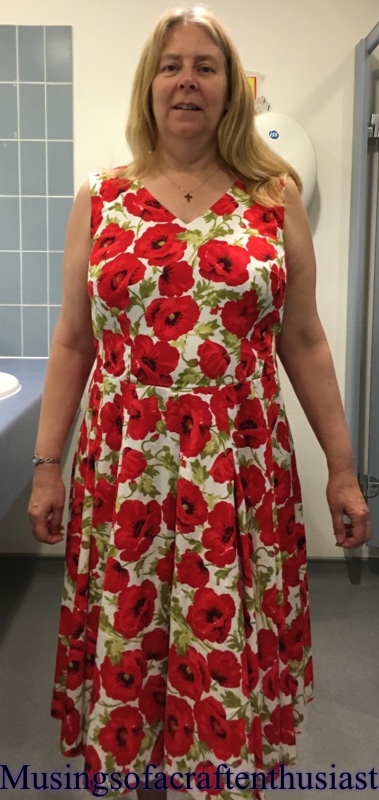
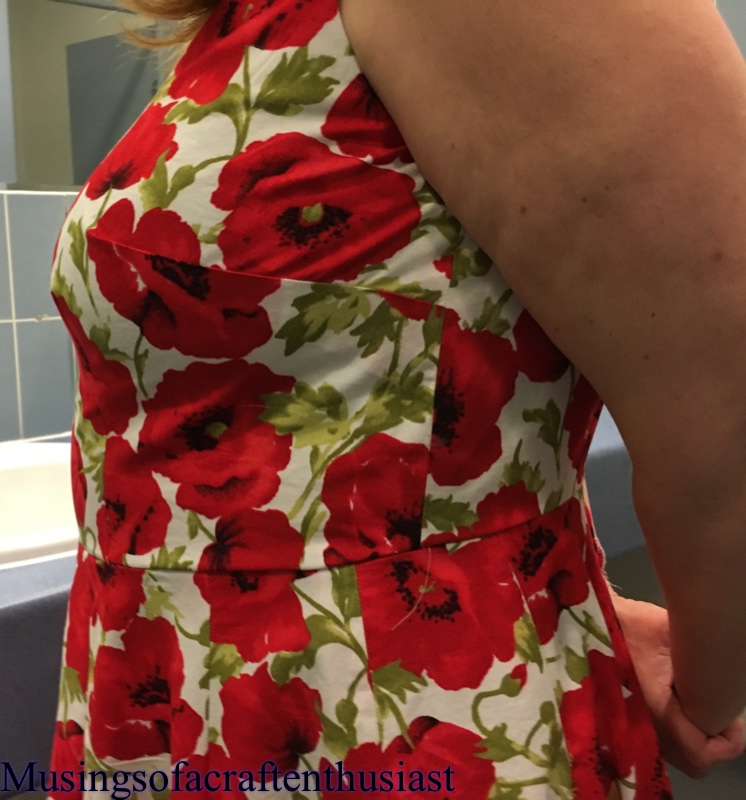
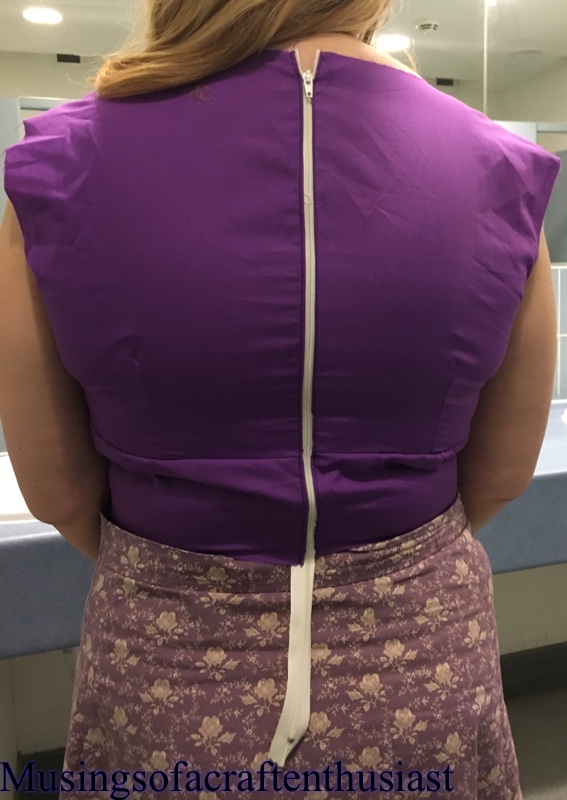
Here is Liz in the altered dress

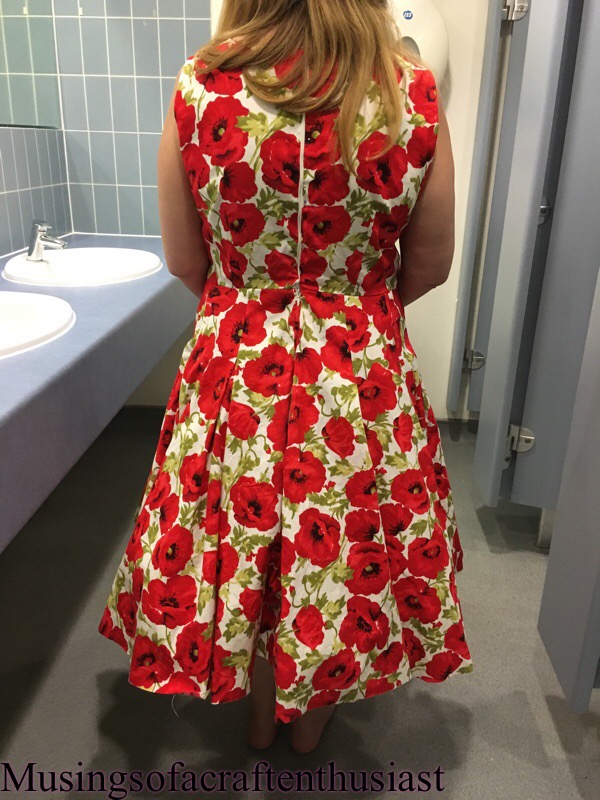
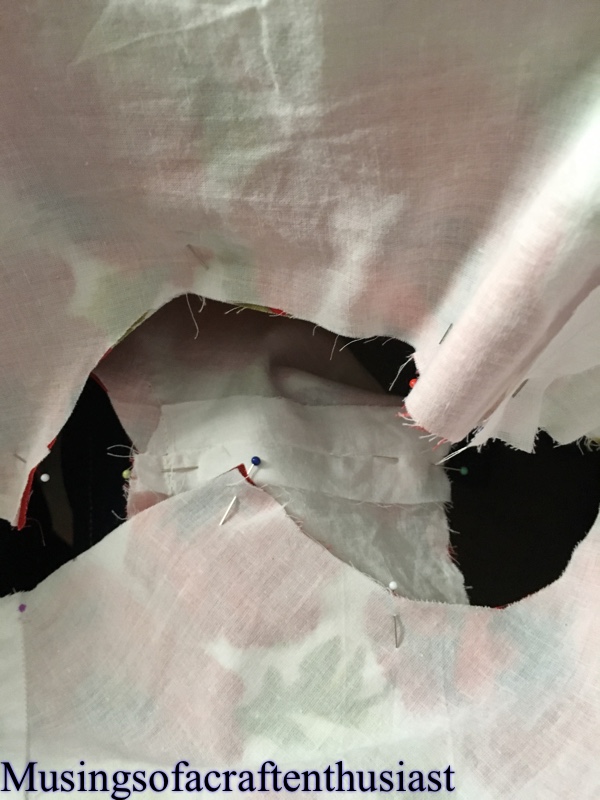
I don’t know about you but I have a lot trouble with invisible zips, the biggest problem I have is, the darned thing works when I put it in, then by the time I try on the item of clothing the Zip diesn’t work, this is what happened with this one, I unzipped it put it over Liz’s head went to do it up, no matter how much I tugged on the zipper it would not work 😦 the dress is pinned together in these pictures.
After these photos, Liz tried on her net skirt.


I have pinned up the skirt so hopefully this weekend I can get the hem done and a new lapped zip installed.
First finished WIP
Here is the first item of clothing from my WIP list that I have completed, it is a blouse and it is so old that I’m not sure what pattern it is. This was actually mentioned in my first UFO post.
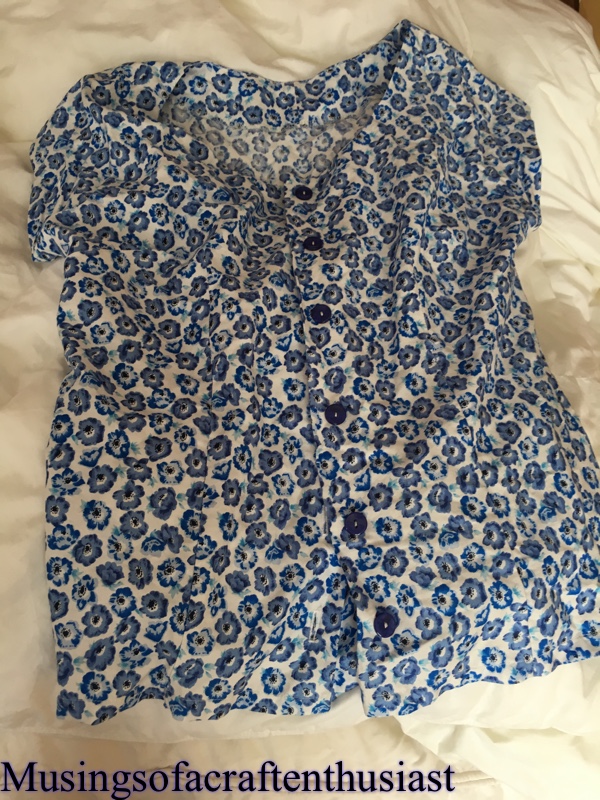
I think it is a Blackmore blouse pattern, I have made the pattern with the side zip which is a very nice top, I do have some issues with it sliding forward but if I wear it tucked in it is fine, this is the version with the buttons up the front.
All that was left to do on it was stitch the facings down and put the buttons on. Now there are probably three reasons that have stopped me from finishing this top.

1. The hole in the sleeve facing – I’ve just darned it
2. I couldn’t decide what buttons to put on it – I’ve found some dark blue buttons, not sure if these were bought for this project but they will do fine- buttons stitched on.
3. The fabric was used on Strictly Come Dancing about two years ago, it was used for the sleeves of one of the male contestants shirts, I didn’t like the look of the outfit, and it probably coloured the view I had of this blouse and the unfinished dress in the same fabric.
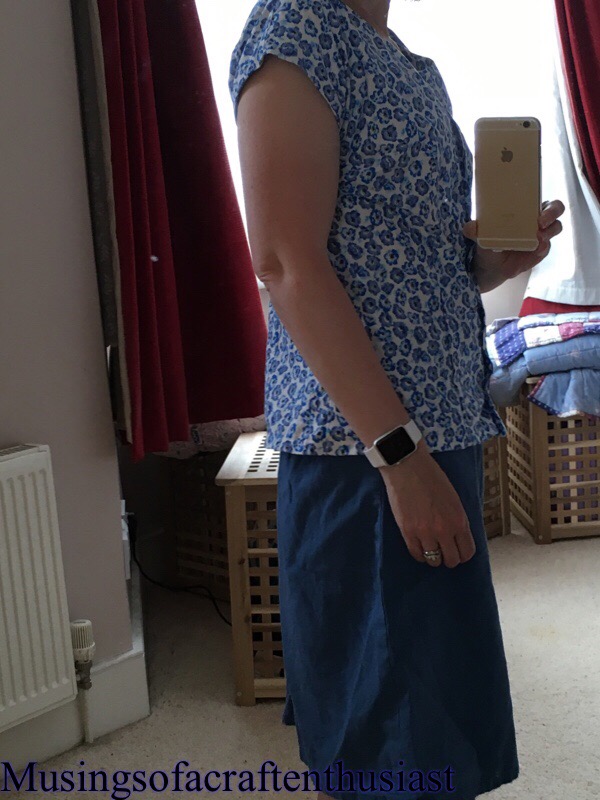
I’ve overcome the obstacles in front of me, it is finished, I’ve even worn it, I don’t like it.
I don’t like the fit, and I don’t like the fact that the minor slippage I get with the side zip version is nothing to what I am getting with the buttoned up version, I’m fairly sure it will be off to the bin, but at least it is finished.

Dress for Liz part3
Every thing is coming along quite well and I am still on schedule, which is always a bonus. Simon was gigging most of the weekend just gone so I took the opportunity to get some major work done on the dress.
I started by tracing the pattern for the skirt, I traced the largest size, knowing that as it was a circle skirt if the waist wasn’t large enough I could just cut a bigger hole. If I was to do it again I might do it slightly differently, but as we were under a tight time fram this seemed easier.
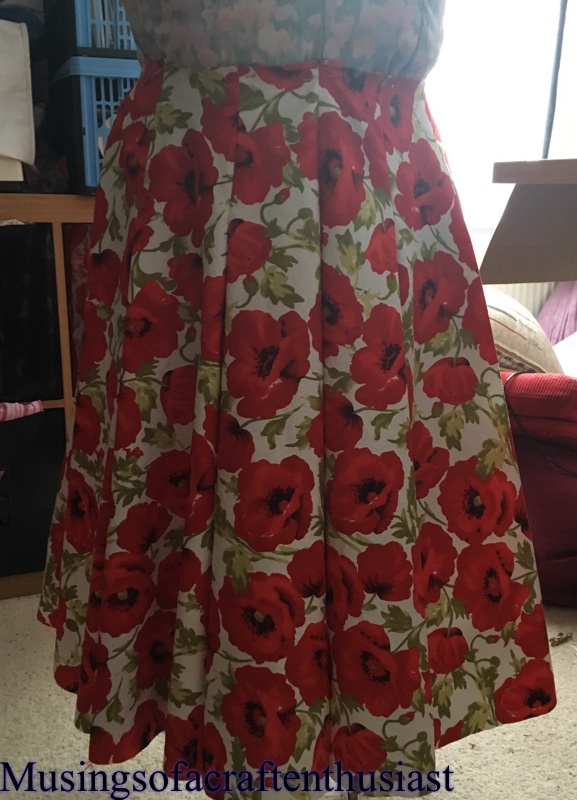
I used the circle skirt with box pleats, it gives the skirt a bit more body and a lovely shape even without a net under it.
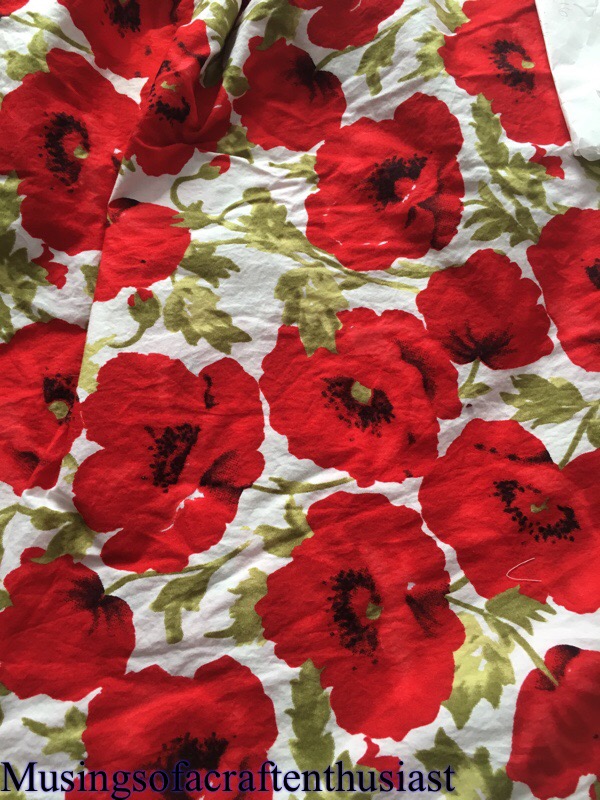
I must admit seeing it sitting there in its poppy glory I did wonder what we had done and what sort of mess I had got Liz into, but once the bodice was attached it looked a lot better. I padded up my dressmakers dummy with a 2 meters of fleece and used the test bodice as a guide.
I cut the bodice on the fold after remembering to remove the ‘seam allowance’ and I also added 5/8 to the front as it looked a lot shorter than the back.
I ran the stay stitching along the neckline as per the instructions in the book, but just to be sure I attached some 1/4 inch tape I got from my Mum which I assume was for that purpose.
I decided to line the bodice with some cotton lawn I had laying about so that the inside would look nice, I used my overlocker on the skirt.

After both peices got a good iron, and using more pins than usual I attached both peices of the bodice together.

I basted the skirt to the bodice, I needed to take about an inch off the top of the skirt to get it to fit, which is why I should have put more thought in it as the pleats no longer line up with the dart on the bodice.
First dress fitting.

The fabric I added to the front I didn’t need once the skirt was added and there were some gaping on the arm holes on the back.

I’ve pinned almost an inch out of the back shoulder as the front looks good. You can see on the picture below that the front is now too low.
I have taken the bodice apart and done the two alterations. We decided to leave the rest of the issues, like the pulling under the bust, which might be fixed by the other two changes, to be honest I didn’t want to fiddle with that bit too much as I was worried I might make it worse.
More next time….
Dress for Liz part 2
Hi, we completed the fitting for Liz’s dress on schedule, I’d given myself one week to fit the bodice and a little under three weeks to make the dress itself.
It is surprising how you go into these projects with one thing in mind and at the end decide on something different.
In the end I made four bodices in total, the first one just proved what I had thought, that a FBA would be needed, it was also a little small round the waist, which I’ll come to in a minute.
I decided to add a 1inch FBA which made the side dart huge but as I was going to need the extra space across the waist I decide to rotate most of the extra into the underbust dart, otherwise I was going to end up with no shaping at all under the bust. Liz tried this one on Monday, the fit seemed almost perfect apart from some pooling at the center back at this point it didn’t have a zip in it so this was guess work.
As I was pretty happy with the fit at this point I decided to make up the bodice of ‘our’ choice, it was at this point I discovered that when I had traced off the front bodice piece I had missed off the cut on fold, oops. This explains why the original bodice had been way too small I had taken out 1 1/4 in out of the front.
So that week I then made up the bodice with a 1/2 FBA,


put a zip in the one Liz had already tried on and take a 3/4 inch horizontal sliver out of the back

 and also made up the style I thought would look best.

Liz tried them all on and it turns out that the second bodice with the center seam and the 1inch FBA looked the best, so that is the one we are going with.
More soon……
Dress for Liz
I am quite excited about my next project, I have offered to make a dress for one of my best friends to wear to her nieces wedding at the beginning of July, when I say the beginning I mean July 2nd, and Liz and her family are leaving for Wales on the June 30th which leaves me with only one month.
We have picked the fabric and have had one bodice fitting, as Liz is a completely different shape to me I have a whole load of fitting issues I haven’t had to tackle before.
Issue one she has a lot more chest than I do, FBA here I come, and proportionally her waist is larger, but her hips are in the same size range as her bust.
We have decided on a pattern from Gerties new book Gerties Ultimate Dress book (well I think I talked her into it, but I’m not sure) it’s sort of the boat neck dress, but not, Liz isn’t keen on higher neck lines, so I was thinking the V neck from the basic pattern, with either a circle skirt or a pleated skirt.
Liz is very keen on the 50s type vibe in a dress, I also figured that at the bodice was going to be the hardest for fitting issues I worry about the skirt later.
The first bodice I made up was 14 on the shoulder and bust and 16 on the waist, it fitted beautifully across her shoulders and upper chest but needs about two inches added across the bust as it bought the side seams forward.


For ironing out the fitting issues I’m using the basic bodice as I think this will be easier to fit initially and then the changes can be transferred to the pattern I want to use.
Birkin flares no. 3
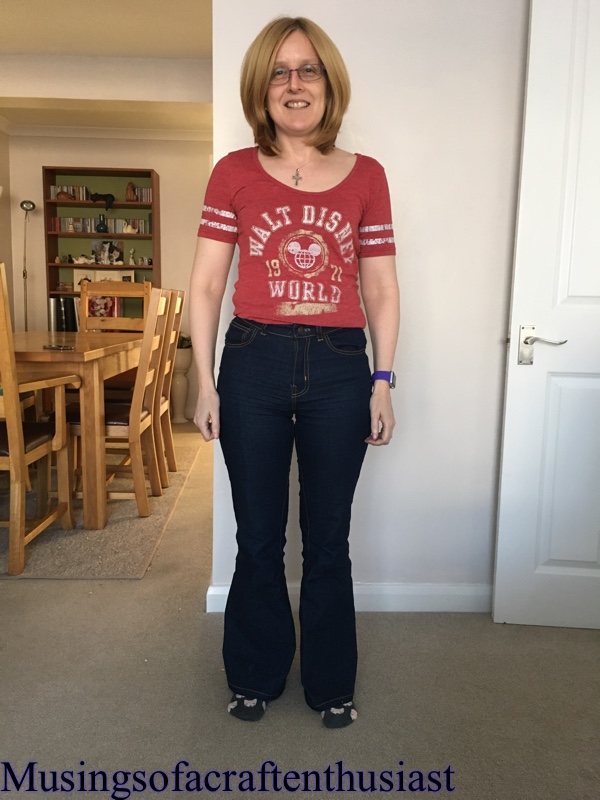
Hi, I’m on my third pair of Birken Flares, I still love the pattern and they are so comfortable, the first pair I made from a cheap 10oz Denim from eBay this is quite a light weight but it holds it’s shape over multiple wears. I bought the black, it has faded to a charcoal grey but for the price, fantastic. The second pair is a heavier weight denim and better quality, I thought but after 2 wears max has to go back in the wash.
This pair (third) I went back to my trusty man on eBay and bought the dark blue denim he had advertised with the black. I bought 3 meters out of which I cut two pairs of jeans and my skirt blogged about here so far I have only had time to put one pair together, I was stitching them at the same time but with different coloured top stitching, once I started confusing my self I decided against it.
This pair has yellow top stitching and came together pretty quickly, I did have a problem with the fly top stitching and the crotch but otherwise it went together with no problems, I do have one confession to make though I still haven’t tried rivets yet, I’m quite happy banging in the one button and yanking the extra teeth off the zip, but to be honest the rivets scare my some what. Maybe next time.


Unfinished projects
Anyone that has actually read through my blog, (and I thank you for sticking with it) will have realised that I do have a lot of problems finishing Items.
Anyway recently I was reading a blog that I follow, loweryourpresserfoot.blogspot.se and it appears that this lady has an even worse problem than I do, that could just be because she has been sewing and blogging longer.
She has made a decision to complete one Unfinished Project a month and she also wants to work out why she lets things become UFOs, I’m fairly sure I know why I let things become UFOs I do the initial fitting and either I don’t like the fabric after all, or it doesn’t look the way I envisioned it. There are a couple of other reasons, I can’t be bothered to do the hand stitching, or I’ve jumped into another project, the next big thing.
So starting this month I also want to complete one unfinished garment a month, but also I want to pledge that I will finish any stitching that I start before going onto the ‘next big thing’
There are a couple of things that I want to get into the habit of doing, one of which is not waiting until I have something finished to show you. If I can blog as I go hopefully there will not be long stretches of time between posts and also it should be extra encouragement for my UFOs.
Do you have trouble finishing projects? How do you deal with it?
Thanks for reading….


