Category Archives: Craftsy
Craftsy Class – Pattern Making for Knits the essential sloper
At the end of May Craftsy seemed to be desperate for me to spend my money with them, they sent me a ‘buy one class for £14.99’ so I obliged by picking this class.
It is a very well taught class by Judy Jackson, I wouldn’t have said that the blurb gives you a complete idea of the course, the first thing that you don’t realise is that Judy assumes that you have a body double, and brushes very briefly on what to do if you don’t have one, where as any other sloper course I have taken relies on measurements and drafting onto paper, this one is more of a draping class than a sloper course.
The course starts off by describing different types of stretch fabric and how to tell how much stretch it has. You cut two pieces of fabric and and pin one to your dress form, then working on one side of the dress form you pull the fabric tight across the shoulder and under the arm. After getting this to a state you are happy with you then mark it un pin it and duplicate to the other half.
Once you have the front peice you copy that to the back peice, apparently the front and back should be close to the same size. You pin these together on your dress from and take some more markings duplicate it on the other side of the back peice. Once you have your front and back pattern peice you stitch them together and try them on your dummy and see if there are any other tweaks needed.
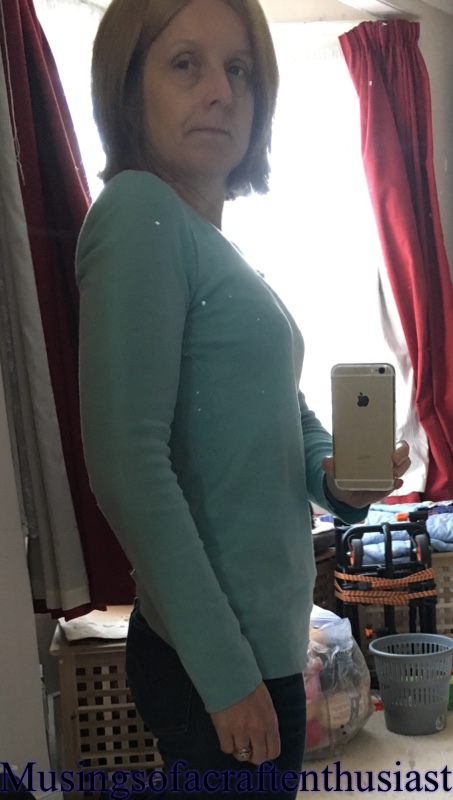
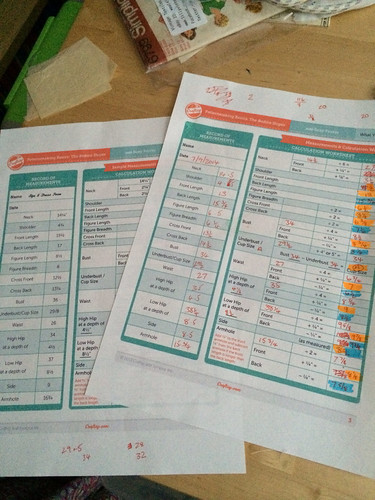
Once you have your pattern this is when the class comes into it’s own, it shows you how to take your sloper and create tops and dresses, the class also shows you how to take a woven pattern and turn it into a pattern for stretch fabric. At the moment I do only have one photo
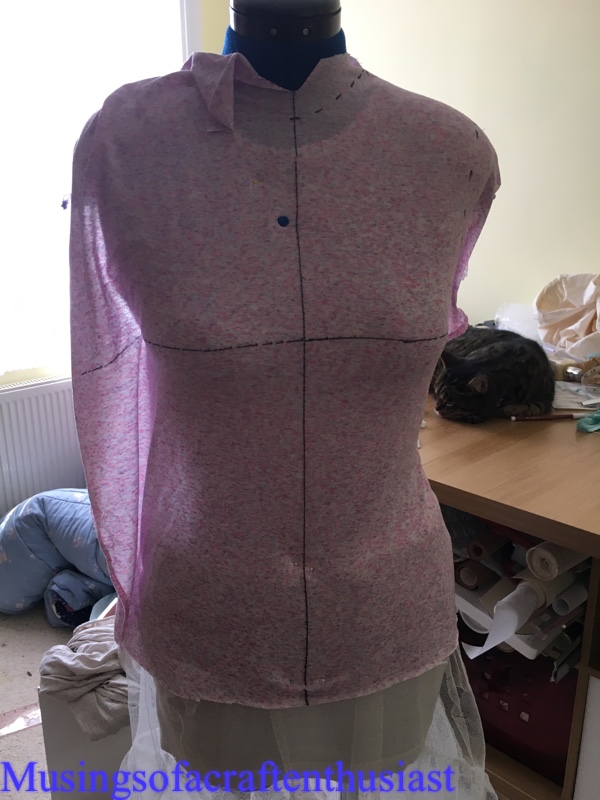
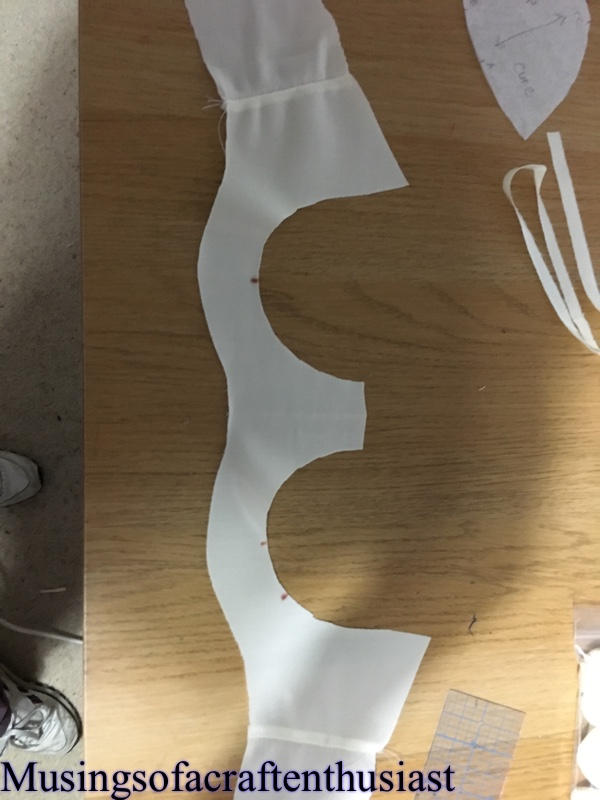
Here you can see the shapeing for the front, the resulting sloper needed a lot of pulling in for the waist.
It has given me lots of ideas for future projects and I can’t wait to actually get home start trying it out.
Overall for £14.99 the class was brilliant and I hope to get a lot of use out of it.
Goals for July
Going into July the house is still in a bit of a mess, the new flooring is going in next week, hopefully after that the posting schedule will be back to normal. I do have a couple of goals for this month, I’m going to a Wedding 1st August so I want to make a new dress, I have the pattern and fabric, I know that there will be some fitting issues so that will have to be sorted first. view b.

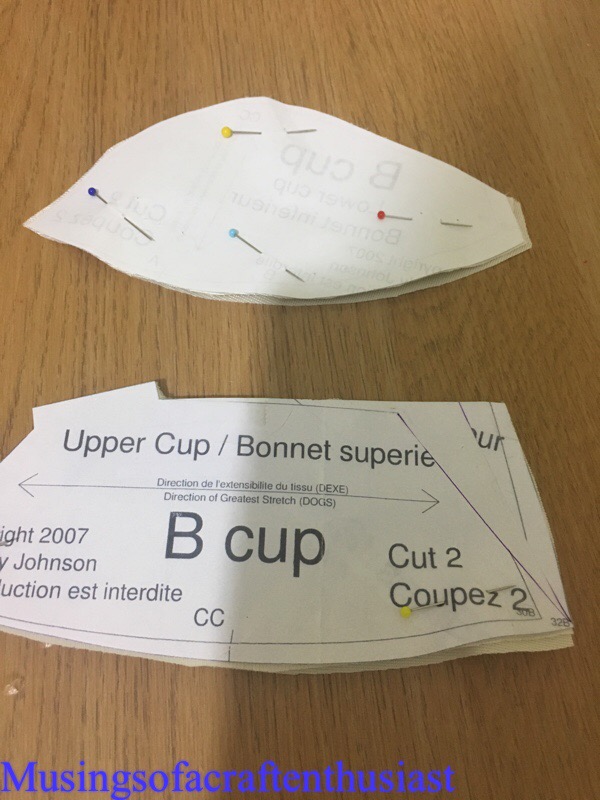
I am looking at the bra class again and am determined to sort the fit out on this, I don’t actually wear full cup bras but until I sort out the pattern for this I can’t go ahead to complete the other two classes I bought which take you through foam cups and altering the bra pattern for different designs.
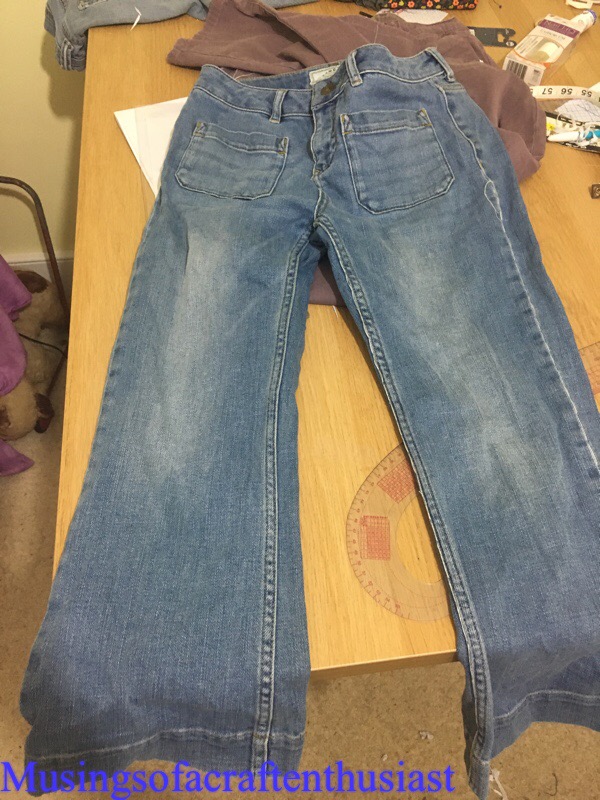
The third goal or goals three and four are to take patterns from these two pairs of trousers. I love these trousers but I wish they had a boot cut hem, they are prepared and I am just waiting for the organza to take a ‘rub off’. I do have some organza already but with everything boxed up I’m not sure where it is.

The other trousers are these cut-offs from fatface, they are so comfortable but they are just a little bit too long so I have to wear them with the bottoms turned up. I have an off cut of denim that should be just the right length.
More soon….
Bra Making pt 2
Here is the long awaited update to Bra Making pt 1, it doesn’t take that long to finish once you get onto the elastic.
My kit came with two different widths of picot elastic luckily I picked the right one, the slightly wider one goes along the bottom band the other one along the outside of the straps.
Each bit of elastic has two rows of Zigzag stitching, the first row is to switch it to the front of the bra band then you flip it up on the back and do the other row, the first one is normal zigzag the second is the three stitch zigzag.


The elastic is only pulled tight across the bottom of each cup, and you cut the bridge fabric so that you can stitch that straight.


You do much the same thing for the top of the band and up the strap, the only bit that need pulling is the side of the cup.

The neckline trim doesn’t have to be elastic but the stuff in my kit was, and to be honest not my cup of tea once it was installed, it was a bit too big.
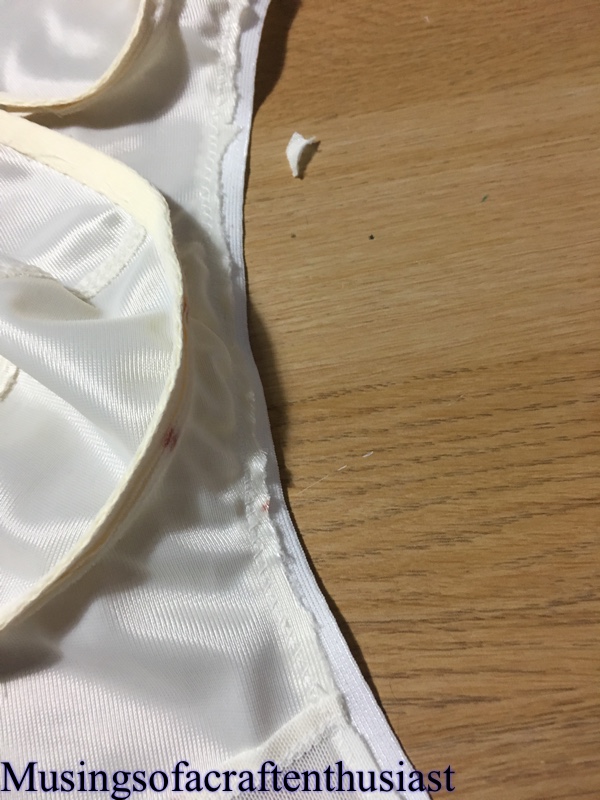
Once the bottom band has been completed, but before the strap elastic is fitted you check the band for size against the hook and eye band, trim off any excess on the band. You fit the hardware to the back strap then attach that to the back of the bra, and attach the bra strap to the the elastic back.
attach the hooks and eyes then you have a finished bra.


before you finish off the channelling for the underwires you try it on for fit.
The cup fit was pretty good, it was slightly tight along the top cup edge and the bottom band was also a bit tight, I was thinking of going up a band size but after asking the class instructor she suggested adding 1/2 to 1 inch to the back band piece and adding a wedge to the top edge of the upper cup.

So I’m going to try it and see how these alteration affect the fit.
If you are thinking of taking the Beverly Johnson class I would recommend it, I would also recommend getting her pattern and the kit that goes with it, I have enough fabric for about four bras, I will need to get extra elastic and findings. There are two reasons for saying this, if you take her other classes this is the bra pattern Beverly shows you how to alter and also I bought another kit from eBay and the main cup fabric is horrible and I think the the lace is unsuitable for bra making as it is slightly directional (one way) it is as if they have got a list of things needed for the process but have the necessary knowledge to select the right stuff. If I hadn’t bought the other kit I wouldn’t have known any better and probably not finished the bra.
I bought my official kit from b’ware they are Swedish website which accepts PayPal as well as credit cards the kit arrived very quickly.
Craftsy – Bra making part 1
Hi, you might remember this time last year I bought a craftsy class – Sewing Bras construction and fit, I also bought the kit that went with it, of course as usual by the time the kit arrived I had moved on to other things.
So fast forwarded to the black Friday sales this year where I bought the other two bra making classes and the knicker class as well.
Beverly Johnson, is a very good teacher she obviously knows her subject and comes across really well in the videos, the class starts off by giving you hints and tips on measuring and choosing your size, I went with the pinup girls classic bra Beverly Johnsons own pattern, usually I would wear a Balconette bra but I couldn’t find a pattern I liked and figured it might be better to start less complicated.
Beverly then went on to talk about the fabric and cutting out the peices, I had already traced them off the pattern, size wise I went for 32b, which is what I wear, what you are supposed to do is measure yourself in your most comfortable unpadded bra, but as I don’t buy unpadded bras I had to guesstimate
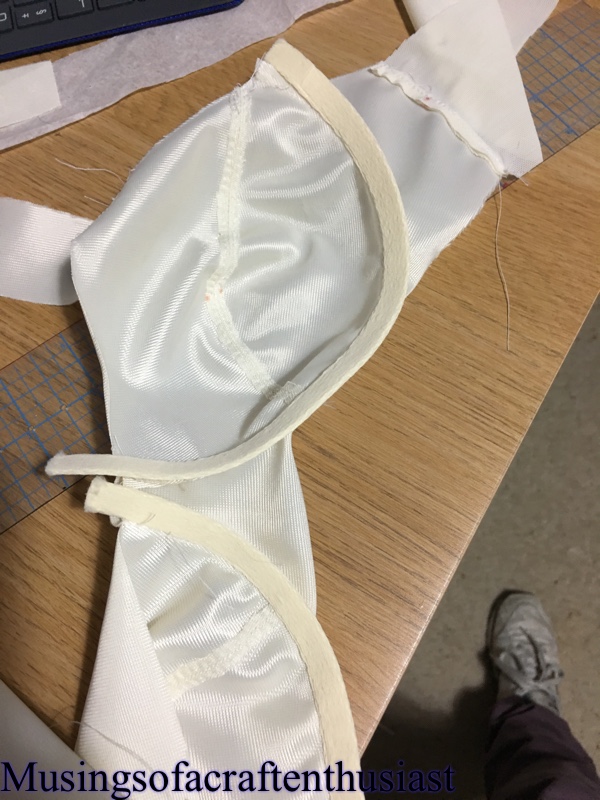
First you stitch the two halves of the cup together, and attach the straps after ironing (Beverly prefers a newl post for cup ironing) you top stitch the the seam allowances and trim.


Then you attach the back band to the front band
And the cups to the front band
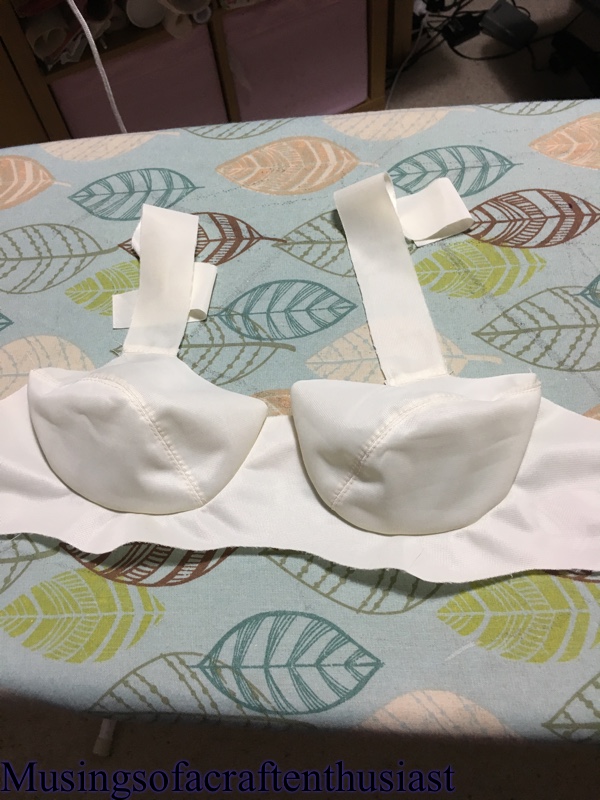
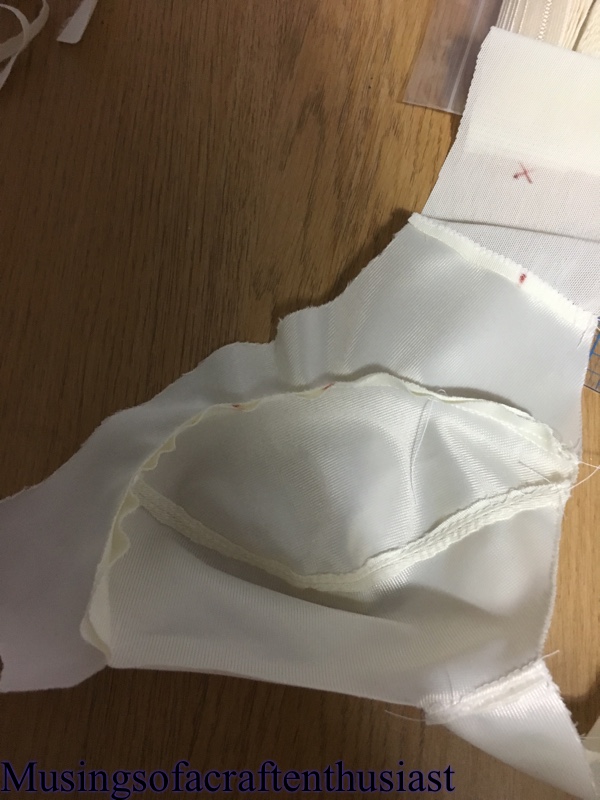

Then the underwire channelling to the undercup seam allowance

The next thing we move onto will be the elastic. I will say I am not 100% convinced on cup size or shape, but I won’t know for definite until it is finished.
Kenneth D King – Craftsy
Simon, asked me if I could copy a pair of jeans for him, he has finally found a pair of jeans that he likes the fit on, they are Gap and of course, not only are they the most expensive pair Gap does they are always sold out in his size. Initially I said no, not without taking them apart, but I was browsing through craftsy where I came across Kenneth D King jean-ius! :reverse engineer your favorite fit.
Before depriving Simon of his favourite pair of jeans for at least a couple of days I thought I would try it out on a pair of my jeans, as I said on my previous post I have this very nice pair of low rise Levi jeans, I have no idea on the model number (do jean even have a model number) but I have been trying to replace them from ebay but if you don’t know what they are called it is a bit hard.

I’m not going to go too deeply into the actual class, just a brief overview, if you want any more detail you’ll have to get the class, (on sale it was £16.99). Kenneth D King is very easy to listen to, the explanations are easy to follow and he is a very able presenter. After walking you through the getting of the pattern he then goes on to take you step by step to test the fit of the muslin and make changes and on to creating the finished article.


One thing that I don’t remember him mentioning is that you should probably give your jeans a quick iron, just to get the pocket edges and the crotch seam to lie flat. You trace your pattern off on to organza and from there to paper, where I discovered this amazing gadget a double tracing wheel, if I’d have known about these when I was dabbling with Lutterloh and Haslam it would have made life a lot easier!
I do have a problem with the inseam, it wasn’t as noticeable with the first pair and I only had a problem with one leg of course I assumed that the leg that didn’t have the problem was correct, apparently not 😦


I discovered that if I pinched a bit of fabric out by the knee this straightened up the lines, what also made it a bit better is if I stretched out the back, it also pulled the seam round to the back, luckily I had already added an inch to the bottom so it was alright to lose an inch, this obviously is a cheat, I’ll correct it properly on the next draft.
So after unpicking the side and in-seams, and redoing the stitching and top stitching I tried them on, the top stitching isn’t totally right, but right enough that I won’t mind wearing them, I tried them on, disaster them struck, I obviously hadn’t tightened the stops at the top of the zipper enough as one of them popped off and the zipper tab with it, while I unpicked the fly facing and cursed Kenneth D King, I decided for my next attempt I would stick to the Lauren Dahl method of zip insertion which I did, the zip went in beautifully and there was no chance of zipper failure.
I just have the waistband to finish belt loops and button, maybe rivets ( I have to tackle them sometime.
There is one part of the class that I have a problem with, let’s say conservative estimate 85% of people taking this class do it to copy ‘blue’ jeans Kenneth seems to have pickup a pair of nondescript ‘jean type’ trousers, there is probably a copyright issue on actual ‘named’ jeans, however the construction method that he uses makes it impossible to put some of the top stitching in. He tells you to stitch the out seam before the inseam, we have several makes of jean in our home and they all have top stitching on the inseam and a tiny bit of top stitching over the hip on the out-seam. I must admit that once I had the pattern, 90% of construction was from my baste and gather Birkin Flares. If it works why use something different.
Bye for now
Two Projects – craftsy
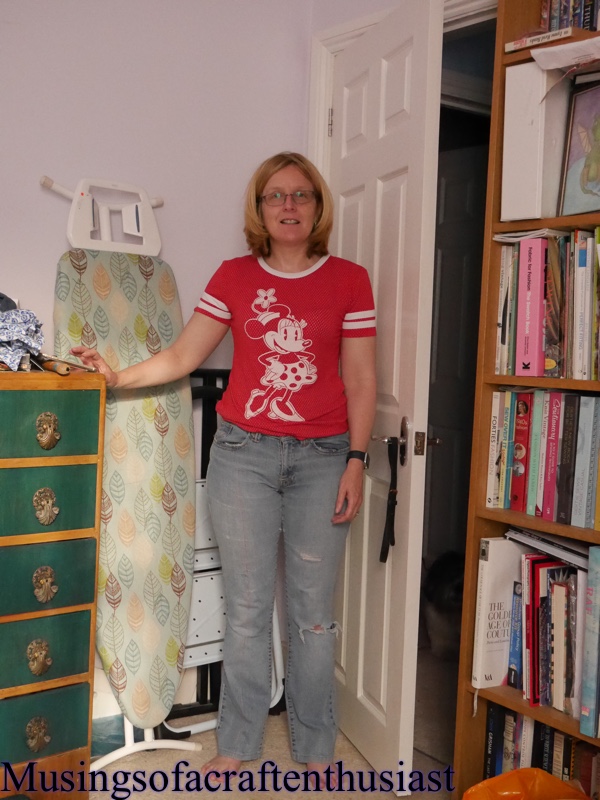
I’m working on two projects at the moment, both craftsy classes and both ‘trouser’ projects.
The first class is Kenneth D. King – jean-ius Reverse engineer your Favourite Fit the second is Pattern design – the pants Sloper with Suzy Furrer.
This is just an overview of my two projects, I’ll do a review of both classes at a later date.
I have a very nice soft pair of Levi jeans which are getting so thin that they probably don’t have much more wear in them. When I saw this class I thought it might be ideal for copying them. The first thing I did was to wash the jeans to make sure that they had ‘shrunk’ back to size. I decided on which side to copy, I went to the side without the knee hole :-).
You stitch around the seams and copy on to organza, from the organza you then copy to paper, and then from the paper to fabric.
here is the first version of my jeans.
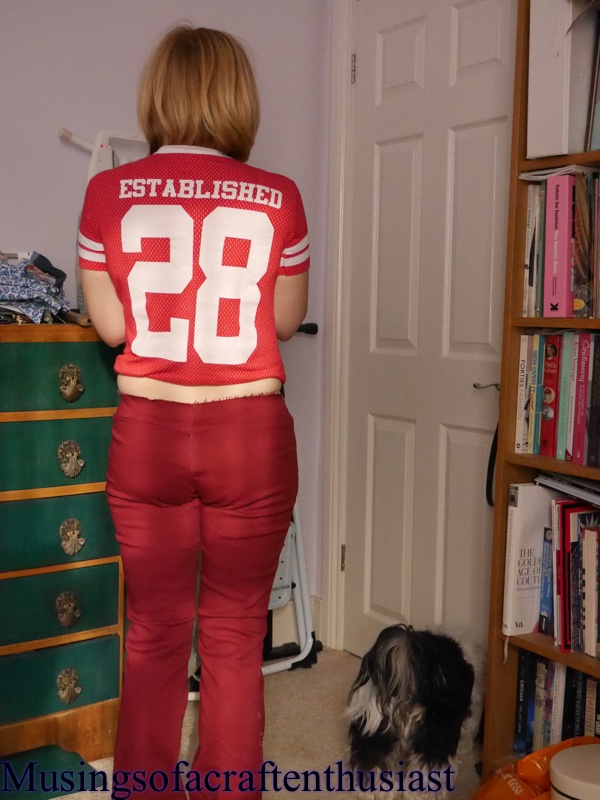
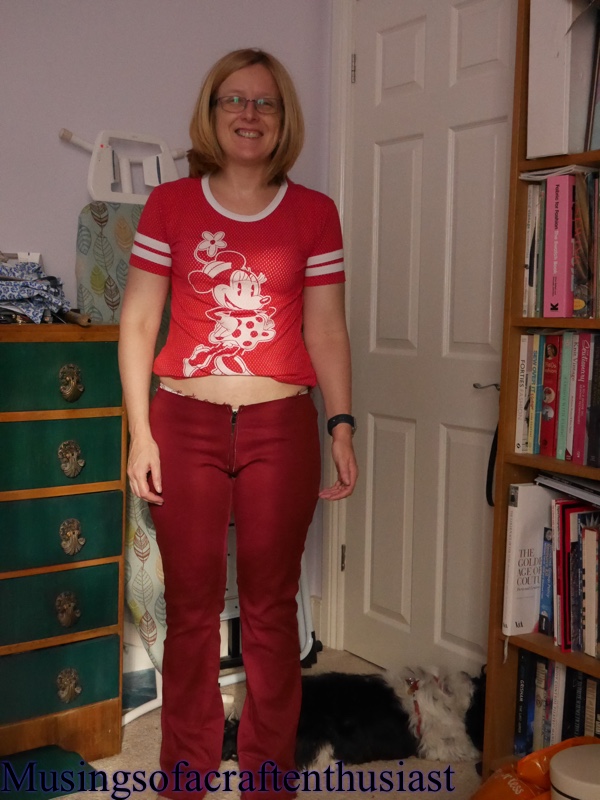
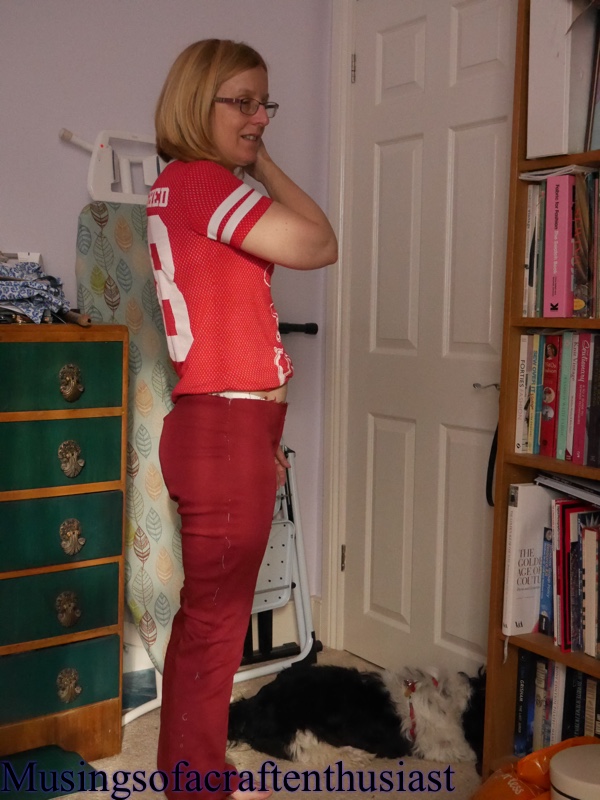
I have quite a few of the Suzy Furrer Craftsy classes, I haven’t yet finish one but I keep trying. So far I have created my first ‘pants’ sloper and made it up in an old sheet, this might be too thin to get a correct reading on the pattern but i’m relatively happy with the fit, here is the first version of the Trousers.
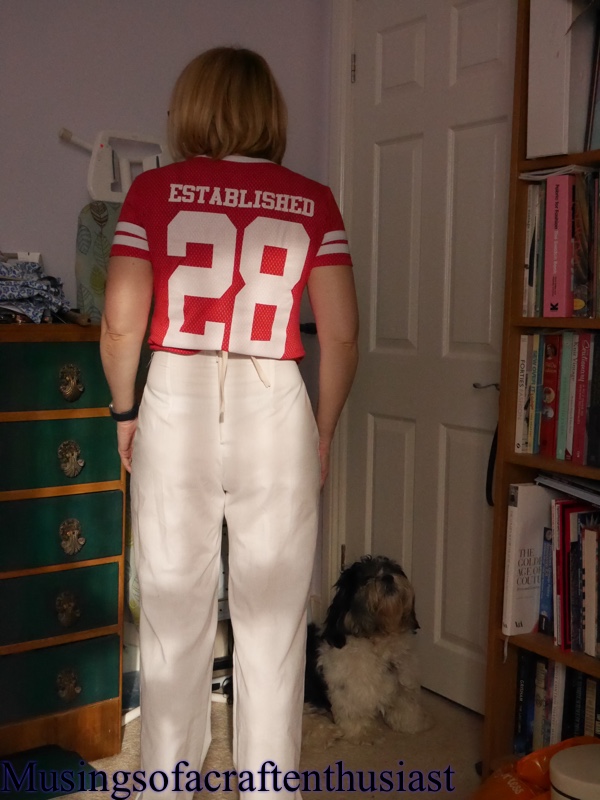
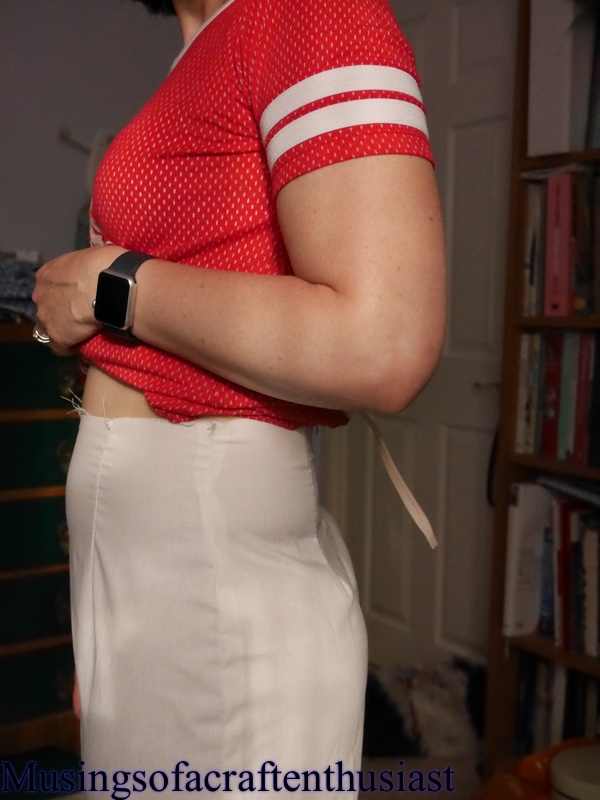
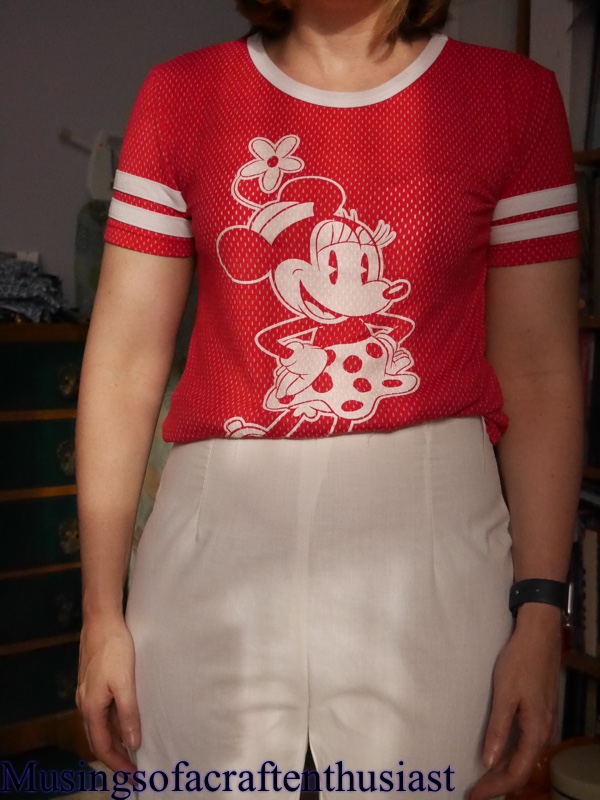
 I don’t know about you but I feel the trouser sloper has a very 80s vibe, Simon thinks it is the high waistband.
I’ve managed to take a whole load of photos, so expect some more posts coming your way…..
Stretch fabric
Now that I have spent some time with knits, I can now say that although I don’t love them, I do realise that they are not as scary as I first thought. Off the back of the stretch Craftsy class I have decided to try and replicate one of my tops, the result, while unwearable has a lot going for it.

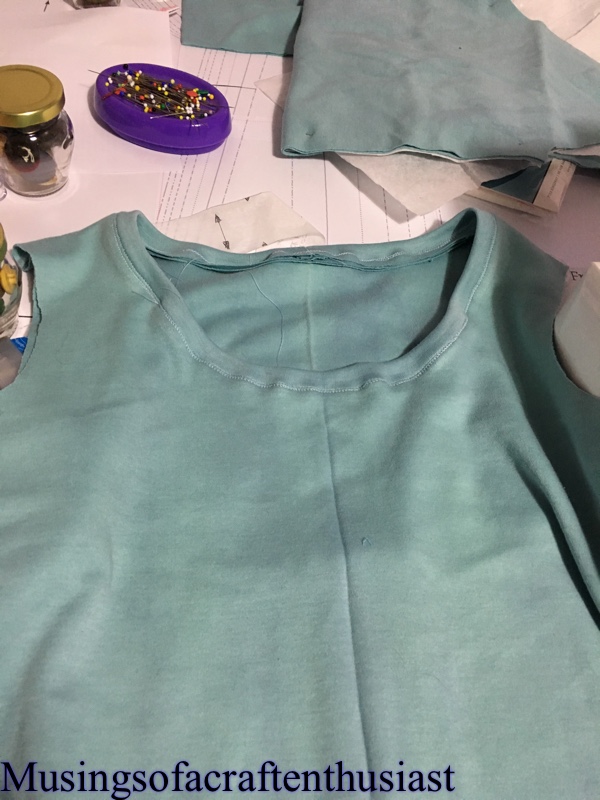
I laid the top I wanted to copy out on my table and also traced off the t-shirt pattern from my class, my top has pintucks in it and a yoke at the back which means that the shoulder seams are forward.

To start with I modified the neck line to mimic the lower scoop of the original then I took 1 1/2 inch off the front and added it to the back piece, because of the pintucks I slashed my new front pattern piece and added in the extra for the pintucks. After redrawing the new front, I checked it against the original and added length and width.

I then moved on to the back piece, I sliced off the yoke and added the seam allowances on.

Fit wise it looks great, I had to take a bit off at the hips as they seemed to have a life of their own, and was standing out in a most ungainly way.

As I said it is unwearable, the unwearability of it is tied up in the front placket and the neck treatment, the fabric is too thick for for the front placket to four layers, if I had checked the original I would have realised this as they have replaced half of this with what looks like ribbon, and also I’ve rather messed up the curved edge of the neckline, however the basic shape is there I just need to tweak it.
Bye for now.
Craftsy – Sewing with knits: 5 Wardrobe Essentials
Hello, in preparation for the Davie Dress, I decided to take a Craftsy class on knits, I narrowed it down to two and I decided on the Sewing with knits: 5 Wardrobe essentials, the two main reasons I picked this one is on reading the reviews the other class didn’t have any demonstrations and the second reason is that that this class actually came with some patterns.
I will admit Meg McElwee does go on a bit to start off with and does say umm a lot, however once you actually get into the actual course material she is very good, so if you have started the class and feel that you can’t put up with the umming and the things you don’t want to know about, just skip straight to either lessons two or three, I jumped straight to the scoop neck Tee, but did have to go back and listen to Hoodie as a couple of times Meg said that she had covered that construction detail in the Hoodie class.
I had a large piece of T-Shirt fabric that I bought last year waiting for Simon to tell me which of his T-Shirts he wanted me to copy which he never got around to (he says I never mentioned it to him). So after printing off the T-shirt pattern and sticking it together I checked the size copied it off and cut out my fabric. Although Meg does say that you could use an Overlocker(serger) for this she exclusively uses a sewing machine.
We go through the lessons step by step, the first bit is putting the the clear elastic/ shoulder seams using a three stitch zigzag, I wasn’t convinced by this watching the video and in practice my fears were correct, the seam looked loose and not very professional, It could just be that my stitch wasn’t close enough together and I need a pit of practice.
The other seams and the neck were put together using a plain zig zag Megs was set at one wide and two long, my Singer sewing machine wouldn’t let me go any lower than 2 for the width , but it did have a preset for stretch fabrics, which sort of looks like a lighting bolt which worked brilliantly.

Meg showed us how to put on the binding for the neck and put two rows of stitching to hold it down, the sleeves are put in flat and then the side seams and underarms, two rows of stitching are used for the cuff we then use a twin needle for the hem. Full disclosure I put the t-shirt on after sewing the side seams and underarm and decided it was too big, so I haven’t done the finishing off, but I have worn it a lot round the house for slobbing about in and it is very comfortable. When I make the next one it will be in a smaller size.
This is the first time that I have used the walking foot that came with the machine, once I got it fitted it worked really well, I had no puckering on the fabric or unsightly stretching.


I bought this class in the sale so the patterns made this a great bargain, but I would recommend this class even though I skipped most of the first two lessons.
Craftsy Class, The Weekend Duffle
I think out of the many Craftsy Classes I have bought this is the first ‘making something’ class I have completed. I did Adjust the bust but I have yet to complete an article of clothing using the patterns.
The trainer, Betz White is very likeable and obviously knows what she is doing, the other thing that I like is that a couple of times the stitching hasn’t go quite the way she wanted it to, but they didn’t re shoot it, showing that even if you have made loads of bags it doesn’t always go according to plan.
In the spirit of full disclosure, to be honest even without adding in the price of the class it would have been cheaper to go out and buy a good quality Weekend bag, some of that was to do with my fabric choices, and if I hadn’t used two pieces of quilting fabric from my stash for the lining it would have more expensive, but mostly the fusible fleece and fusible interfacing bumped the price right up.
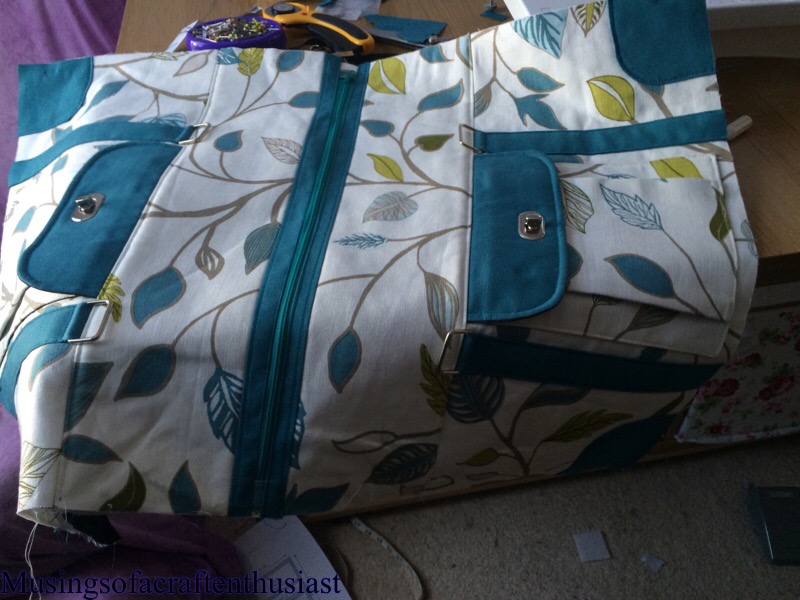
Here are my fabric choices I think it is called ‘Allegra’ blue/Lime Lorient Decor Voyage Linen Cotton furnishing fabric (some of the colours won’t photograph correctly) I also bought a linen/rayon blend for the accents but decided that the colour and the weight wasn’t right, (I’ll make a skirt out of that later) these were both bought from eBay. As I wanted to start quickly I walked down to Kayes Textiles to see if they had anything I wanted, I found a heavy cotton but not quite in the right shade, (Simon will be rolling his eyes at this) it was a green/blue colour instead of a Blue/Green, but a packet of blue jean dylon and a very quick dip in it, no more than about 5 mins and a trip to the washing machine it was exactly the colour I wanted.
I cut all the pieces out, it is a mixture of templates and measurements, this is all provided for in the class materials.
The body of the bag is interface with fusible fleece, which I didn’t know existed the lining is interface with a medium weight fusible cotton interfacing, towards the end the bag does tend to get a bit bulky.


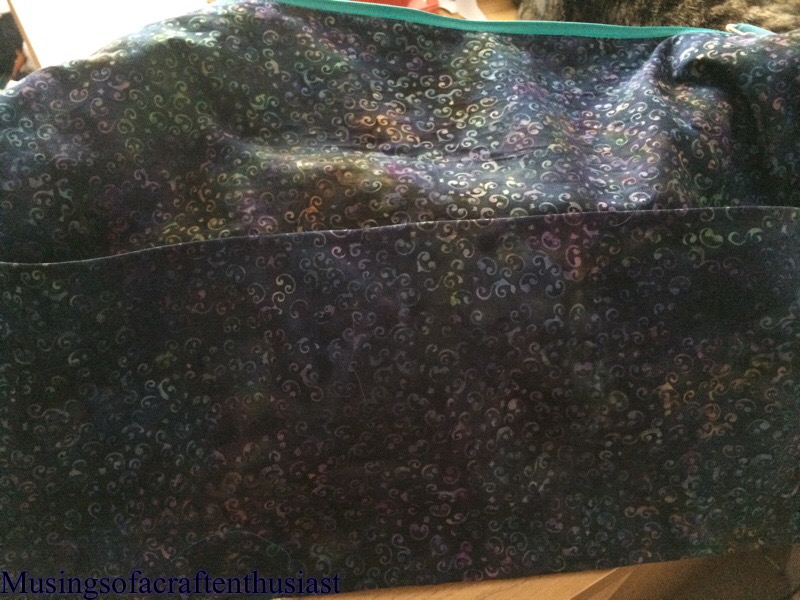 Betz takes you through creating the inside pockets, one of which is a zip up pocket the other is a row of three pockets, she mentions how you could customise these pockets by making thin pockets for paintbrushes and such like.

we then go through we then make the bellows pockets for the front and back of the bag and how to put the hardware on.
The next step is to put the accent fabric onto the front and sides of your fabric, and putting on the handle rings. (I bought all the hardware from eBay most of it arrived in a timely manner but one shop in Swansea took longer to to send out my stuff than it took for something to be sent and arrive from China)


The next step is to attach the zip facing and zipper tabs, then you start to assemble the bag. The zipper is sandwiched between the lining and bag front, then some top stitching, then do the same to the back pieces.
You then baste the end panels on, this is where my new sewing machine started to protest, it was not happy to stitch through bag fabric, fusible fleece and zipper tabs, the cotton kept breaking, in the end I went up into the loft and got down my old sewing machine which I knew could cope with this no problems (I stitched a leather handbag on it, it had no problem with three layers of leather this should be a doddle) It breezed through the basting, then it breezed though stitching it all together with the lining added.

Then we get to putting the base in, remembering to open the zip first, otherwise we will be very sad :-(.
now that is left is to add the handle and the straps

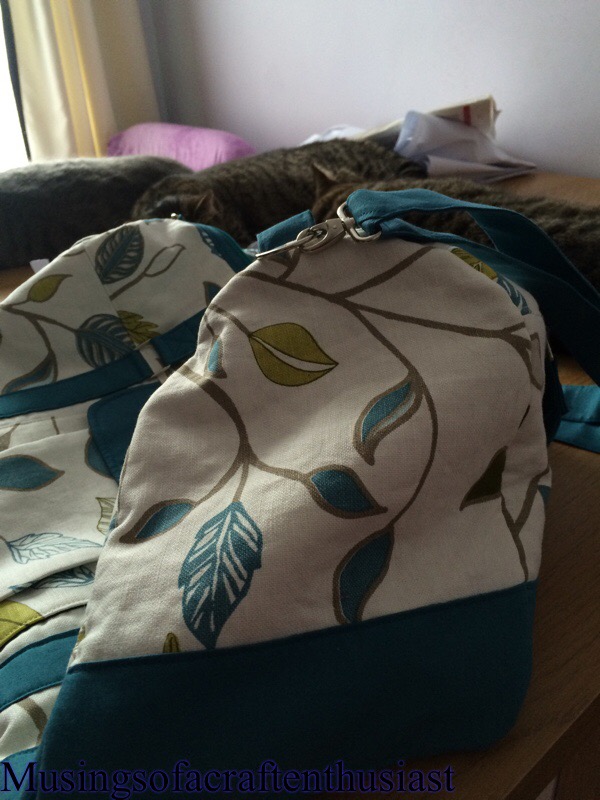 A lot of these classes seem to be common sense when you actually look at them, but because you have the class you get to put it together in the most convenient order and there are little tricks that take your bag from looking home made to something you can be very proud of.


Craftsy Pattern Making Basics :the bodice Sloper
The last couple of dresses I have made have hung rather badly on my top half, and I’m fed up with it. It seems that, if there are clever drapey pleaty things going on I don’t have enough boobige to fill them out, which means that skirt lovely, top like a sack. one of the patterns is this
if anyone was wondering what happened to it I finished it, it didn’t fit I threw it in a corner. I have actually made it fit, sort of by taking an inch out of each side. that was just guess work and I’m not sure how much damage that has done to the arm sync.
Lets get back on track, I thought I’d sign up for a pattern making class, at least I’d have an idea where I was going wrong, I tried doing a small bust adjustment I think I went wrong some where as the pattern was practically the same size as when I started off.
so far I have taken the measurements and done more math than I have probably done since school
now I am half way through the transferring the measurements to paper, the hiding fairy has hidden my 2in by 18in ruler that I bought especially for the job, but while she was doing that she obviously took her eye off the ball and everything else turned up. 🙂


