Category Archives: 1970
Project 3, January
Here is project 3 for this month, once I had shrunk the pattern, it is actually a very quick make.
To shrink the pattern I traced it off on to x and dot paper, I used to use the burda tracing paper but I find it just a bit too flimsy for this type of thing. I shortenend it by 3/4 inch first then cut it into five strips, each strip I overlapped 1/8 inch and stuck it back together, I had been using pritt stick, but I managed to pick up write on able scotch tape before christmas so I used that, it is quite a lot easier. The next thing I did was a SBA of 1/2 inch.
I checked the measurements before laying it out and decided that I needed to put the two inches removed from the top back at the hip it’s a pity I didn’t realise this earlier as it would have meant I didn’t have to change the bottom half.
The fabric is a beautiful purple with a white ‘flower’ design, I layed the pattern pieces out and drew on the extra 1/4 inch to the outside seam cutting out immediately, the last thing I wanted to do was forget what I had decided.


I actually put the dress together as per the instructions which meant hand stitching all the hems, the main problem with that is the ‘skirt’ pieces need to be hemmed before they are attached to the shorts.


basically you put the top half together with the darts, facing and zip, for some reason at this point you don’t touch the sleeves, then you put the front shorts together and add the skirt overlay then repeat for the back, then finish making up the short and attach to the top half, once it is all cut out, even with the hand stitching it only takes about 3 hours to put together.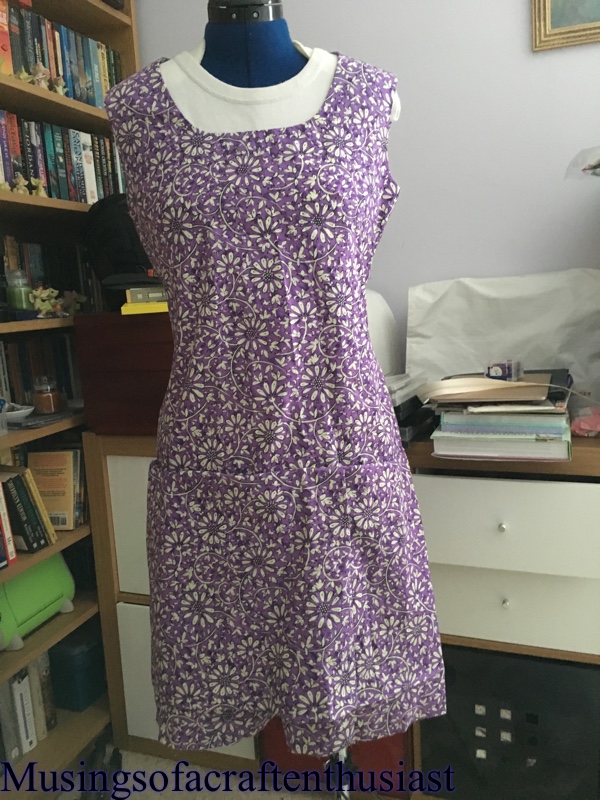
more soon…..
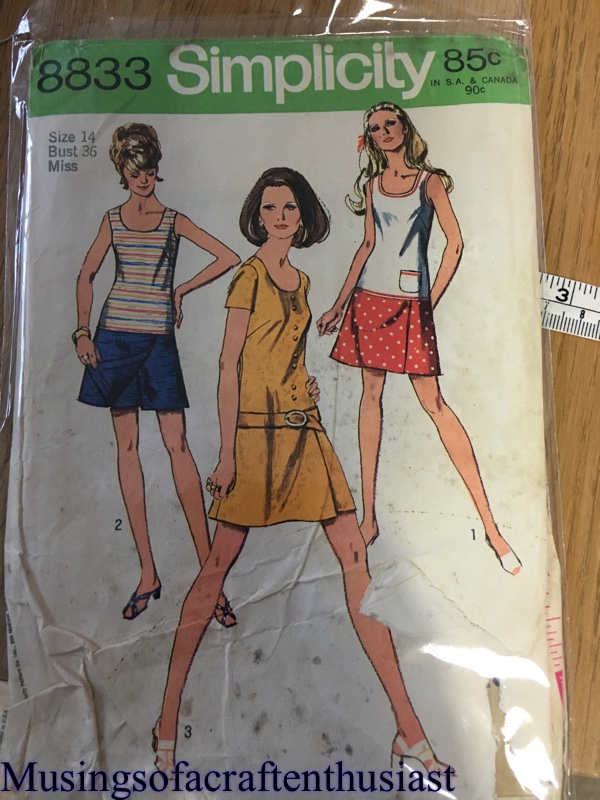
Simplicity 8833
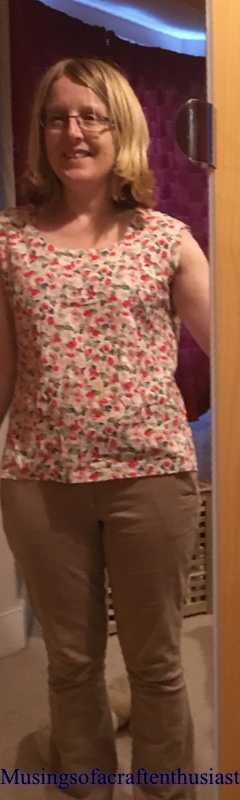
Hi, I didn’t mean to have a month off blogging, it just happened, to tell the truth i haven’t done anything much since the last post, but here is a brand new stitch, this is in the muslin phase and not what I was expecting when I made it.
Simplicity 8833 is classed as a mini-pant dress, I suppose what it is, is a playsuit with two skirt flaps, I managed to get hold of a pattern in my size, I shortened the top by and inch and the skirt/short pieces by an inch, I think I should have shortened the top by another 1/2 inch.
The top half of the dress would be good just as a simple summer top to wear with jeans or shorts.
The major issue I have with this dress is the ease in the top half and the fact you have to take it off to go to the toilet, also these ‘minis’ never turn out as short as they look on the packet, even allowing for at the fact I’m just over 5 ft 2 inches.
This pattern goes together very easily, you stitch the top together, then you stitch the front shorts together and attach them to the front skirt flap and do the same with the back, attach the front to the back then sew the whole thing to the top.


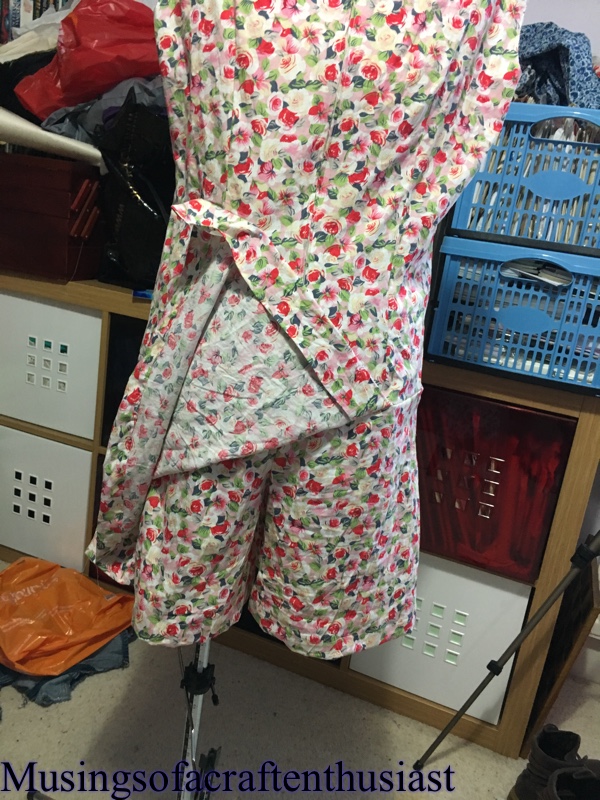
As this is just a test run I haven’t done all the finishing off or attaching the sleeves.
I love the idea of this ‘dress’ I can have it short without the risk of showing everyone my knickers, but the practicalities might just outweigh that peace of mind.
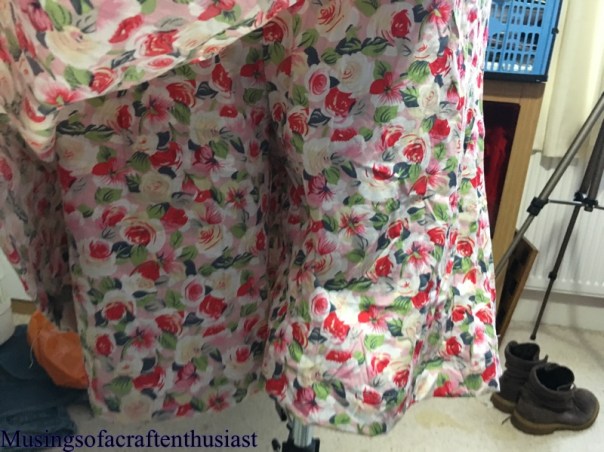
This is the first time I’ve used the trouser part of my dress makers dummy, it is quite a faff because the support post goes up inside one of the leg parts, you have to straighten the stand, feed it through the leg hole on the garment, then put the stand back into the outwards/support position.
sorry for the state of the photos, but I was worried if I took the time to tidy up and get my camera sorted out I might lose the posting momentum…..
Simplicity 7995
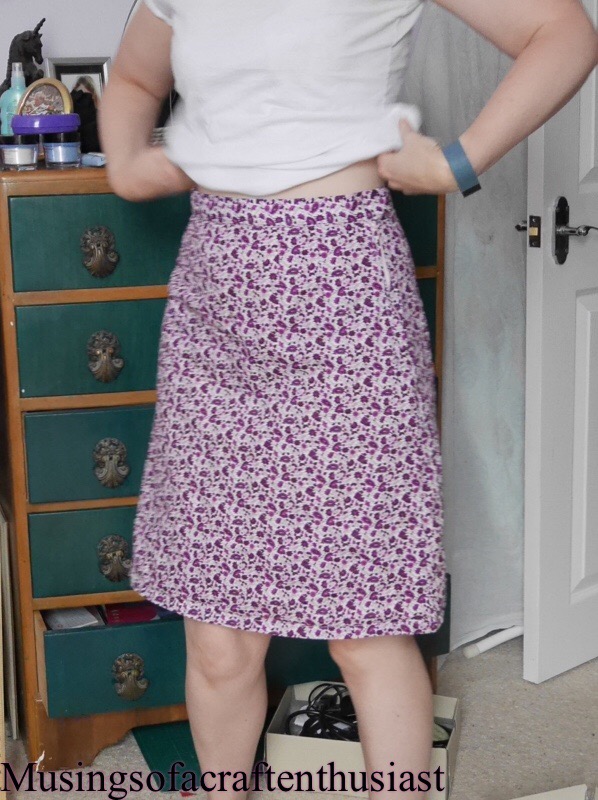
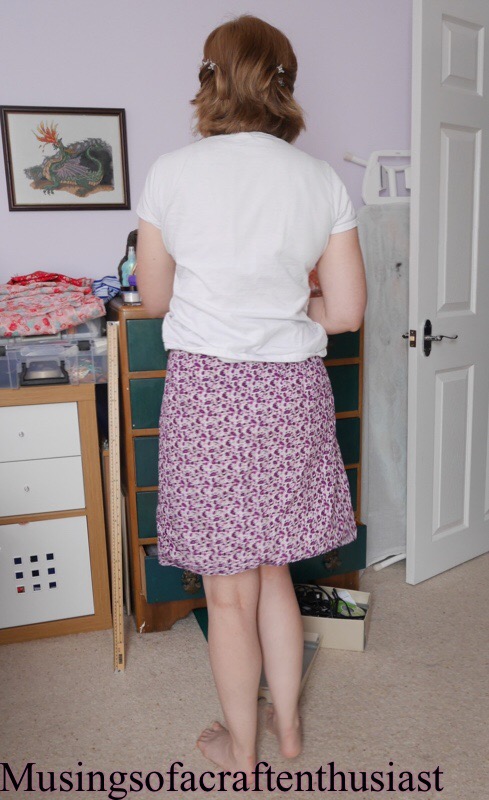
I mentioned a couple of posts ago that I had made this skirt, well I have actually made two (almost).
A couple of weeks ago when the Summer was still sunny, I realised I didn’t have the skirt equivalent of Jeans to wear to dress down Friday, so Thursday evening I looked through my patterns and picked this one
I wanted originally to do view 1 but when I opened the pattern envelope I didn’t have the pattern pieces. 😦
I really, really have to get in the habit of checking things like that when I get new patterns, to be fair I can’t remember where I got the pattern from, it could have said pieces missing on the auction.
So I decided on view 3, which was probably just as well as it is only three pieces and no top stitching, I had this piece of blue cotton I had bought from Kayes on a whim, I had been planning a play suit type thing for the holiday, I discovered that although the bust size was right on the pattern the hips were wrong so the playsuit didn’t materialise, which is probably just as well I’m having serious doubts on the convenience of going to the toilet while wearing one.

Back to the skirt it has four darts front and back, I was sneaky because i knew there wouldn’t be time to wash it first I used tailor tacks, which in general I hate I always get at least one or two that won’t stay in place.
 The zip went in first time and looks good, I think/hope that I’m getting the hang of those now. I used waistband facing for the waistband (obviously) which always comes in handy with the cutouts for folding, to save time I also machined the inside down, which i don’t always do because you get a much better finish hand stitching it. I machined a small hem on it and wore it down stairs to show Simon, we both agreed that it needed a lot off the bottom. infact I took practically 4 inches off it , Looking at the picture I’m not sure just how tall these models are but they ain’t 5ft 2 in.
all in all I think it took me a couple of hours to cut out and put together, so I’ve made another one.

on a roll
I’m on a roll this weekend, after having the surgery on my shoulder and sorting the house out to be painted, I’ve been finding it difficult to get back into my dress making, but this weekend:-
I have finished a 70s dress apart from the hem, and managed to do some more on two other dresses.
here is the 70s dress
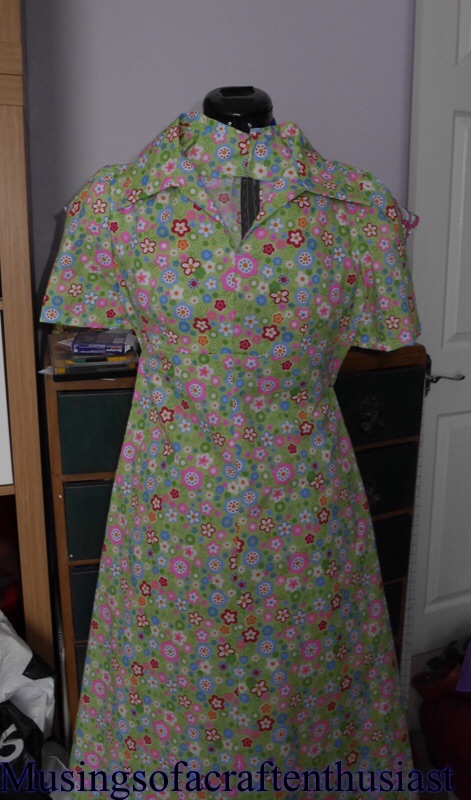
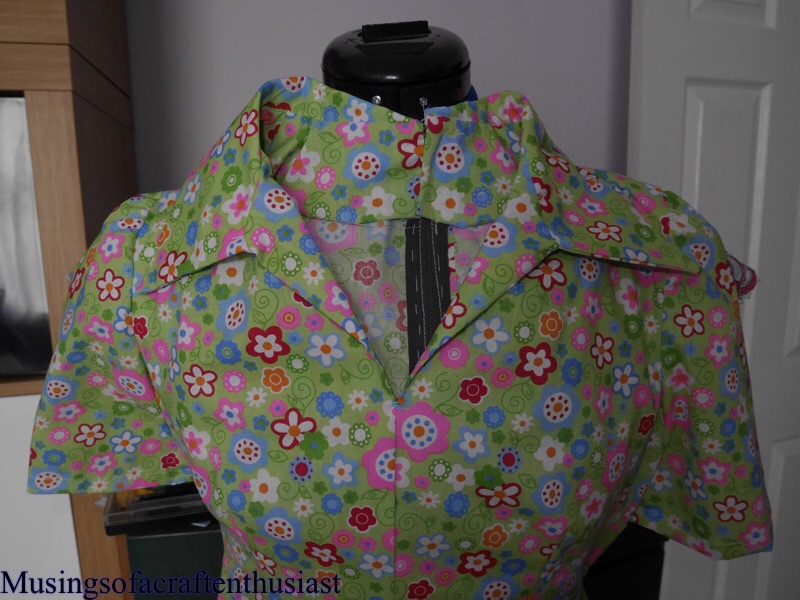
here is a close up of the collar, I bought the fabric at Kayes Textiles during the week, it is a £2.50 poly/cotton, it is a bit stiff but it gives the dress some body, hopefully if it is sunny during the week I’ll take some photos of me wearing it.
I also finished the bound button holes on this dress and restitched the bodice to the skirt

This dress I put the collar on the dress ironed on the interfacing and attached the cuffs to the sleeves

STYLE 3193
Don’t worry I will get back to the dress over the weekend, suffice to say I ironed it and it looks a lot better.

Not sure if this is a late 60s early 70s pattern, never having made Trousers before it came as a surprise that they are so easy to put together, obviously fitting them could be another matter.

Ignore the spots, I try to. the fabric is Cotton and I bought it as seconds, not realising that the spot was quite so big, and the reason the fabric is seconds is that half of the spots aren’t printed correctly. but I though it ideal for my first attempt, I have some nice corduroy for the real trousers.
At the moment the Trousers are very comfortable but not very elegant.
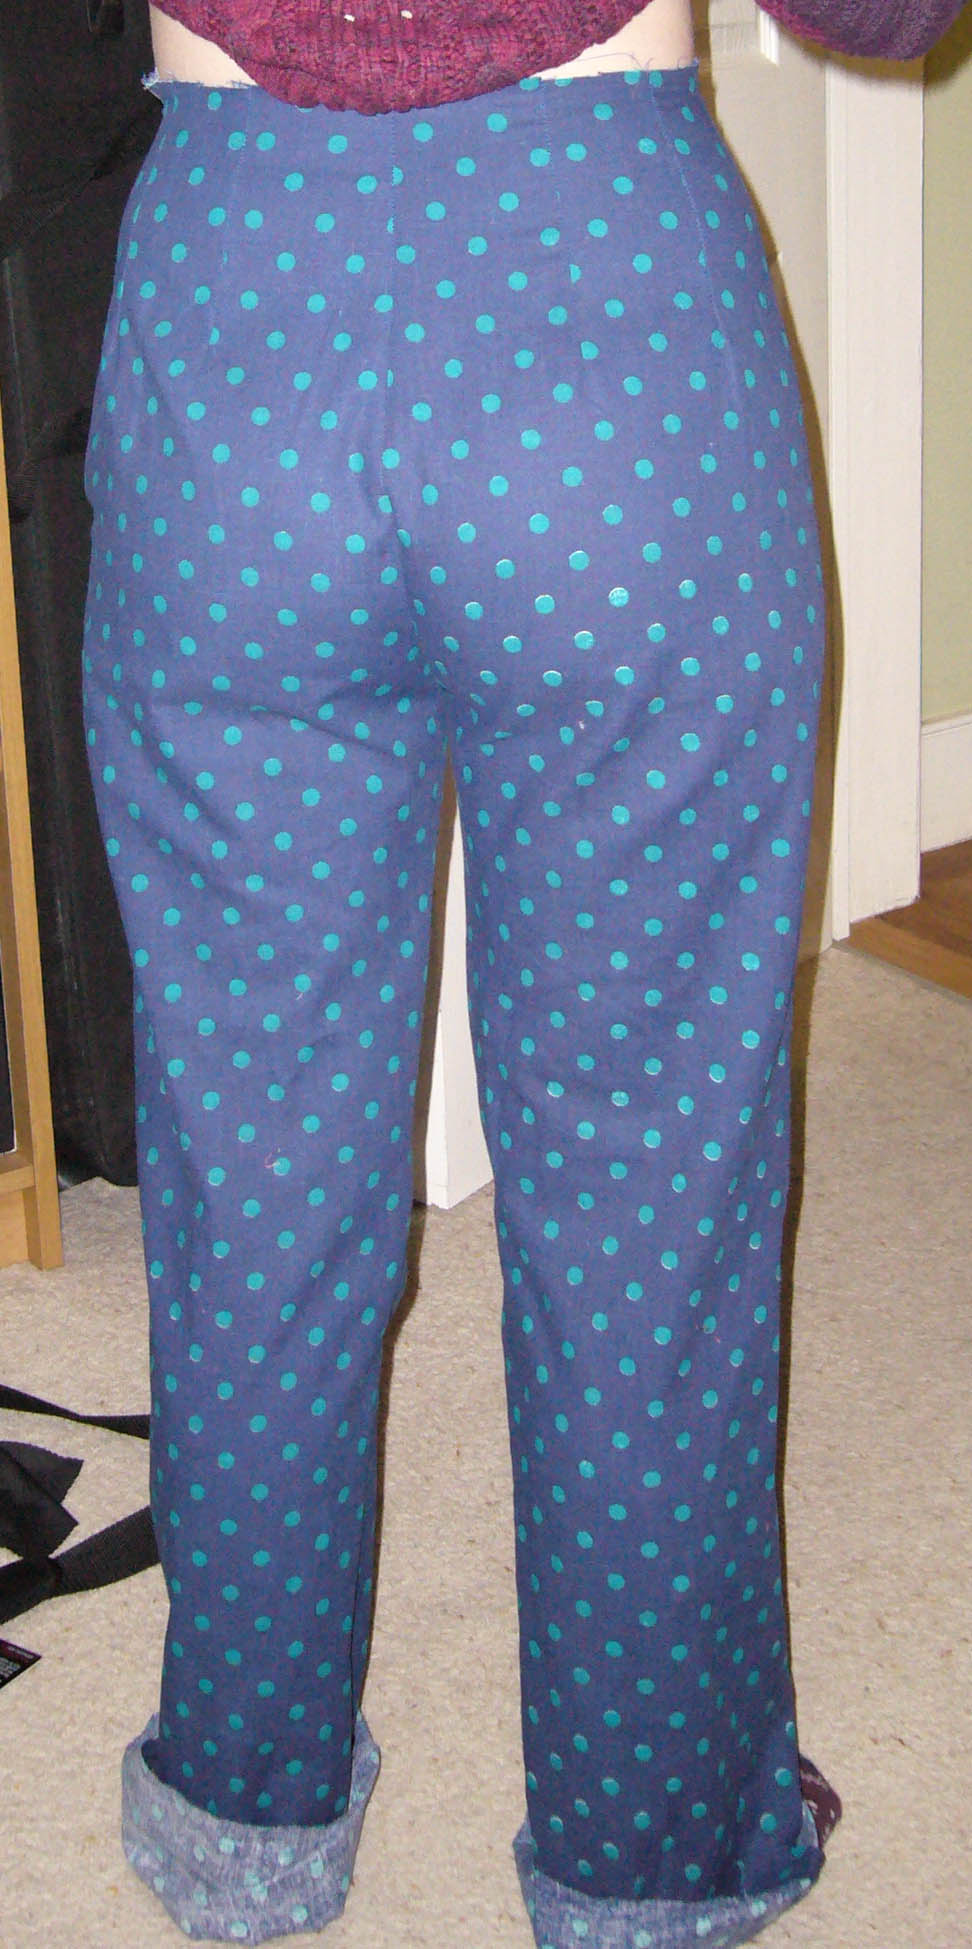

They seem to fit round my bum alright but are too big at the top of my leg, I received a ‘Perfect Fit in pictures’ book for Christmas looks like I’m going to get some use out of it.
I think I’m going to have to talk to my photographer about the angle he is taking the pictures from, the first picture looks like I have incredibly wide hips and very small feet


