Monthly Archives: June 2015
Haslam System of Dresscutting Pt2
Ok, I have made my Blouse, it went together very easily, no funny, I’m not sure what that bit is doing….
There are a couple of problems, one of which is to do with measuring and two, the ladies of the 40s must have been a darned funny shape in the hip/stomach region.
Item one – either I mis-measured my shoulder or I didn’t quite understand what the foundation booklet wanted. I measured my shoulder at 4 1/2 inches it wasn’t wide enough, when I measured it a second time I carefully read the instructions ‘measure from the prominent bone in your neck to the point of your shoulder bone then take 2 1/2 inches away’ after a re-measure it turns out that maybe it should be 5 1/2 inches, this actually corrects half of the problems I had with the blouse.
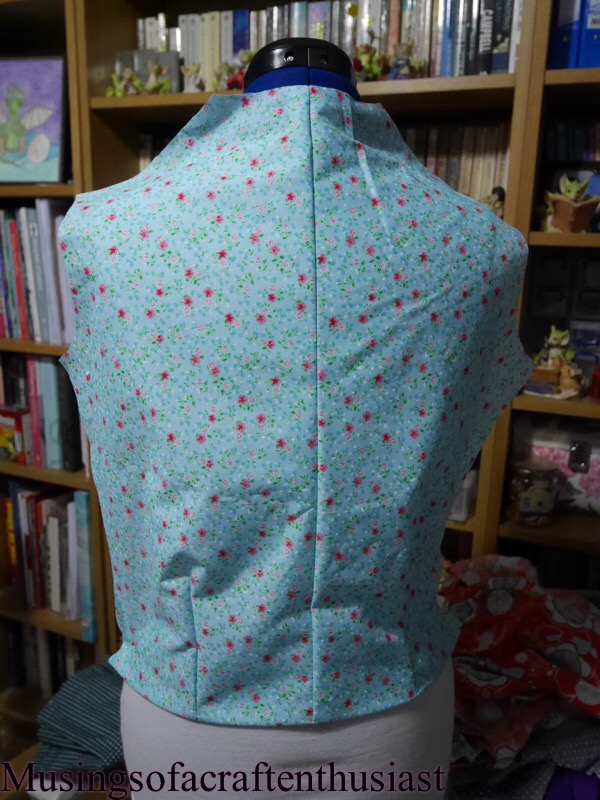
Item two – The hem of the back of the blouse wasn’t wide enough. I was going on the assumption that the side seams of the blouse should fall level with my under arms. Wrong!!! If I held one side level with where you would expect a side seam the other side was at least an inch out, maybe a bit more. Also I had a lot of fabric in the front, when I say a lot, each front nearly went from one side seam to the other.
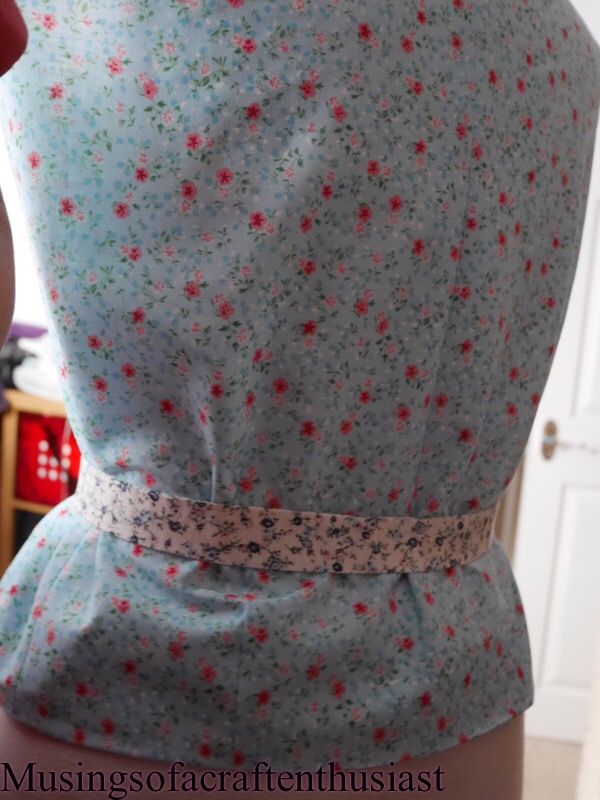
 Looking at the instructions you can see why this would happen, you take the hip measurement and quarter it, then you add an inch to the front, the back you deduct an inch.
On the bodice sloper craftsy class I have, you do something similar but only with 1/4 inch. May be I should have done this but I went the other way I measured my hips then I split the measurement up as my body split it up.
There was one other problem but that was connected to my fabric choice, I used a piece of poly cotton which was a bit stiff and I think the fabric should have a lot more drape to it. As it was the blouse looked very boxy and was quite uncomfortable across the back and sleeves, (this should be fixed by the nearly 3 inches added to the back piece across the shoulders).

 I have redrafted the pattern pieces and cut them out in some sort of pink shiny fabric, that I’m not sure why I bought it the colour is totally not what I would wear.
Butterick 7556

This is another Sewing post, I am in the middle of sewing a second version of this dress, this one was done just before our holiday. It went together so easily and looked really good, I decided to make another one.
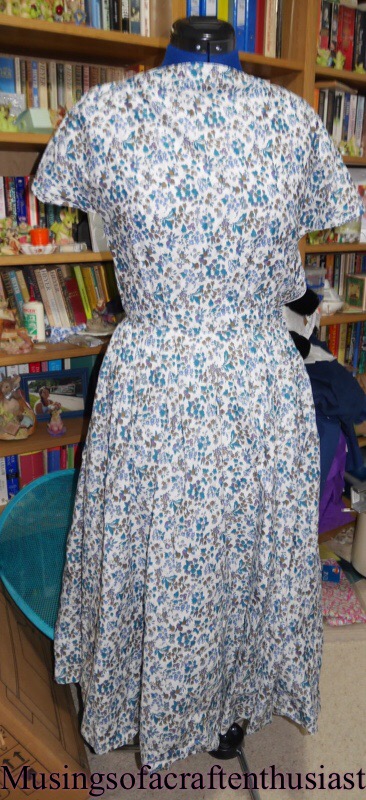
This one was made with a Lawn Cotton, I bought at the Knitting and Stitching Show at Olympia earlier in the year, the stall said it was LIberty, but I haven’t been able to track down the print, it was a good price and the fabric is nice and soft, also cool to the touch, it irons beautifully (which I haven’t done to take these photos).
I wasn’t really sure about the neckline but it does look better on.

After marking everything out, you stitch the four skirt bits together, then baste the pleats in, the skirt closure is different, the dress has a short zip in the bodice but because of the pleats the skirt has a placket, the last pleat on the left side front folds over on to the side of the left side back and is held in place by a hook and eye and two press studs.
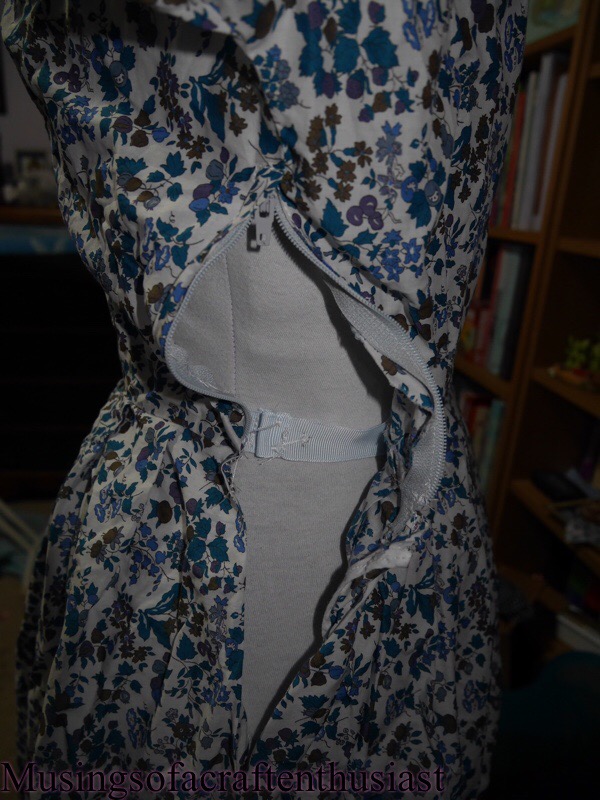

The first time I made the dress I didn’t look at the instructions close enough and didn’t realise there was a hook and eye, as I didn’t fancy relying on two press stud to keep my dress closed I put in a waist stay and a skirt hook and bar.
It is a surprisingly comfortable dress to wear, especially if you get the zipper tab in just the right place, and I got a couple of compliments on it while in the States.
Tracy’s Adventures in HaslamLand
Before Christmas I bought the Haslam dressmaking system from pinkemilyrose on ebay. This is a drafting system slightly different to Lutterloh, with this one you start by drafting a pattern block, then you draft your dress, blouse or Jacket over the top. like Lutterloh you end up with a pattern drafted to your measurements.

These are the three peices of the Haslam System of Dresscutting.
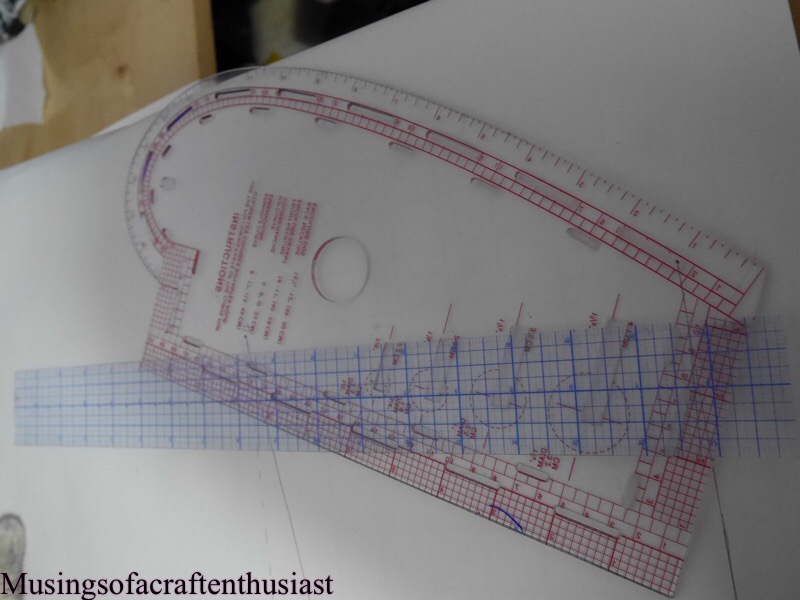
These are the extra tools I needed.
I thought I would go through the process and hope at the end of our ‘journey’ I will have a finished piece of clothing that I can wear.
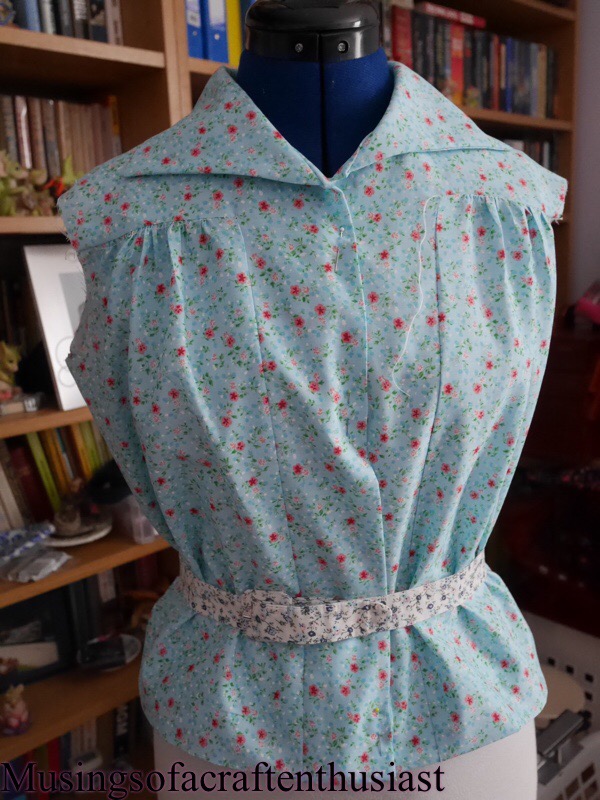
I have decided to try some thing simple first, a blouse, I have decided on this one

It looks simple enough to not cause me many problems putting together but with a couple of nice details.
I started by drafting the front block, I used wallpaper lining paper to draft the block, and a pencil, I strongly advise using a pencil, the first time I attempted to do this, I used coloured pens for the different types of line and got my self into a right old mess. 🙂 this way if you make a mistake or get confused it is easy to erase it and start again.
you can just see the base block under the tissue paper I have layered over the top. After I finish the block I laid a sheet of the Burda tissue paper over the top so I can use the front block again and again.

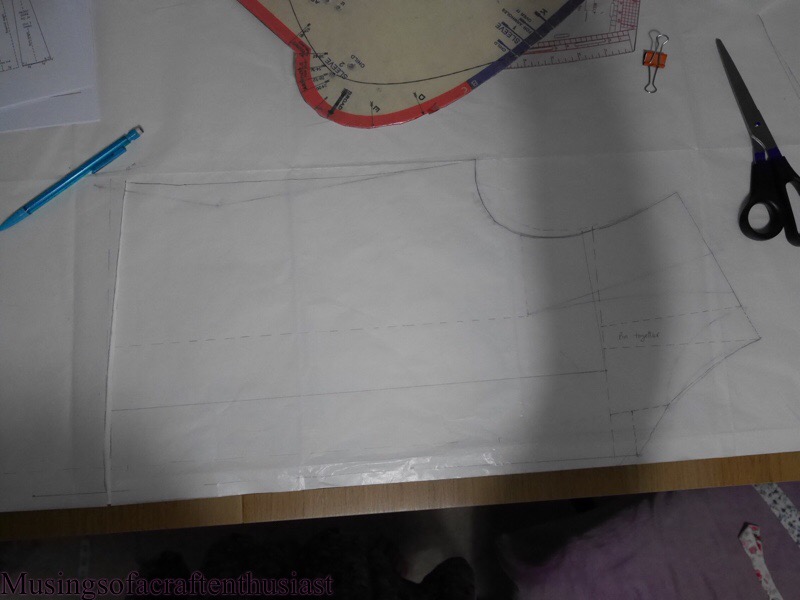
Here is the first pattern piece I created, it is part of the front.
 you can compare the collar pattern piece with the diagram in the photo above
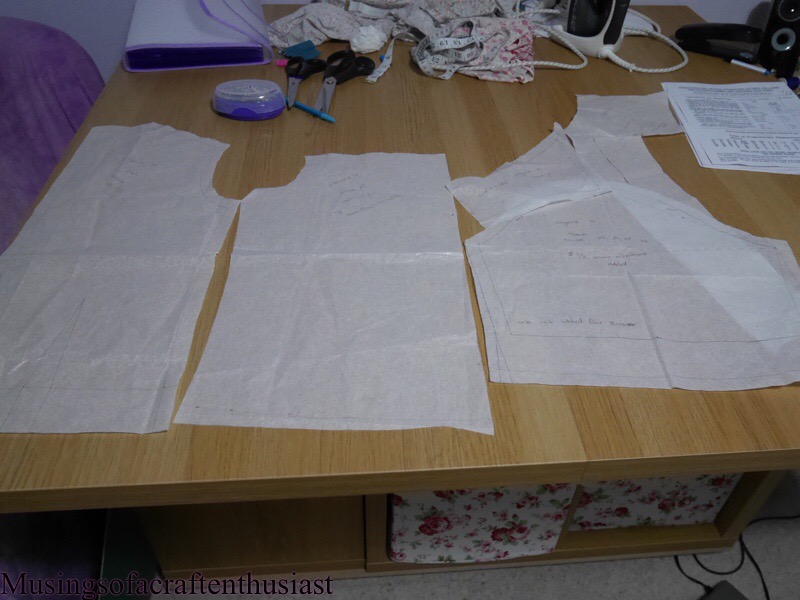
Here are my pattern pieces all cut out.
The next post will be on how it easy it was to be put together and the fit.
Craftsy Class, The Weekend Duffle
I think out of the many Craftsy Classes I have bought this is the first ‘making something’ class I have completed. I did Adjust the bust but I have yet to complete an article of clothing using the patterns.
The trainer, Betz White is very likeable and obviously knows what she is doing, the other thing that I like is that a couple of times the stitching hasn’t go quite the way she wanted it to, but they didn’t re shoot it, showing that even if you have made loads of bags it doesn’t always go according to plan.
In the spirit of full disclosure, to be honest even without adding in the price of the class it would have been cheaper to go out and buy a good quality Weekend bag, some of that was to do with my fabric choices, and if I hadn’t used two pieces of quilting fabric from my stash for the lining it would have more expensive, but mostly the fusible fleece and fusible interfacing bumped the price right up.
Here are my fabric choices I think it is called ‘Allegra’ blue/Lime Lorient Decor Voyage Linen Cotton furnishing fabric (some of the colours won’t photograph correctly) I also bought a linen/rayon blend for the accents but decided that the colour and the weight wasn’t right, (I’ll make a skirt out of that later) these were both bought from eBay. As I wanted to start quickly I walked down to Kayes Textiles to see if they had anything I wanted, I found a heavy cotton but not quite in the right shade, (Simon will be rolling his eyes at this) it was a green/blue colour instead of a Blue/Green, but a packet of blue jean dylon and a very quick dip in it, no more than about 5 mins and a trip to the washing machine it was exactly the colour I wanted.
I cut all the pieces out, it is a mixture of templates and measurements, this is all provided for in the class materials.
The body of the bag is interface with fusible fleece, which I didn’t know existed the lining is interface with a medium weight fusible cotton interfacing, towards the end the bag does tend to get a bit bulky.


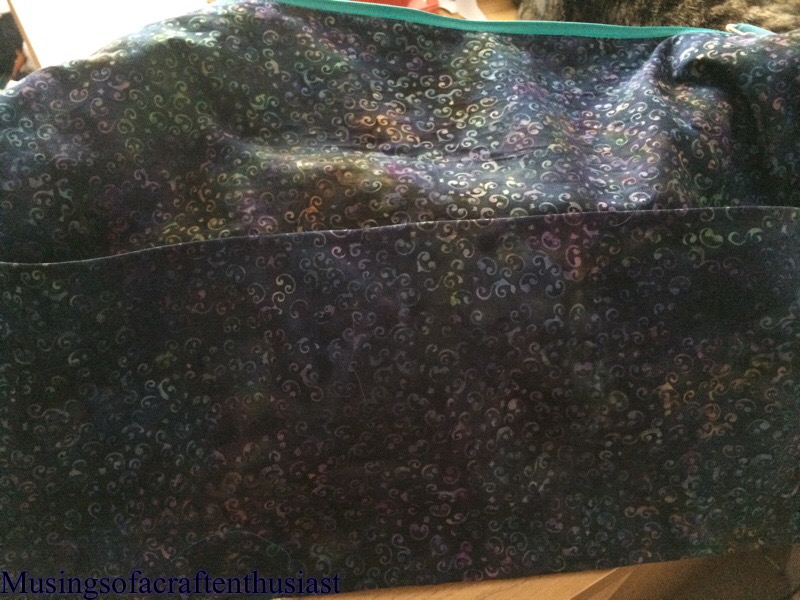 Betz takes you through creating the inside pockets, one of which is a zip up pocket the other is a row of three pockets, she mentions how you could customise these pockets by making thin pockets for paintbrushes and such like.

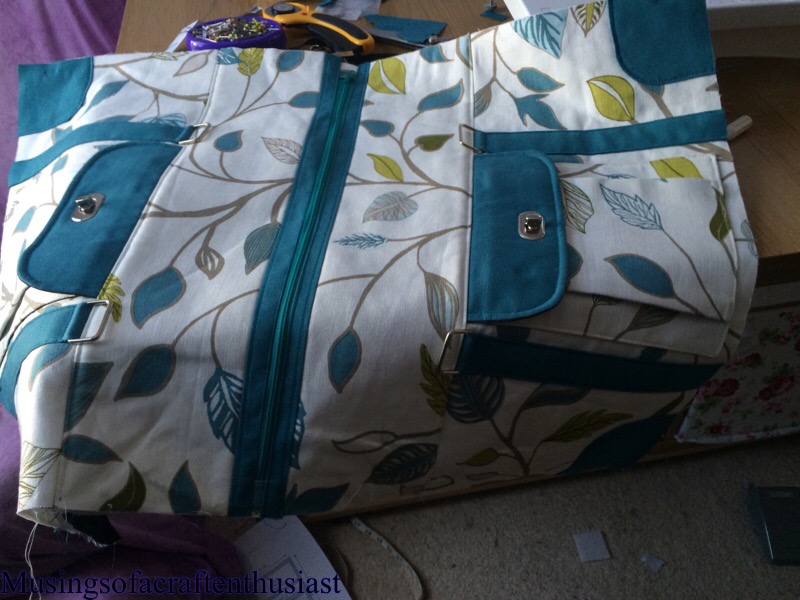
we then go through we then make the bellows pockets for the front and back of the bag and how to put the hardware on.
The next step is to put the accent fabric onto the front and sides of your fabric, and putting on the handle rings. (I bought all the hardware from eBay most of it arrived in a timely manner but one shop in Swansea took longer to to send out my stuff than it took for something to be sent and arrive from China)


The next step is to attach the zip facing and zipper tabs, then you start to assemble the bag. The zipper is sandwiched between the lining and bag front, then some top stitching, then do the same to the back pieces.
You then baste the end panels on, this is where my new sewing machine started to protest, it was not happy to stitch through bag fabric, fusible fleece and zipper tabs, the cotton kept breaking, in the end I went up into the loft and got down my old sewing machine which I knew could cope with this no problems (I stitched a leather handbag on it, it had no problem with three layers of leather this should be a doddle) It breezed through the basting, then it breezed though stitching it all together with the lining added.

Then we get to putting the base in, remembering to open the zip first, otherwise we will be very sad :-(.
now that is left is to add the handle and the straps

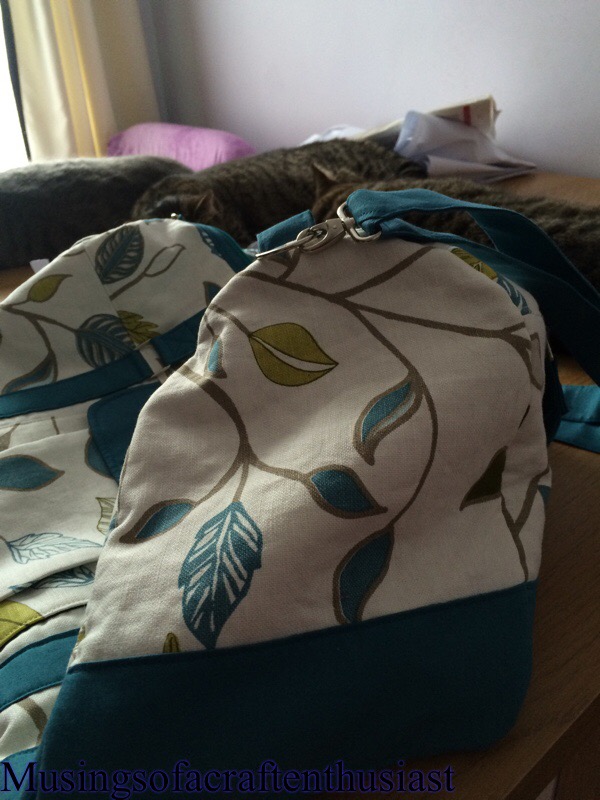 A lot of these classes seem to be common sense when you actually look at them, but because you have the class you get to put it together in the most convenient order and there are little tricks that take your bag from looking home made to something you can be very proud of.


Sunday, Kennedy
This post has been a while coming, we hadn’t been planning to go to Kennedy, when we booked the Holiday at the end of last year, Simon asked about tickets for Kennedy, but we decided that we wouldn’t have time. To be honest if we had done more of the rides, we probably wouldn’t have had enough time, but we didn’t so Simon got his wish.
It was the last Sunday of the Holiday, we took the hour 20 minute drive, along a very straight road, waited while the bridge opened and closed for a couple of small masted boats, and there it was.

I want to make this clear, Kennedy would not have been my first choice or even my second choice for a day out, from my point of view once you have seen one rocket that went into space, you don’t need to see any more. 🙂
I thought the ‘grounds’ looked quite run down, the staff seemed happier than the staff at SeaWorld (always a bonus)and it wasn’t as clean as Disney and Universal.
From Simon’s point of view, he was happy in the knowledge that because I wasn’t that interested I would spend the whole trip taking photos, and he could concentrate on taking in the whole experience.
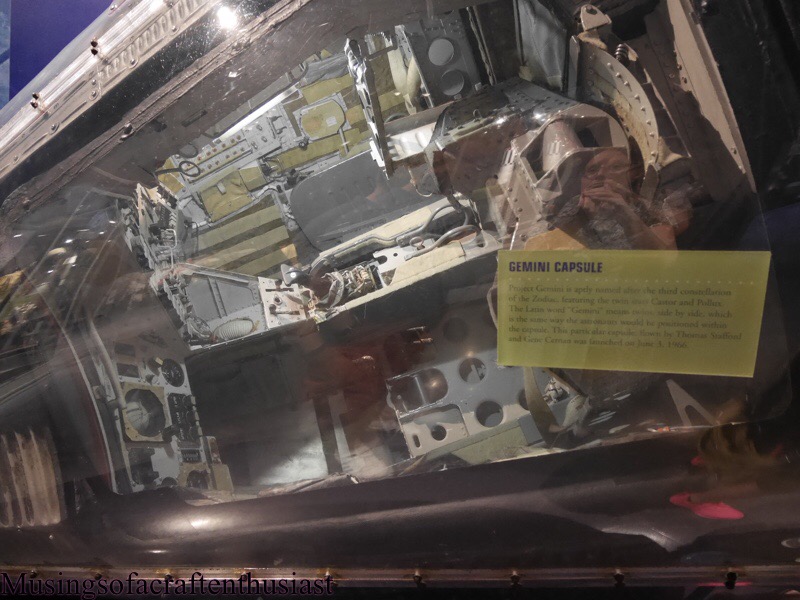
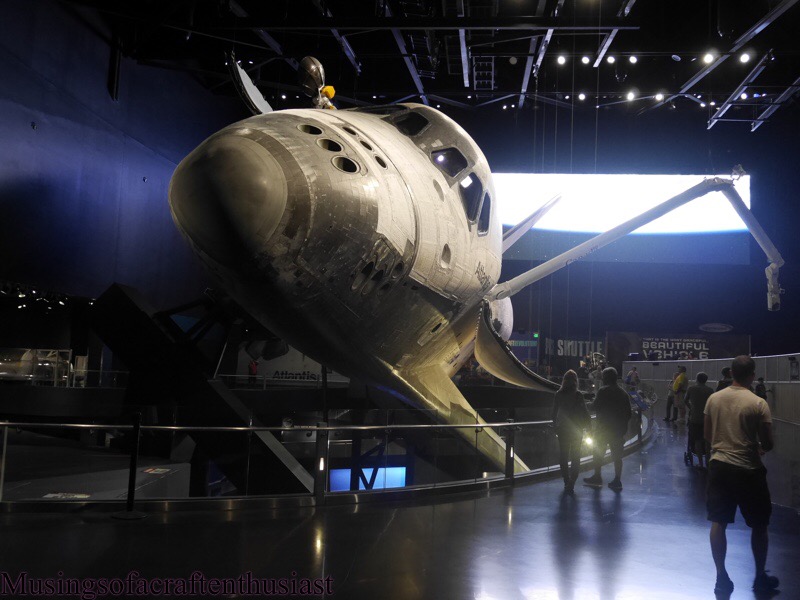
I will admit that when you see these things on the TV it doesn’t convey the size and scope of them, we saw the Gemini capsule and you wonder how one man could sit in it let alone two, on the other side of the scale, you go into the Atlantis exhibit underneath a replica Space Shuttle Stack.
 We started off by going into the Early Space Exploration exhibition, which goes right from Dr. Robert Goddard’s Liquid Fuel Rocket to Saturn V. There was also, oddly the Robot from Lost in Space.

 After Early Space we went to see the Space Shuttle Atlantis (which was huge. Before we actually got to see Atlantis you go through watching a simulated shuttle launch, then they take you through to another room where you have stars all around and bring up a solid screen so that you see Atlantic through a screen of stars (which is very effective)
After Atlantis you can get on a bus which will take you around the launch pads and passed the Vehicle Assemble Building,

which is the largest single storey building in the world each of the stars on the side are 6 ft wide, then over to the

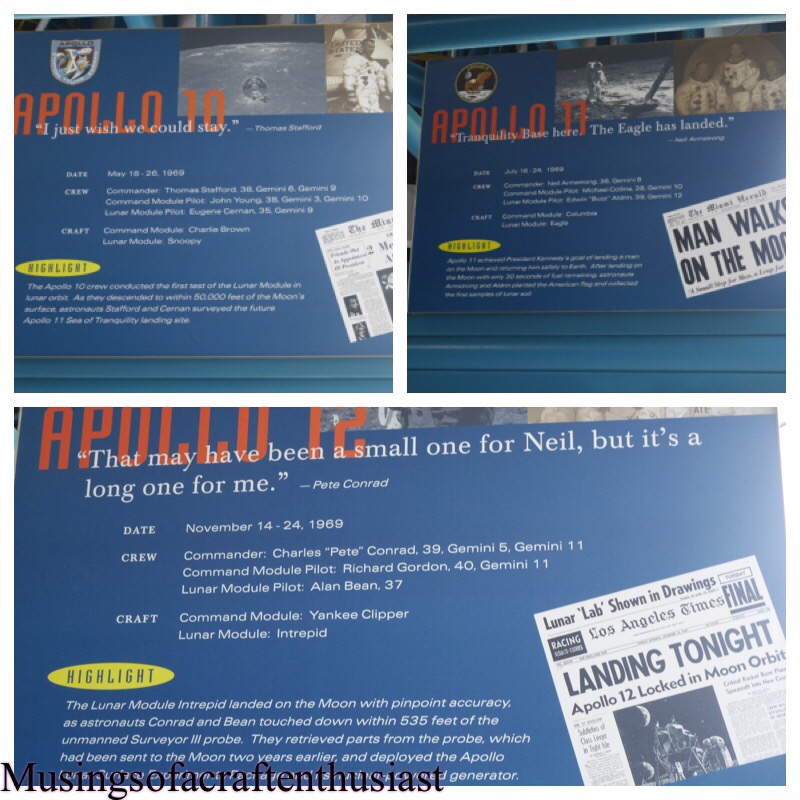
Apollo Saturn V center where you get to see Launch Control and you sit through a launch of one of the Apollo rockets, and you get to see a video of Jim Lovell talking about his flight (not Apollo 13) after that you go through into a very large hanger that houses the Saturn V rocket, which is split up into it’s pieces.

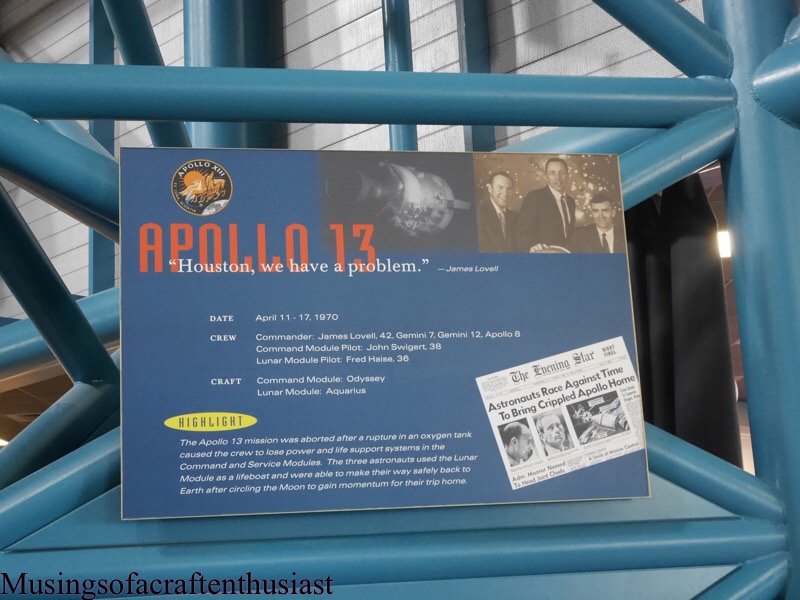
 I appear to have missed the board for Apollo 15

Over all it was a good day out, the quality of the merchandise seemed a bit iffy compared to Disney and Universal which was disappointing as I don’t believe the t-shirts and such like were a lot cheaper and apparently they weren’t the right shade of NASA blue.
If you are into this sort of stuff it is unmissable and even if you like a bit of history go and see it.


