Category Archives: Gertie Shirtwaist dress
Gerties Shirtwaist dress again
Hi, sorry it has been so long since my last post, it has been not so much manic as blugh, Simon has been away a lot, which in theory should give me a lot of spare time but in actuality just means I read a lot more 😦
I have made another Gertie shirtwaist dress, which went together slightly better but that could have been because I made a straight size 6 (US) instead of grading between 4-6-4, the first dress was a little tight across the top of the bust so I figured the larger size would be fine and as the skirt has so much material in it extra over the hips I felt that an extra size wouldn’t make a difference.

I do think that there is a slight drafting issue, I don’t know if it affects all the sizes but it does affect size 6, If I had used the notches on the shoulders the top would have been a very funny shape.
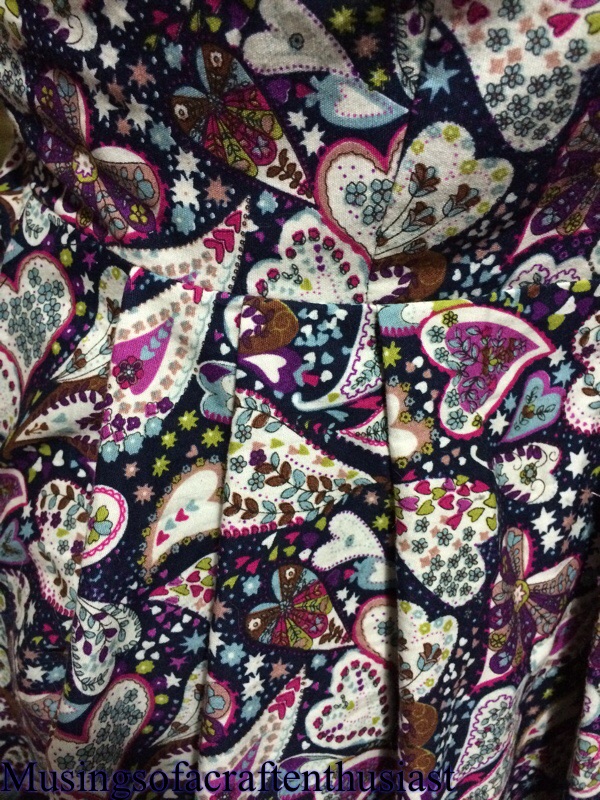
Denise will be glad to hear that the pleats gave me almost as much trouble the second time round as the first. At least I knew what it should look like this time!! I don’t know what I was doing but with the first side, it didn’t matter how I folded the pleats I had two together and one by its self, it wasn’t until I folded the other side I managed to get it to sit properly, I still don’t know what I was doing wrong on the first side.
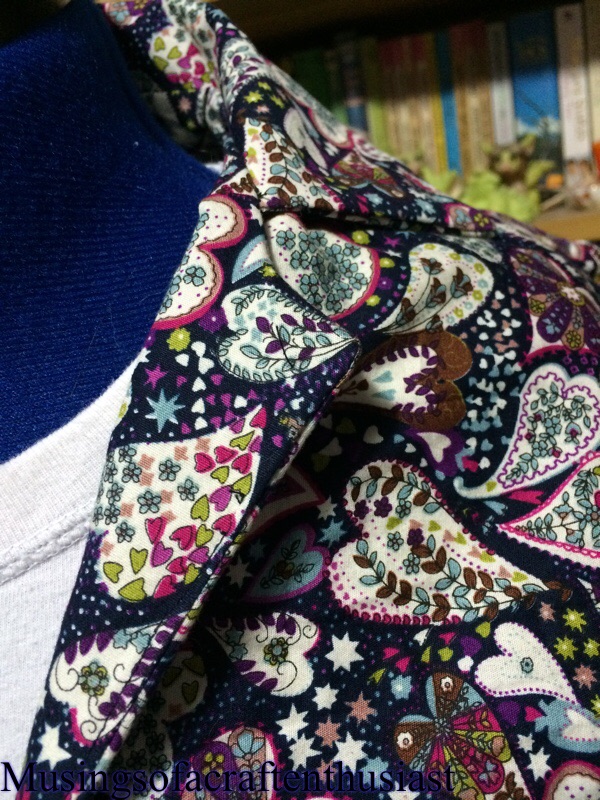
I needed to fudge the shoulders otherwise the collar wouldn’t fit, I pinned the collar at the notches and the shoulder seam, which left me with almost an extra inch and half of top fabric more than collar.
If you make this dress, I suggest you check the front skirt facing is long enough and that the pleats fold in a nice easy three pleats together and the top dart lines up with the first pleat.
Bye for now…
Gerties Shirtwaist dress FINISHED
Hi, I’m back with a roundup of Gerties Shirtwaist dress, although this dress was a complete nightmare stitch from beginning to end I would make it again, and here are the reasons why mainly it is amazingly comfortable and partly because half of the problems I had would have been avoidable had I spent more on copying the pattern and the publisher had proofed the pattern sheets more effectively.
A complete novice probably couldn’t have put the dress together on their own but a novice with an experienced dressmaker on hand for advice would be able to create this dress.
case in point, Denise has made a couple of garments but not one from a book where you need to trace out the pattern, don’t get me wrong Denise is totally capable of working it out for herself but it is easier if she has someone to ask.
Do you want to see some pictures? of course you do.

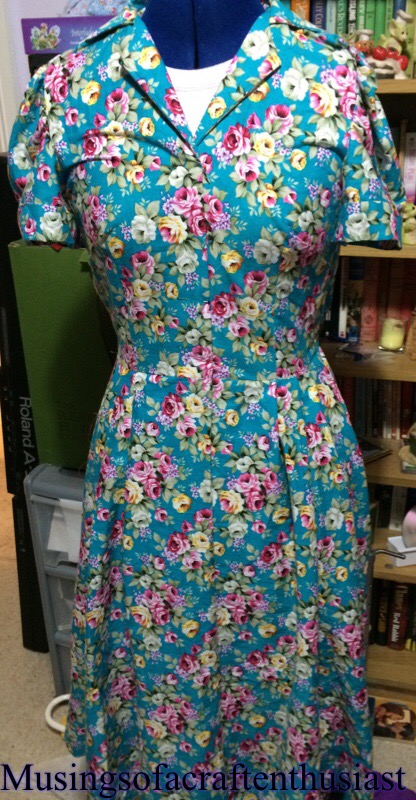
as you can see, the dress is a little tight across the top of the bust but that might be a follow on for the sleeves being too tight across the top of my arm. Otherwise it is quite a nice fit.

though in this picture you can see the front seam raises towards the front, that could be the weird way I’m standing , not sure what I’m supposed to be looking at. If I was to make it again I might make a straight size instead of grading between two sizes
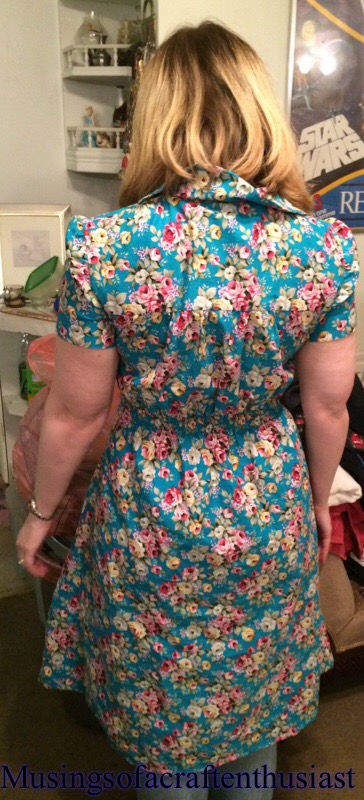
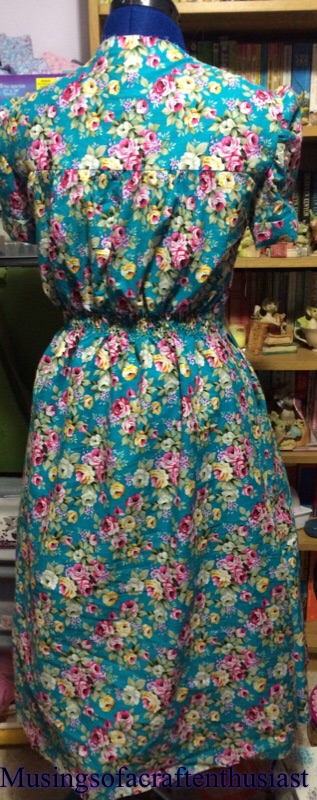
yes the collar is doing something wafty but neither of us noticed when we took the photos, again I not sure if I’m standing funny or it would probably hang better if I didn’t have my jeans on under it. you can see how tight it is across the sleeves. I do like that there isn’t too much blouseyness going on across the back. We both used self covered buttons me mainly because I couldn’t find any other buttons that worked.
If Denise was to make this dress again I think she would agree with me that we can lose some length from the bodice and may be some width from the shoulders.
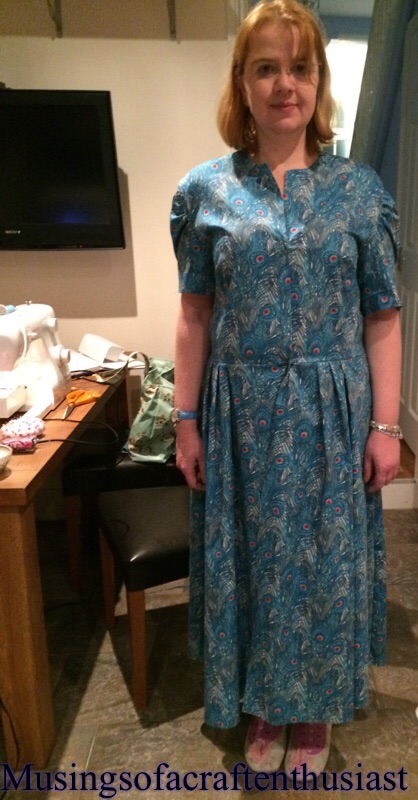
 the sleeves are nice and lose, and you can clearly see the extra puffyness I was complaining about on a previous post, but Denise likes that so that is alright.
here is Denise’s finished dress you can just see the buttons, we were a bit concerned that the front wouldn’t be quite wide enough over the bust, but that appears to be all right. we forgot you give you a hands in pocket shot, but the pockets are nice and roomy mine could probably have been slightly higher, but it does mean I won’t be continuously putting my hands in them.
The next dress that we are looking at doing is the seersucker dress, what I’ve said to Denise is that we will take more measurements first before cutting out the fabric.
Gertie’s Shirtwaist dress part 4
sorry for the delay in posting the results of week 4, I spent Wednesday evening alternating between being hot and cold and then went down with other flu type symptoms, not conducive to sitting down and concentrating on blog posts.
We managed to get the collar and the facings though not without some issues, mainly with not marking pattern pieces up correctly. I cannot stress enough if you are using this pattern book, check and double check all tracings and mark the T s from the pattern to your fabric.
Denise’s waist matched between the facing seam and the dress front seam, mine was about and inch and a half out, obviously my skirt facing was going to be too long as I hadn’t shortened it to match my shortened skirt pieces.
I lined up my collar with the centre of the back seam and centre of the collar, I also lined up my collar notches with the notches on the front of the dress. It seemed to go on all right we both had a couple of issues with a fold in the fabric round the collar but other wise pretty painless, as it was about 10:30 by this time we decided that we would do the slip stitching during the week so that all we had left was the button holes and hemming.
I wasn’t totally happy with the way my back facing was sitting but I figured that it just needed trimming and snipping, it wasn’t until the weekend just gone, once I felt up to wrestling with my dress that I put it on my dress form to look at it properly.
The first thing I noticed was that the pleats were wrong on one side of the dress, the pleats were all facing the same way doh!!! so I unpicked that part of the waist seam and folded them the way they should go. The second thing I noticed was that the collar wouldn’t lay flat.
I started trimming away the excess fabric which was when I discovered I’d somehow managed to catch part of the collar which I shouldn’t have when stitching on the facings and added to that there was a large fold of facing fabric where it should have been flat. I undid the iffy bits of the neck line and put it back in again, trimmed it all up and snipped the edges.
the collar lay nice and flat now, unfortunately it wasn’t symmetrical, the collar was noticeably off centre boo!!!
I took the whole collar off checked the marks they all lined up, the collar was still off, in the end I ignored the marks and used my tape measure. Here are the picture of how it look now, unfortunately I forgot to take any before pictures.

This weeks sewalong (10th)had to be put off as we were both not well, but hopefully the dresses will be finished next week.
Gerties shirtwaist dress part 3.5
I have done a couple of alterations on my Shirtwaist dress, and now it looks much better.
I removed the yoke and took the elastic off of it, I then replaced it using the old fashioned method (two rows of stitching and gathered it by hand)
After removing the sleeves and undoing the under arm seam, I redid the seam with a 3/8 inch seam instead of the 5/8 seam which gave me an extra 1/2 inch.
Using the pattern from my New york 444 pattern I have increased the arm sync on the front, I also redid the under arm seam by the same amount as the sleeve.
After trying it back in the armhole, it was still too puffy so I removed a couple of millimetres from the entire top of the sleeve head going from the single notch to the double notch.
The sleeves are now in the dress and although are slightly puffy they look miles better also, for some reason the fit overall looks a lot better

Gerties shirtwaist dress part 3
Denise and I met up at my place, Simon being in Telford, the cats always take an interest in Denise’s bag, at least this week they didn’t try to fill it up by pushing things off the counter and window ledge.

Denise hung up her dress and here is the promised photo of the yoke….

This week we are starting on the sleeves, after checking the marks and the book several times we put in our rows of gathering stitches…….

Stitched up the underarm seam

Made the sleeve cuff and stitched it to the sleeve and ironed it all in place.
This is where my problems started, I stitched my sleeve in place, it went in first time which is always a bonus. I took the pins out and turned it the right way round, urk!!! There are loads of gathers across the front of the seam, I’m thinking this can’t be right! I checked the pattern pieces both the traced ones and the pattern sheet, then I double checked the markings on my fabric and the instructions in the book, everything is right, so I check Gerties picture in the front of the book no, the front of the sleeve is smooth, the top of the sleeve is nicely puffy. So in desperation I type ‘Gerties Shirtwaist dress’ into Google images, looking through the images there are an array of puffy sleeves with rather a lot of gathers across the front, looking (as Denise said) much like the cast of Oklahoma.

I’ve put my other sleeve in, not only do I not like the puffy sleeve look, the sleeve which was alright to put on when it wasn’t attached to the dress, is totally impossible to get out of on my own when stitched into the arm hole.
After Denise had prised me out of my dress, I undid all the work done that evening and am about to go back to the drawing board.
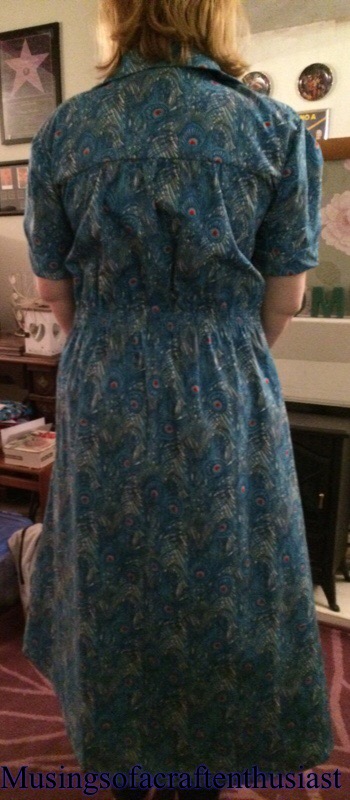
Here is a couple of photos of Denise’s dress, she also has the gathers on the front, but they aren’t quite as puffy as mine and she can also get in and out her dress without needing help.

so long for now
Gerties Shirtwaist Dress part 2.5
Hello
As you saw on the previous post we had planned to sew up the side seams before Denise and I met again (which would be next week)as I am notorious for leaving things to the last minute Last night I thought I would get a drop on it, it is a good thing I did…..
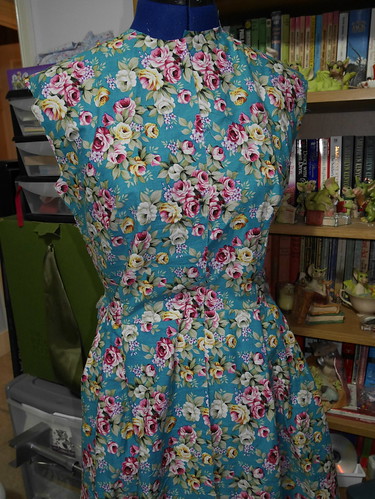
Here are some pictures of the dress sitting on my dress form

Back View

Side View
I stitched across the shoulder seams, but when I got to the side seams the pockets didn’t line up, well if i went from the bottom up the pockets lined up but there was about a two inch excess on one side of the bodice. I remembered that fact that my pleats didn’t add up and thought I had better check the front skirt and bodice patterns.
I checked and there was something wrong, not entirely my fault, but maybe if I had been paying attention it wouldn’t have happened. I traced the pattern 4-6-4 4 on the bust 6 waist and back to a 4 for the hips, if you look at these two photos, the markings for the size 6 on the skirt pattern are wrong, it is marked up with the size 8.


I’ve gone looking for dashes I’ve used the 12 line graded back to 4 (it was late, I was tired) so not only is is the piece too wide it is also too short.
Luckily I like my skirts long so I had already lengthened it by three inches when I cut it out, which means that I can still use my fabric, I just now have to shorten the back piece, and hope I like the length any way.
Shirtwaist Dress Sewalong part 2
Hi, It has taken me a little while to get the photos sorted out for this post, out Sewalong actually happened on Tuesday and it is now Friday, life gets in the way.
I arrived at Denise’s at about 8PM, slightly later than I anticipated but in plenty of time to get loads done (We thought)We both started off by putting in the line for the first row of stitching, I used my water soluble pen, Denise used chalk…
my pen is turquoise, if you look closely you can see the line going across the middle, our first lines of stitching went in brilliantly as did the second, then disaster struck, Denise pulled her gathered stitches out straight and the elastic broke, we don’t know if she had wound her bobbin too tight or the elastic wasn’t as strong as it should have been, but she needed to unpick and start again, of course because Denise used chalk, some of it had rubbed off, once we got the first line in and the rest went on easy

The next bit we did was to attach the back yoke to the the back bodice, Gertie suggests leaving the elastic in the bobbin and using it to gather the yoke, I’m not convinced, in fact I plain didn’t like it. I did my yoke first leaving with the elastic, I found that it was hard to keep the yoke piece from curling up and the gathers weren’t any more even than if i had used the two rows of stitching method. After completing mine I suggested that Denise should do it the regular way, in my opinion it looks better. Not enough to warrant unpicking it, but if i were to make this dress again i would gather with two rows of stitching pulled up rather than the using the shirring elastic.
Back View
I don’t have a picture of Denises yoke if I remember I’ll get one next week.
we stitched each pocket piece to it’s corresponding side piece,

by this time it was getting a little late 11 o’clock so we decided to call it a day.
Denise suggested that before we meet again we stitch up our side seams and shoulders so that we are all ready for the sleeves.
I agreed with this so packed up and went home.
Gerties Shirtwaist Dress
My friend and I are having a mini sewalong, if that is what you can call two people sewing the same pattern together.

Week one we decided on which pattern we wanted to do and traced and cut out the pattern pieces, we arranged to meet up the following week with our dresses cut out and ready to sew.
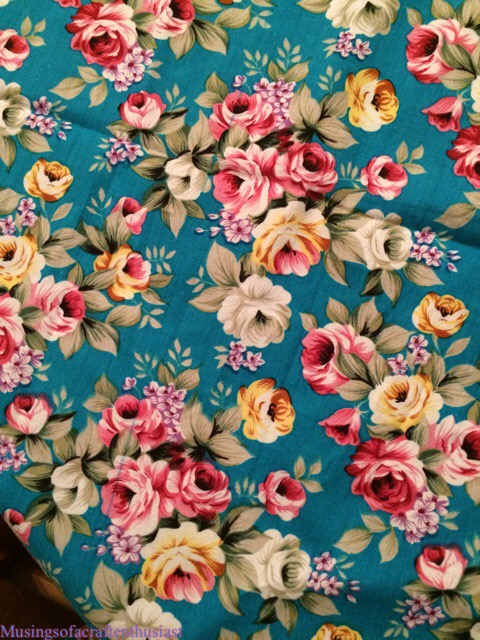
I am using this fabric
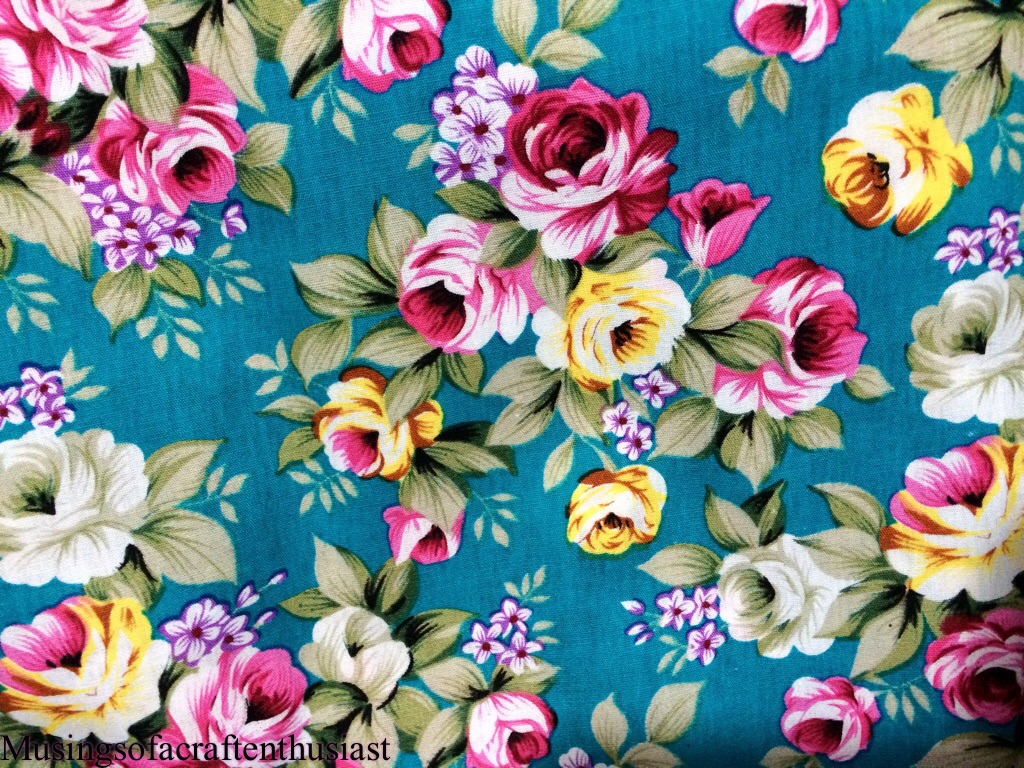
I think it is a light cotton, I bought on my trip to London in the summer.
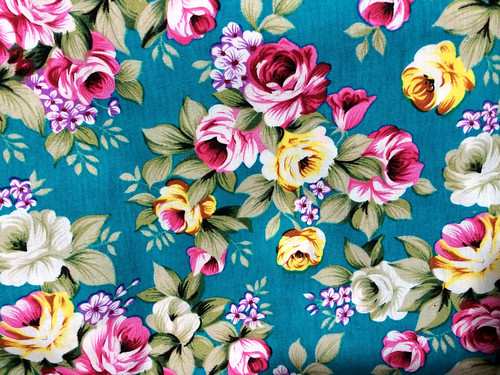
and my friend is using this fabric

A cotton purchased from Kayes Textiles on London Road, Southend-on-Sea, my friend did have a slight issue as in the fact that although the pattern was advertised for 45 inch fabric, her skirt was too wide by about an inch, especially as she wanted it longer than the pattern.
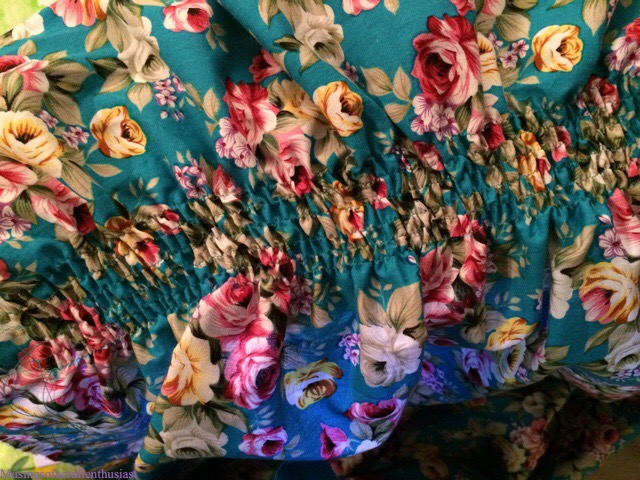
Week two we managed to get the front pieces together, which for some reason took far longer than I thought it would, not helped by the pleats and the misleading diagrams in the book. The book seems to have the pleats going the opposite way to the photo of the dress, also after basting the pleats into the skirt there was half an inch extra fabric in my skirt but Denise’s was fine (can only assume a tracing issue on my part).
Here is what it looks like so far
because of the fabric you can’t really see the pesky pleats but they are there.
next week we tackle shirring, collars and sleeves
2015 Part 1
I’m not big on new years resolutions, I find that if I say I am going to do something I usually end up not doing it, or vice versa if I say I’m not going to do something that immediately becomes the thing I want to do most.
This year I want it to be the year I get things done….I’ve made a start already.
I have a load of actual photos in Albums from Simons Mum which at some point I agreed to scan I think I have had them for a year or more. The beginning of this week I have started and hope to have at least one of the four Albums to take back by the end of this month.
I have had Gertie’s book for Better Sewing since it came out and I and a friend are going to sew something from it, The Shirtwaist Dress, we both have our patterns traced and cut out, I’m hoping to use this fabric….
Sewing starts next week….
I also want to go through my started but unfinished projects, I am going to be ruthless if I can’t muster up the enthusiasm to finish them by the end of June then in the bin they go, in general we have too much stuff laying about and I want to get rid of it.
Which moves me onto my final thing, I want to be more discerning with what I spend my money on, I know I get carried away and I’ll buy something, I like it and buy a whole load of other stuff along the same lines, which is why I have cupboards full of jigsaw puzzles (damn you eBay) and vintage patterns (eBay and etsy)
I also want to continue with my blog and try to post more.


