Monthly Archives: December 2016
Biba – An Exhibition part 2
Here is the second part of the post about the Biba Exhibition, this might confuse people not from Southend but the second hale is housed in the original ‘old’ library which is the museum.

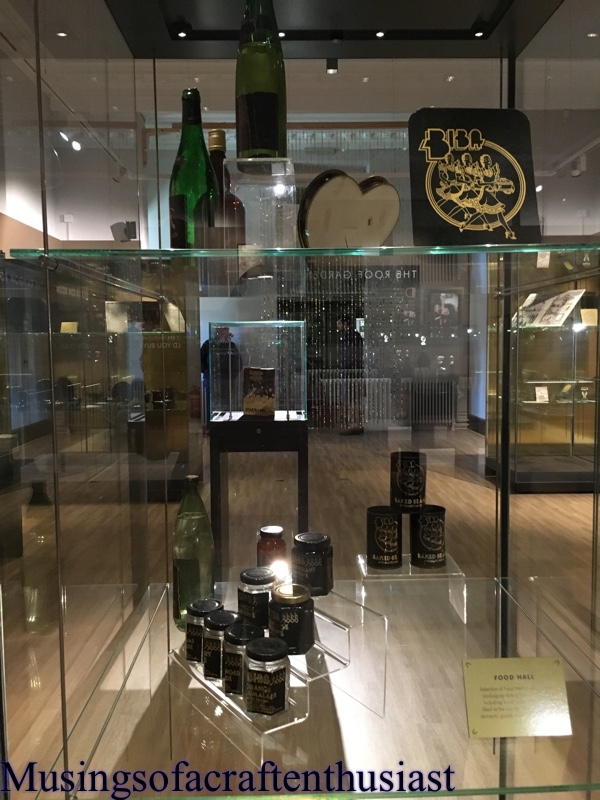
The part housed in the museum was housewares and makeup, Biba apparently had a finger in all pies, as far as I can work out they were eventually housed in a very large department store in London.
while I was looking at the dresses a lady was in there with me she was very nostalgic while looking at all the merchandise, and informed me that at home she probably had more at home than was included in the exhibition, she remembered fondly that the price of the bus fare was probably more than she and her friends bought in the shops, the makeup was very cheap.


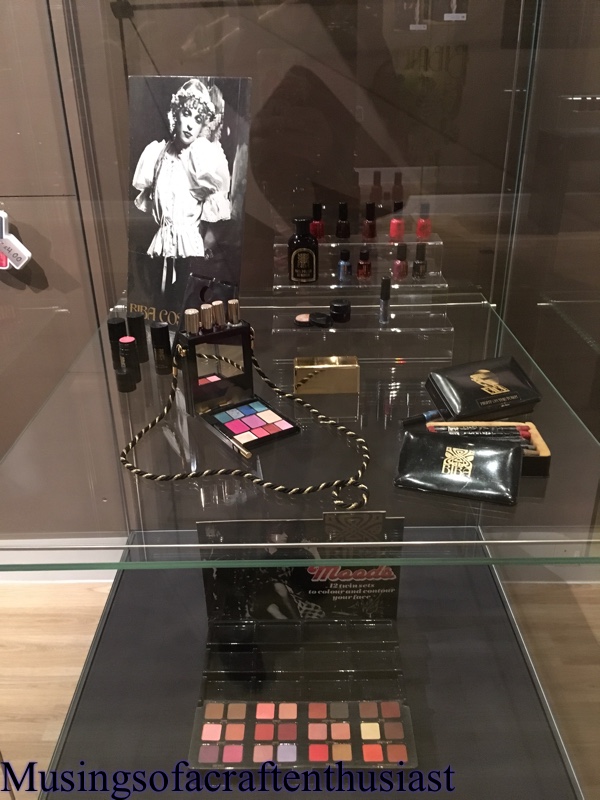
you must admit the eyeshadow sets do look fabulous….

The also sold household from matches to dinner services all with the black and gold motif


there were these really great art deco signs


and here is the ending plaque

One of the ladies in the Museum said that she thought it was one of the best exhibitions that had been put on there and I think she was right, she also mentioned that it all came from one mans collection.
if you have any great memories of Biba I would love you to share them in the comments.
Biba an Exhibition
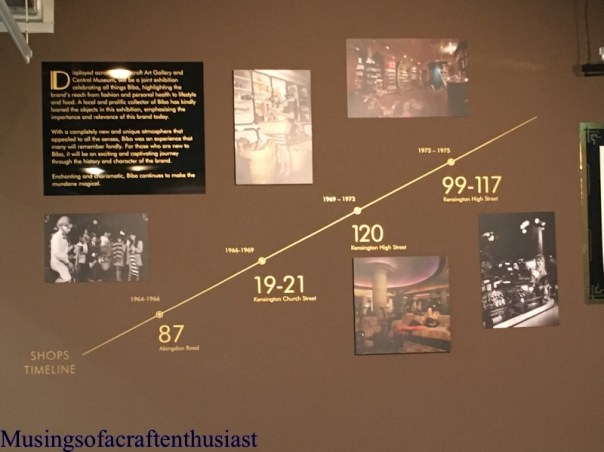
Hi, now I will confess I hadn’t heard of Biba, I think it is probably because of my age, I would have been 7 when it closed 1975. My local museum and the Beecroft gallery have been showing an exhibition since the middle of this year and it is going on until 14 January.
Biba was a Fashion brand that originally ran from 1964 – 1975 there has been a couple attempts to revive the brand since then which don’t appear to have been successfull the latest being House of Fraser
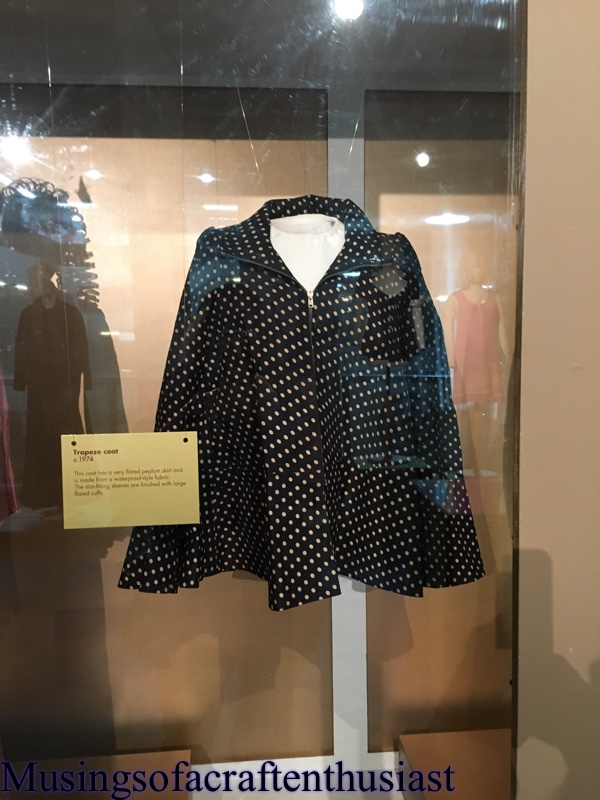
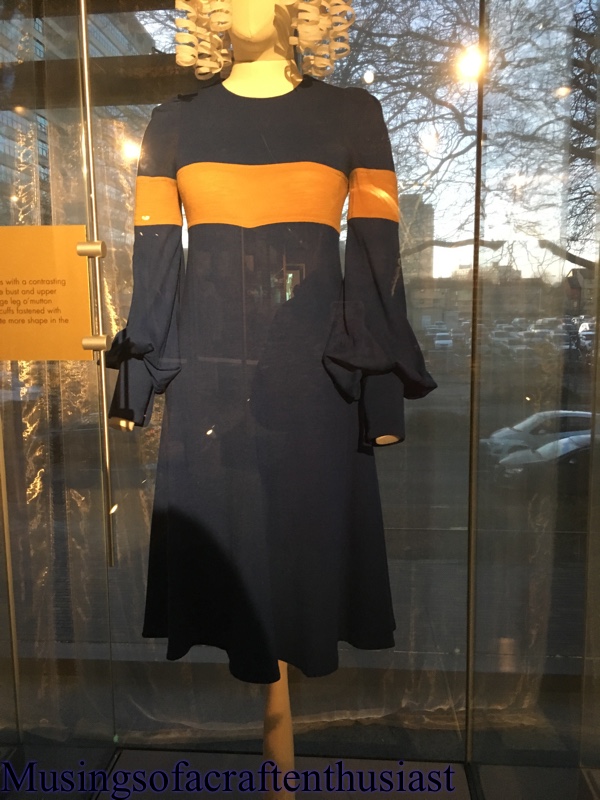
The Beecroft Gallery which is now housed in the old Library has a small display of clothes, this is going to be a very picture heavy post, the photos aren’t that good, they were taken on my phone with no flash so there is quite a lot of reflections going on.


There were a lot of boards up with little pieces of information on the the brand.

I’ll have the next half tomorrow….
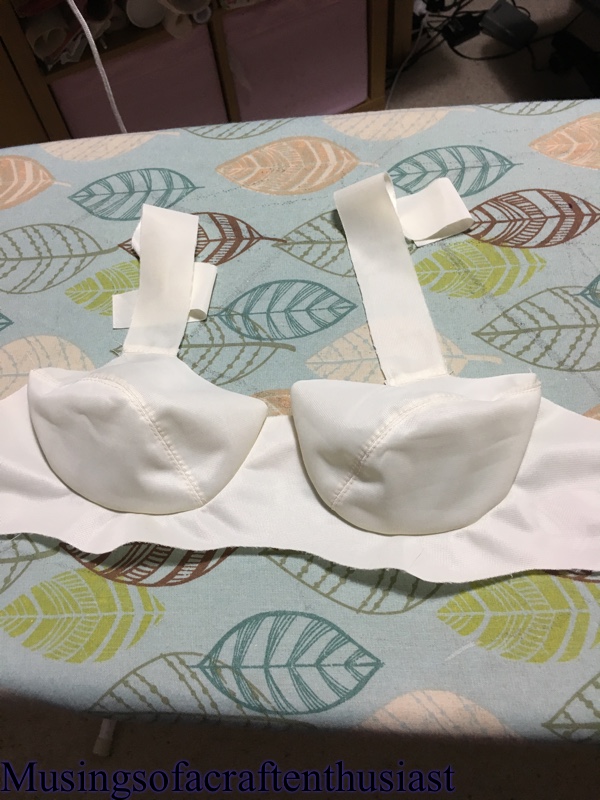
Bra Making pt 2
Here is the long awaited update to Bra Making pt 1, it doesn’t take that long to finish once you get onto the elastic.
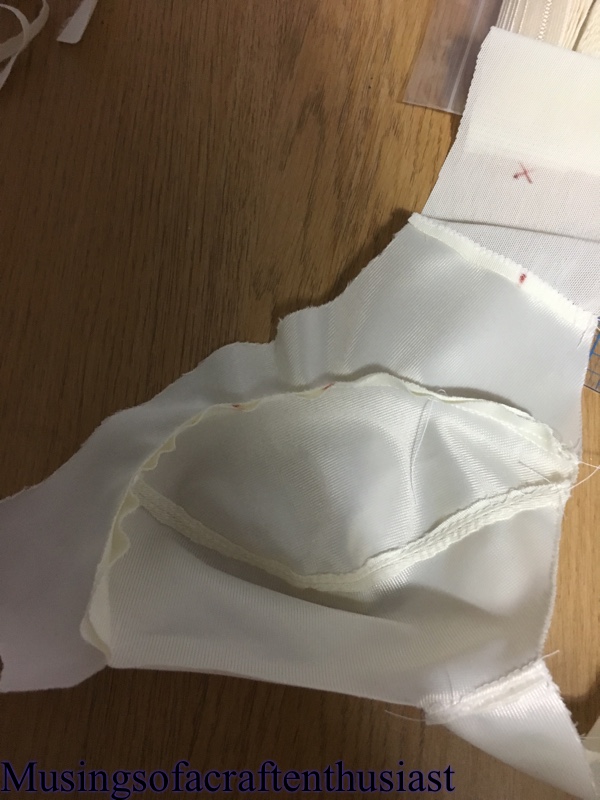
My kit came with two different widths of picot elastic luckily I picked the right one, the slightly wider one goes along the bottom band the other one along the outside of the straps.
Each bit of elastic has two rows of Zigzag stitching, the first row is to switch it to the front of the bra band then you flip it up on the back and do the other row, the first one is normal zigzag the second is the three stitch zigzag.
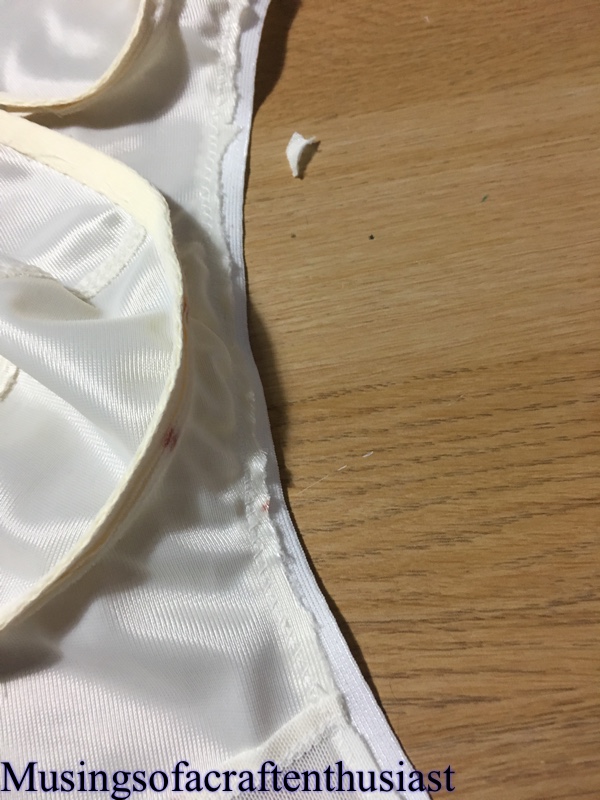


The elastic is only pulled tight across the bottom of each cup, and you cut the bridge fabric so that you can stitch that straight.


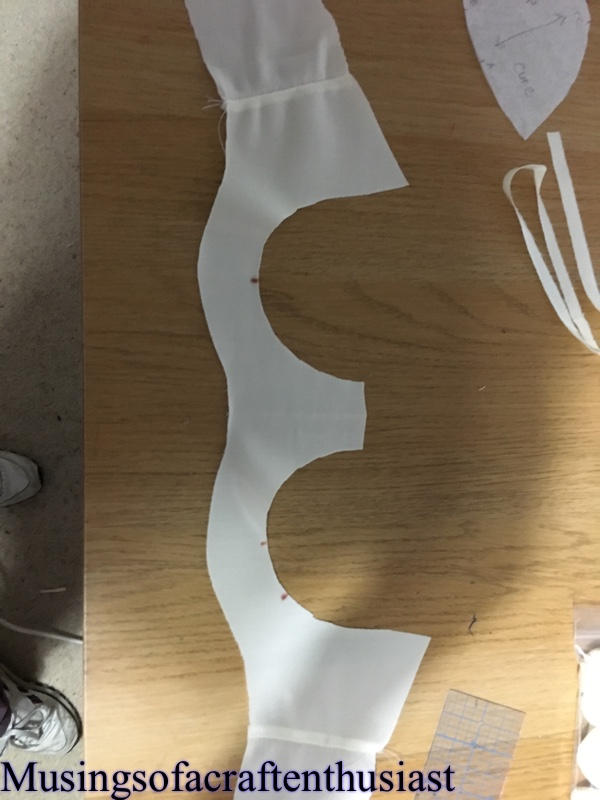
You do much the same thing for the top of the band and up the strap, the only bit that need pulling is the side of the cup.

The neckline trim doesn’t have to be elastic but the stuff in my kit was, and to be honest not my cup of tea once it was installed, it was a bit too big.
Once the bottom band has been completed, but before the strap elastic is fitted you check the band for size against the hook and eye band, trim off any excess on the band. You fit the hardware to the back strap then attach that to the back of the bra, and attach the bra strap to the the elastic back.
attach the hooks and eyes then you have a finished bra.


before you finish off the channelling for the underwires you try it on for fit.
The cup fit was pretty good, it was slightly tight along the top cup edge and the bottom band was also a bit tight, I was thinking of going up a band size but after asking the class instructor she suggested adding 1/2 to 1 inch to the back band piece and adding a wedge to the top edge of the upper cup.

So I’m going to try it and see how these alteration affect the fit.
If you are thinking of taking the Beverly Johnson class I would recommend it, I would also recommend getting her pattern and the kit that goes with it, I have enough fabric for about four bras, I will need to get extra elastic and findings. There are two reasons for saying this, if you take her other classes this is the bra pattern Beverly shows you how to alter and also I bought another kit from eBay and the main cup fabric is horrible and I think the the lace is unsuitable for bra making as it is slightly directional (one way) it is as if they have got a list of things needed for the process but have the necessary knowledge to select the right stuff. If I hadn’t bought the other kit I wouldn’t have known any better and probably not finished the bra.
I bought my official kit from b’ware they are Swedish website which accepts PayPal as well as credit cards the kit arrived very quickly.
Craftsy – Bra making part 1
Hi, you might remember this time last year I bought a craftsy class – Sewing Bras construction and fit, I also bought the kit that went with it, of course as usual by the time the kit arrived I had moved on to other things.
So fast forwarded to the black Friday sales this year where I bought the other two bra making classes and the knicker class as well.
Beverly Johnson, is a very good teacher she obviously knows her subject and comes across really well in the videos, the class starts off by giving you hints and tips on measuring and choosing your size, I went with the pinup girls classic bra Beverly Johnsons own pattern, usually I would wear a Balconette bra but I couldn’t find a pattern I liked and figured it might be better to start less complicated.
Beverly then went on to talk about the fabric and cutting out the peices, I had already traced them off the pattern, size wise I went for 32b, which is what I wear, what you are supposed to do is measure yourself in your most comfortable unpadded bra, but as I don’t buy unpadded bras I had to guesstimate
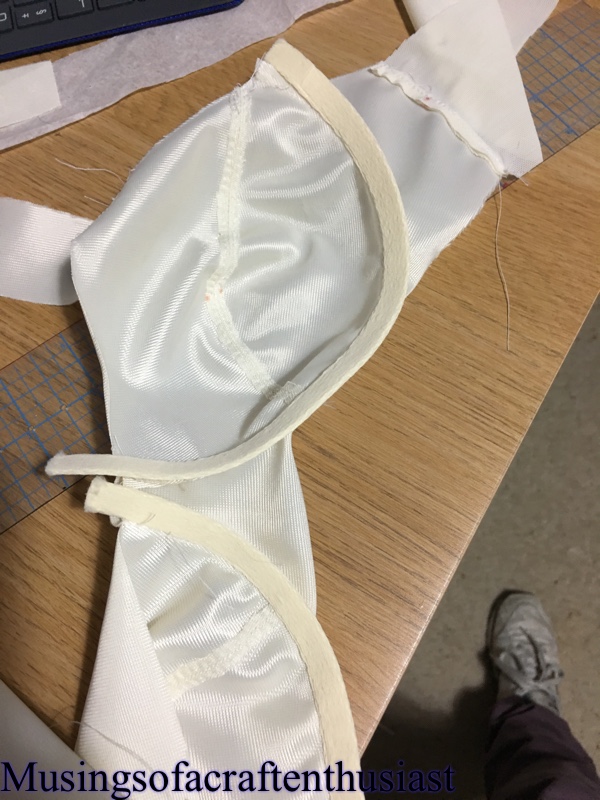
First you stitch the two halves of the cup together, and attach the straps after ironing (Beverly prefers a newl post for cup ironing) you top stitch the the seam allowances and trim.


Then you attach the back band to the front band
And the cups to the front band

Then the underwire channelling to the undercup seam allowance

The next thing we move onto will be the elastic. I will say I am not 100% convinced on cup size or shape, but I won’t know for definite until it is finished.


