Blog Archives
Great British sewing bee
In a bid to get some sewing mojo back, I’ve just binge watched the great British sewing bee on youtube, I’ve come to the conclusion that Patrick and May were better judges, Esme Young is a poor judge because she goes into it with a lot of preconceived ideas, if she doesn’t agree with the style ideas she’ll mark them down, how many times did she say on the first alteration challenge if my students were doing this what would come out is what they are where they come from and all they are apparently they are all skirts. In my opinion, Esme looks like a dogs dinner for most of the season.
If you want to see hideous clothes just check out what Esme is wearing.


I would quite like to try the asymmetrical skirt I don’t have the dexterity at the moment for cutting out or sewing it. Or the figure to wear it.
March – where did you go?
March sort of ran away from me and now it is April 😦
unfortunately a combination of training course (getting up 2 hours earlier) and having work done on the house has removed most of my stitching time for March and looks to be taking over April as well.
I have a couple of part way projects I can show you but nothing finished.
The first project is view 2

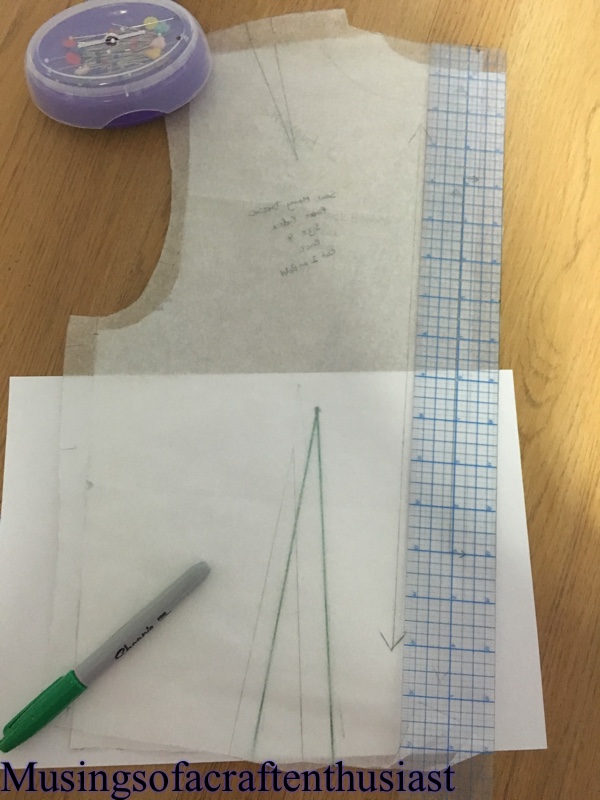
I think this is the first time I have ever done all views of a pattern, this is going to have a better fit, fingers crossed than the other two versions, these I took extra fabric from the side seams this time I have shrunk the pattern and done a small bust adjustment.


The top half of the pattern is one size too big but the waist and hips are perfect, so I turned to my trusty printer and scanned the front and back bodice pieces then I printed them out at 95%, you can just see on the bottom of the two photos how much I lost, it was about 1/4 inch all round. Then for the SBA there were a few things I needed to do

the first thing I had to do was reinstate the 5/8 seam allowance, then decide where I was going to move the bust dart to on the side.

I closed up the underbust dart and moved it to the side

added a piece of paper to the now side dart.

I then cut up from where the original dart had been to bust point then across to the arm hole, and swung that piece over 1/2 inch, taping the top part down

you can see from the above photo that the centre seam part which hasn’t been changed is now longer than the side seem which has been changed, so you slice across from the middle and shift the centre piece up until it matches the side piece, because the chest is smaller than expected for the pattern there is too much fabric going over the bust and this removes it.

The last step is to move the side dart back to the under bust, slice up the middle of the added paper and the area where the underbust dart was and close up the side dart creating a new smaller dart, add a piece of paper under this to fill in the new dart.
as you can see by the drawn in seam allowance (pencil) this dart is far smaller than the original, all that left to do is to make up a bodice and check the fit.

for a full length bodice it is better to add a skirt to check this, but as all I needed to do was to check the fit around the bust I left it at this.
more hopefully soon
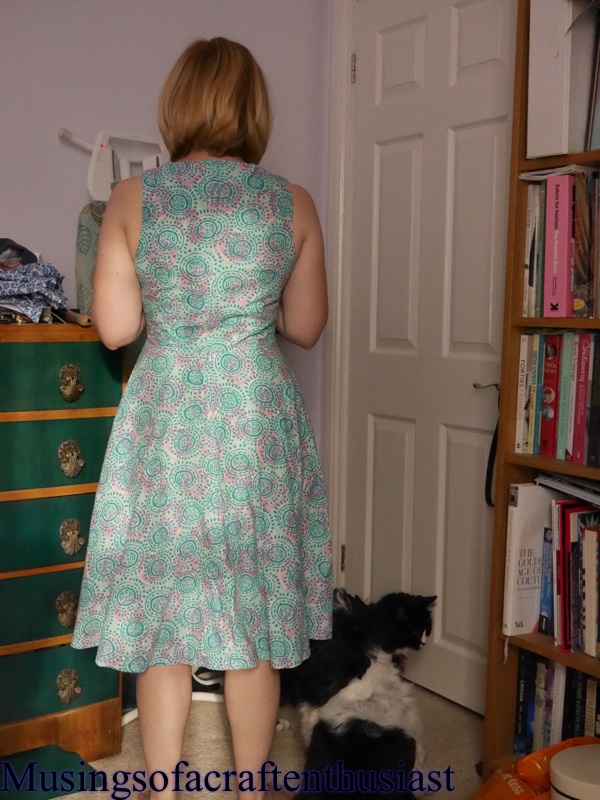
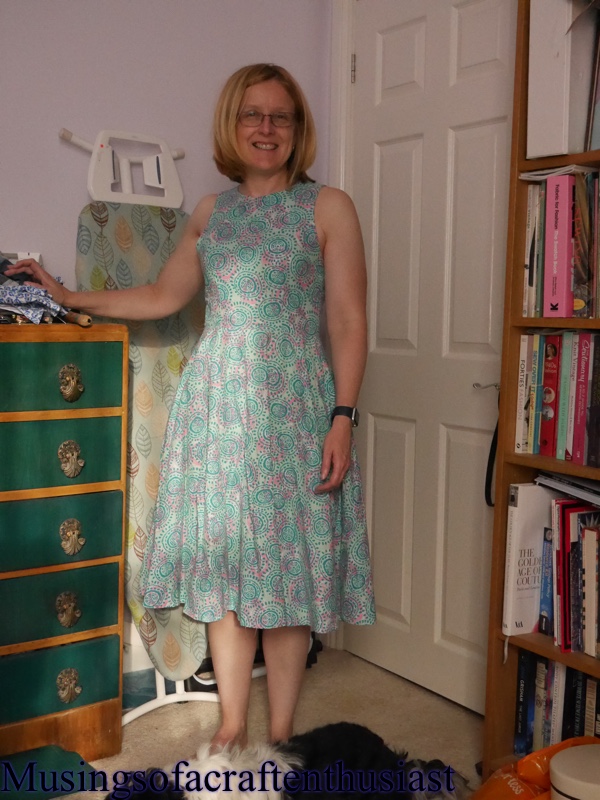
Moneta Dress Mk2
I managed to get in a second Moneta dress this month, this fabric has been in my stash a little while, I think is an eBay buy, it is a slightly heavier t-shirt fabric.
I made this moneta a size smaller on the top, removed 3/4 inch from the length of the top and graded out to the same waist measurement, with the skirt staying the same size.
I feel that this is a better fit.
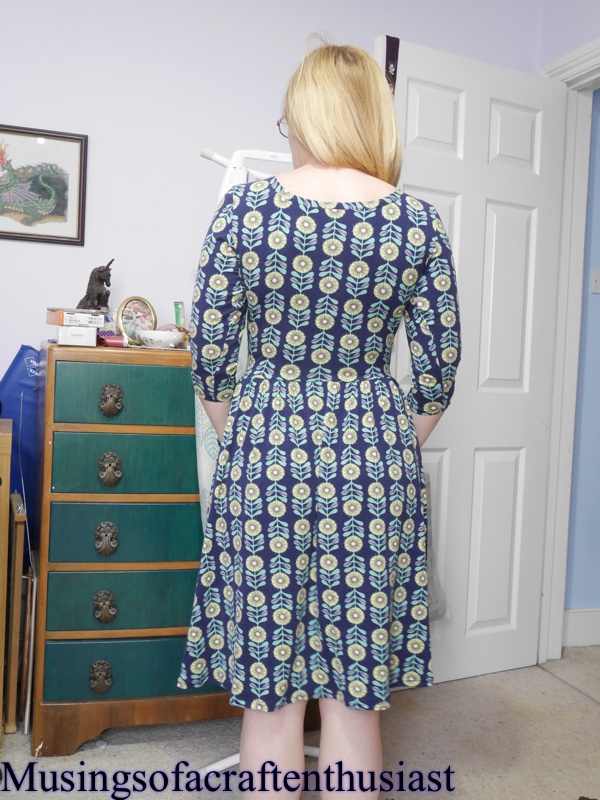
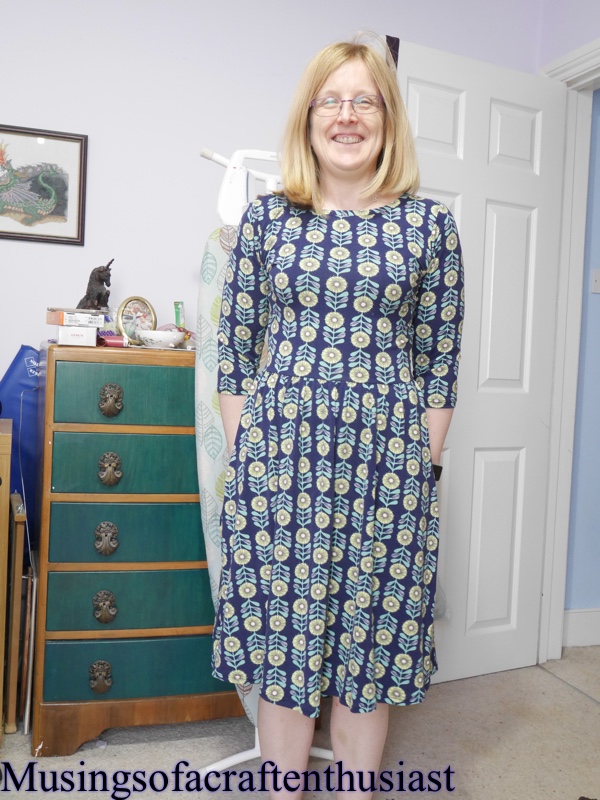

I lengthened the sleeve again by 2 1/5 inches but used a binding for the neck, I assume because it is a heavier fabric than the last one it was easier to tell the back from the front, while putting it together I had stitched a small square of fabric to both back pieces.
bye for now.
Craftsy – Bra making part 1
Hi, you might remember this time last year I bought a craftsy class – Sewing Bras construction and fit, I also bought the kit that went with it, of course as usual by the time the kit arrived I had moved on to other things.
So fast forwarded to the black Friday sales this year where I bought the other two bra making classes and the knicker class as well.
Beverly Johnson, is a very good teacher she obviously knows her subject and comes across really well in the videos, the class starts off by giving you hints and tips on measuring and choosing your size, I went with the pinup girls classic bra Beverly Johnsons own pattern, usually I would wear a Balconette bra but I couldn’t find a pattern I liked and figured it might be better to start less complicated.
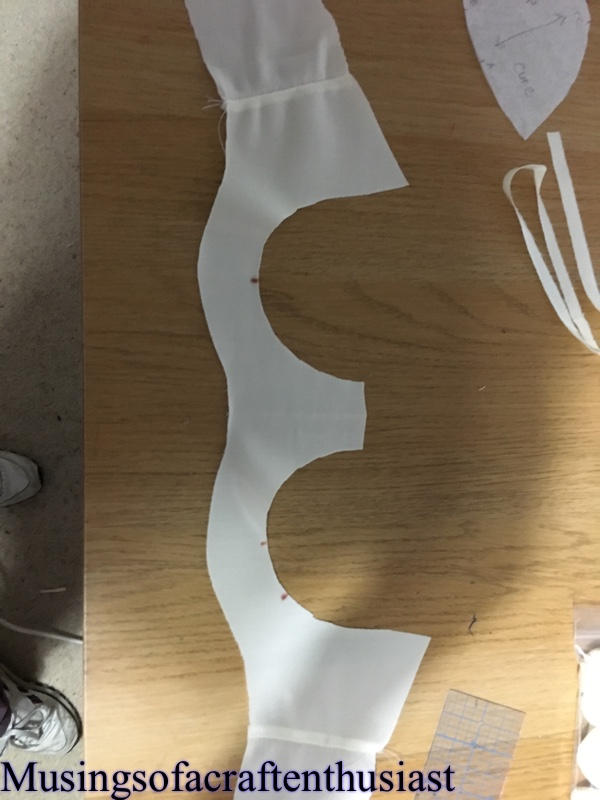
Beverly then went on to talk about the fabric and cutting out the peices, I had already traced them off the pattern, size wise I went for 32b, which is what I wear, what you are supposed to do is measure yourself in your most comfortable unpadded bra, but as I don’t buy unpadded bras I had to guesstimate
First you stitch the two halves of the cup together, and attach the straps after ironing (Beverly prefers a newl post for cup ironing) you top stitch the the seam allowances and trim.


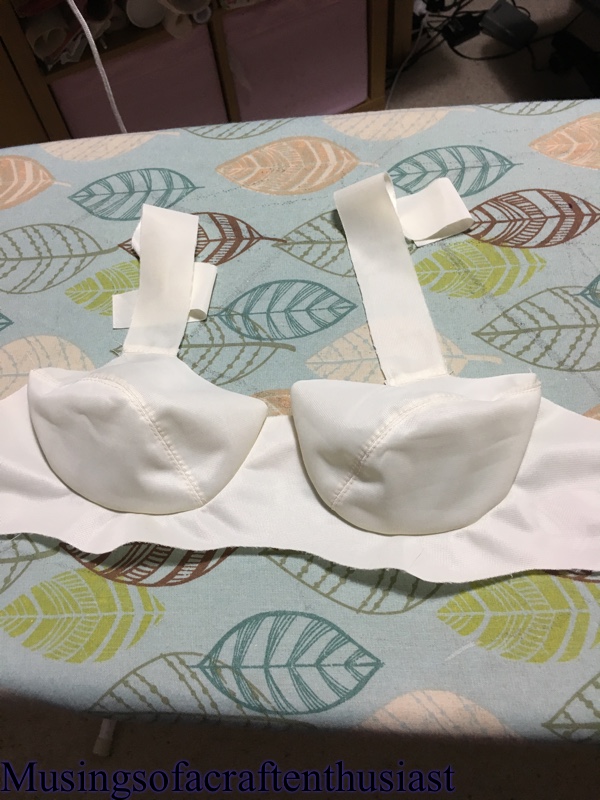
Then you attach the back band to the front band
And the cups to the front band
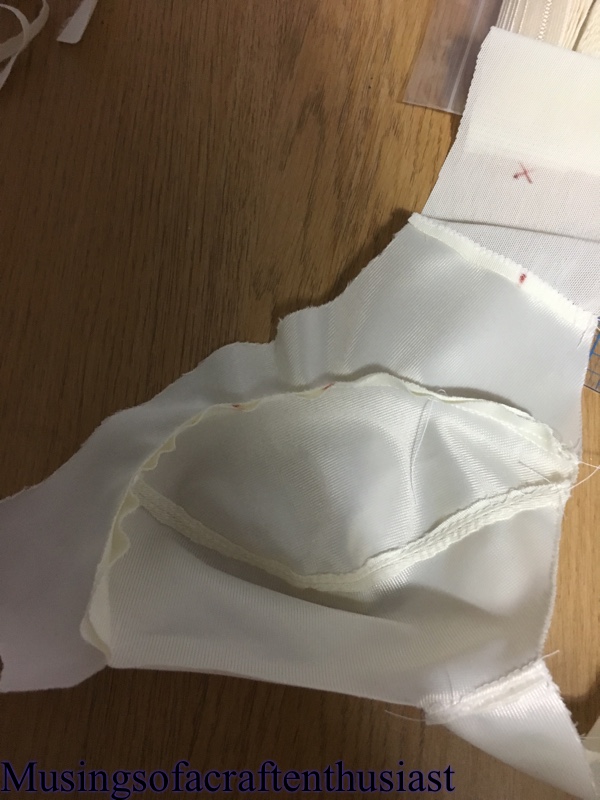

Then the underwire channelling to the undercup seam allowance
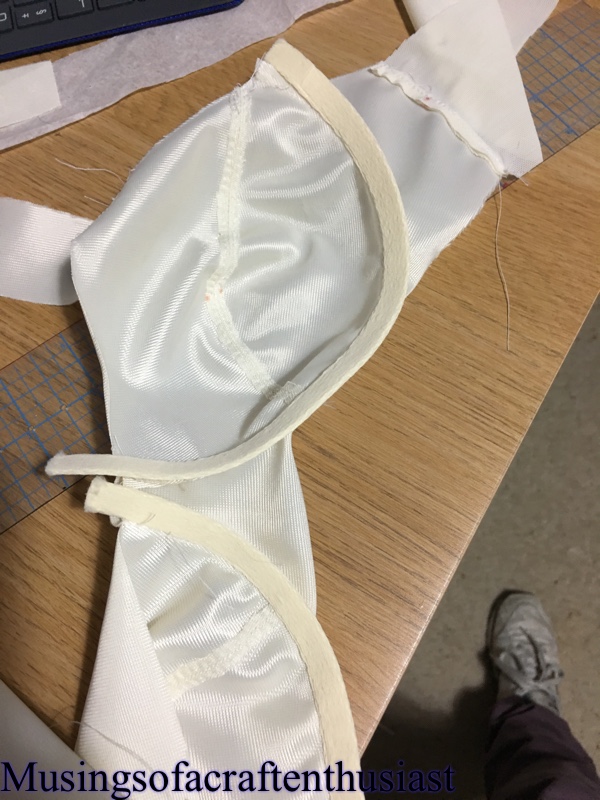

The next thing we move onto will be the elastic. I will say I am not 100% convinced on cup size or shape, but I won’t know for definite until it is finished.
Tanya Whelan – sew many dresses
Just a quick post to show you the equivalent dress from Tanya Whelan’s dress book so you can compare it with the one from Gertie’s Ultimate Dress book
Here are the two back peices Tanya’s one is on top it has an extra shoulder dart, which Gertie’s didn’t it is also drafted without the seam allowance which is why it is over slightly. After wearing both dresses I think that the arm holes and back neck fit better on Gertie’s but the rest is better on Tanya’s.
Here are the dress pictures, I bought the fabric from Olympia earlier in the year, it was a lot heavier than I thought it would be.


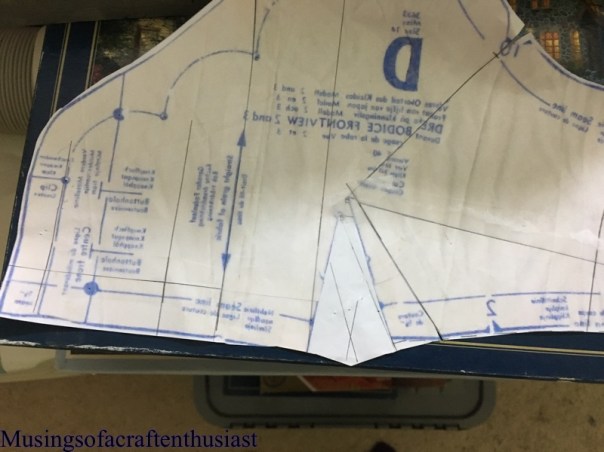
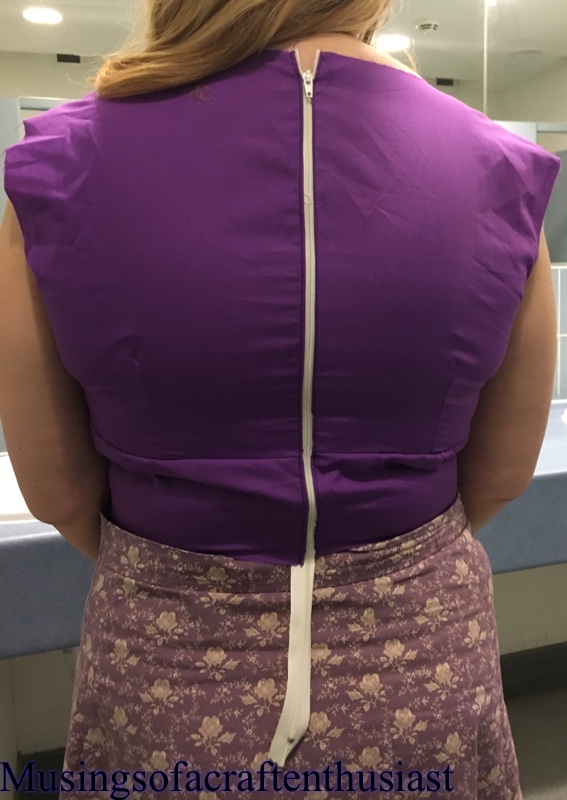
Dress for Liz part3
Every thing is coming along quite well and I am still on schedule, which is always a bonus. Simon was gigging most of the weekend just gone so I took the opportunity to get some major work done on the dress.
I started by tracing the pattern for the skirt, I traced the largest size, knowing that as it was a circle skirt if the waist wasn’t large enough I could just cut a bigger hole. If I was to do it again I might do it slightly differently, but as we were under a tight time fram this seemed easier.
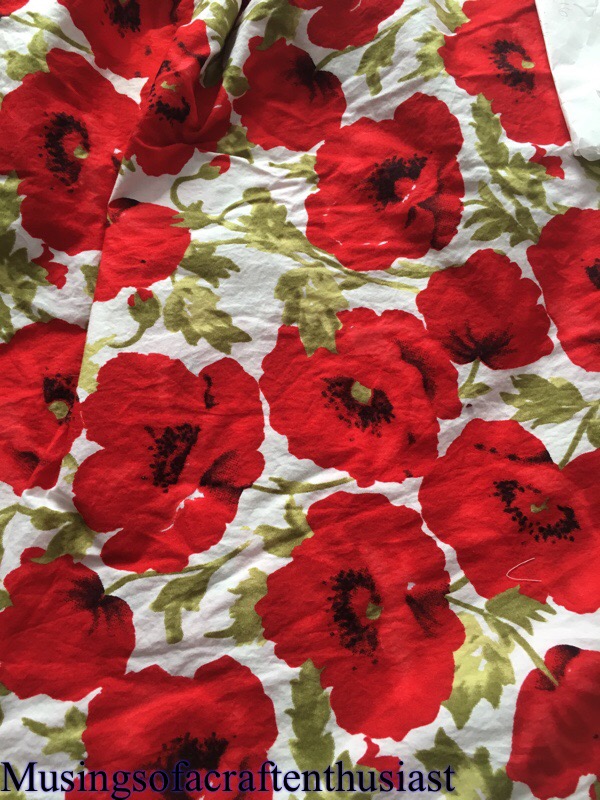
I used the circle skirt with box pleats, it gives the skirt a bit more body and a lovely shape even without a net under it.
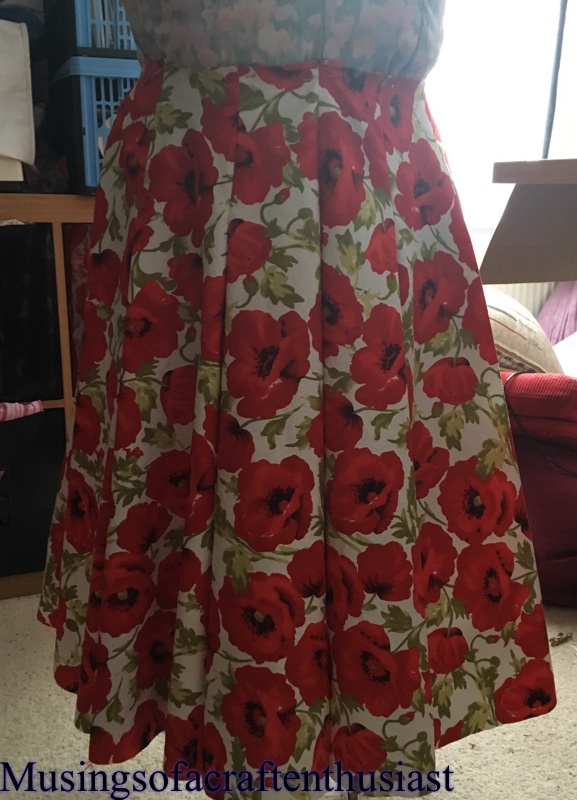
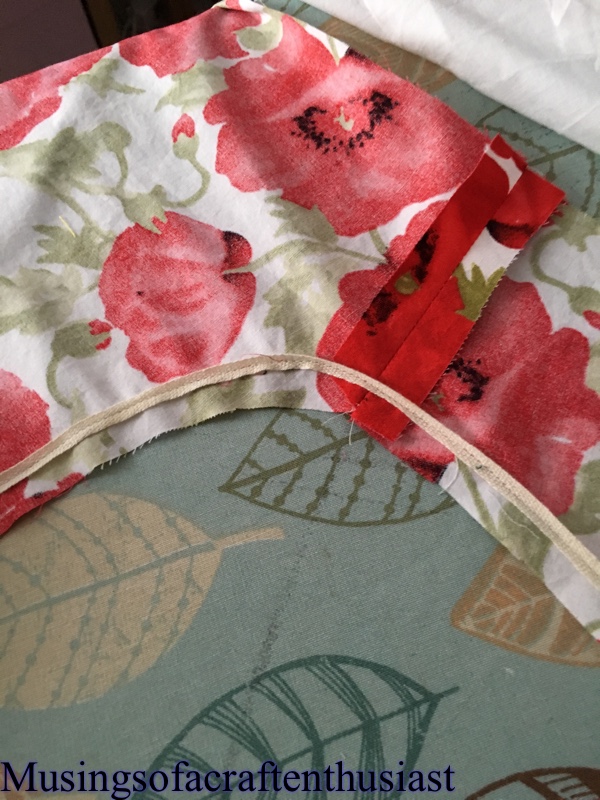
I must admit seeing it sitting there in its poppy glory I did wonder what we had done and what sort of mess I had got Liz into, but once the bodice was attached it looked a lot better. I padded up my dressmakers dummy with a 2 meters of fleece and used the test bodice as a guide.
I cut the bodice on the fold after remembering to remove the ‘seam allowance’ and I also added 5/8 to the front as it looked a lot shorter than the back.
I ran the stay stitching along the neckline as per the instructions in the book, but just to be sure I attached some 1/4 inch tape I got from my Mum which I assume was for that purpose.
I decided to line the bodice with some cotton lawn I had laying about so that the inside would look nice, I used my overlocker on the skirt.

After both peices got a good iron, and using more pins than usual I attached both peices of the bodice together.
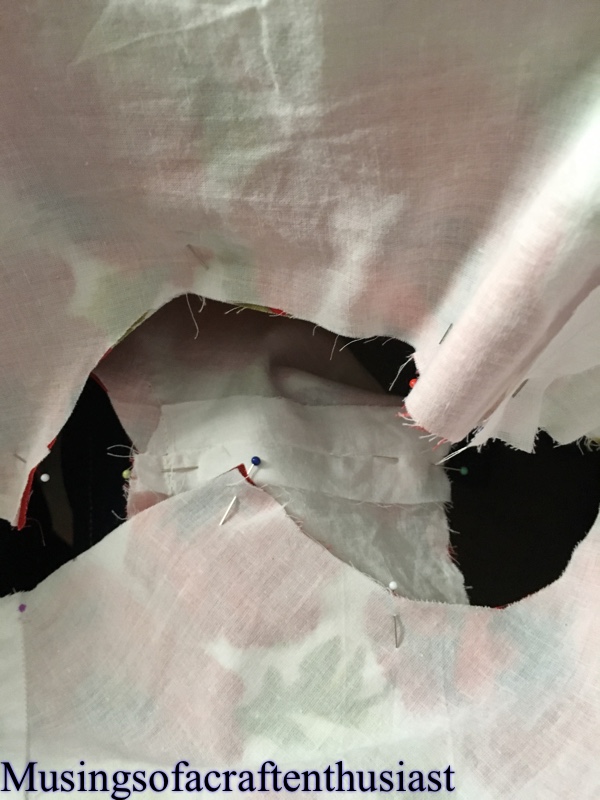

I basted the skirt to the bodice, I needed to take about an inch off the top of the skirt to get it to fit, which is why I should have put more thought in it as the pleats no longer line up with the dart on the bodice.
First dress fitting.
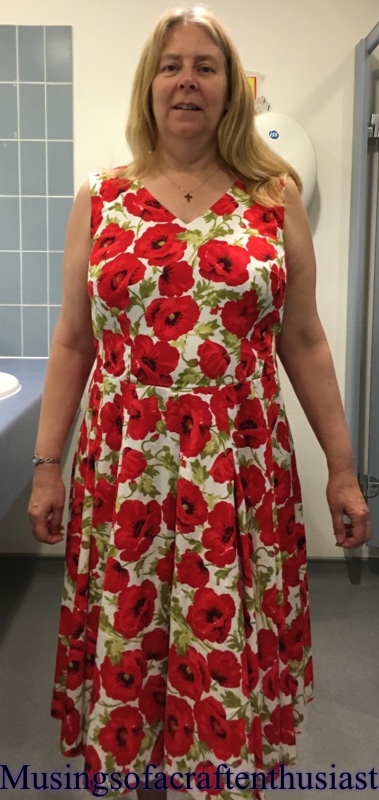

The fabric I added to the front I didn’t need once the skirt was added and there were some gaping on the arm holes on the back.

I’ve pinned almost an inch out of the back shoulder as the front looks good. You can see on the picture below that the front is now too low.
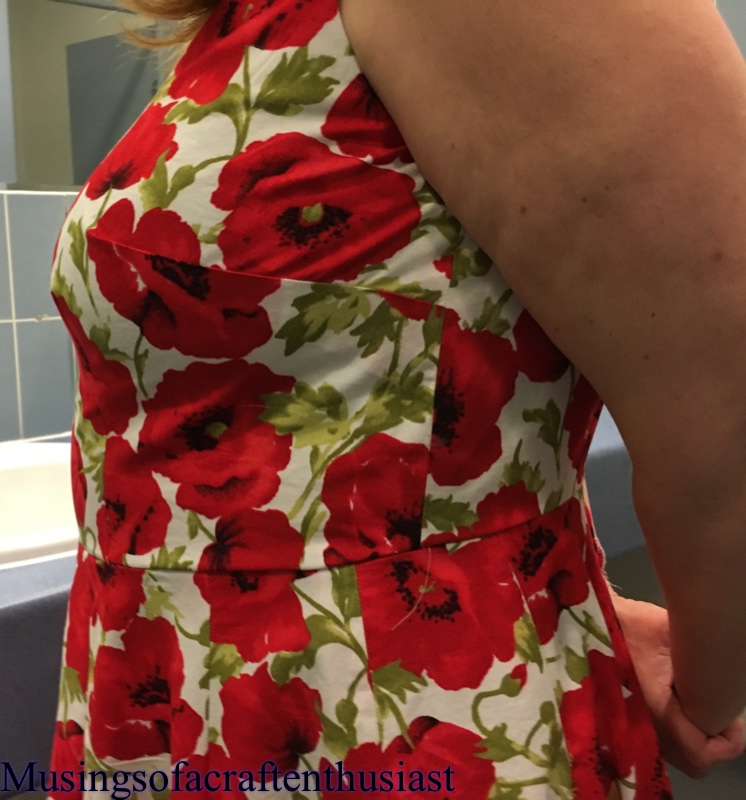
I have taken the bodice apart and done the two alterations. We decided to leave the rest of the issues, like the pulling under the bust, which might be fixed by the other two changes, to be honest I didn’t want to fiddle with that bit too much as I was worried I might make it worse.
More next time….
Dress for Liz part 2
Hi, we completed the fitting for Liz’s dress on schedule, I’d given myself one week to fit the bodice and a little under three weeks to make the dress itself.
It is surprising how you go into these projects with one thing in mind and at the end decide on something different.
In the end I made four bodices in total, the first one just proved what I had thought, that a FBA would be needed, it was also a little small round the waist, which I’ll come to in a minute.
I decided to add a 1inch FBA which made the side dart huge but as I was going to need the extra space across the waist I decide to rotate most of the extra into the underbust dart, otherwise I was going to end up with no shaping at all under the bust. Liz tried this one on Monday, the fit seemed almost perfect apart from some pooling at the center back at this point it didn’t have a zip in it so this was guess work.
As I was pretty happy with the fit at this point I decided to make up the bodice of ‘our’ choice, it was at this point I discovered that when I had traced off the front bodice piece I had missed off the cut on fold, oops. This explains why the original bodice had been way too small I had taken out 1 1/4 in out of the front.
So that week I then made up the bodice with a 1/2 FBA,


put a zip in the one Liz had already tried on and take a 3/4 inch horizontal sliver out of the back

 and also made up the style I thought would look best.

Liz tried them all on and it turns out that the second bodice with the center seam and the 1inch FBA looked the best, so that is the one we are going with.
More soon……
Dress for Liz
I am quite excited about my next project, I have offered to make a dress for one of my best friends to wear to her nieces wedding at the beginning of July, when I say the beginning I mean July 2nd, and Liz and her family are leaving for Wales on the June 30th which leaves me with only one month.
We have picked the fabric and have had one bodice fitting, as Liz is a completely different shape to me I have a whole load of fitting issues I haven’t had to tackle before.
Issue one she has a lot more chest than I do, FBA here I come, and proportionally her waist is larger, but her hips are in the same size range as her bust.
We have decided on a pattern from Gerties new book Gerties Ultimate Dress book (well I think I talked her into it, but I’m not sure) it’s sort of the boat neck dress, but not, Liz isn’t keen on higher neck lines, so I was thinking the V neck from the basic pattern, with either a circle skirt or a pleated skirt.
Liz is very keen on the 50s type vibe in a dress, I also figured that at the bodice was going to be the hardest for fitting issues I worry about the skirt later.
The first bodice I made up was 14 on the shoulder and bust and 16 on the waist, it fitted beautifully across her shoulders and upper chest but needs about two inches added across the bust as it bought the side seams forward.


For ironing out the fitting issues I’m using the basic bodice as I think this will be easier to fit initially and then the changes can be transferred to the pattern I want to use.
Unfinished projects
Anyone that has actually read through my blog, (and I thank you for sticking with it) will have realised that I do have a lot of problems finishing Items.
Anyway recently I was reading a blog that I follow, loweryourpresserfoot.blogspot.se and it appears that this lady has an even worse problem than I do, that could just be because she has been sewing and blogging longer.
She has made a decision to complete one Unfinished Project a month and she also wants to work out why she lets things become UFOs, I’m fairly sure I know why I let things become UFOs I do the initial fitting and either I don’t like the fabric after all, or it doesn’t look the way I envisioned it. There are a couple of other reasons, I can’t be bothered to do the hand stitching, or I’ve jumped into another project, the next big thing.
So starting this month I also want to complete one unfinished garment a month, but also I want to pledge that I will finish any stitching that I start before going onto the ‘next big thing’
There are a couple of things that I want to get into the habit of doing, one of which is not waiting until I have something finished to show you. If I can blog as I go hopefully there will not be long stretches of time between posts and also it should be extra encouragement for my UFOs.
Do you have trouble finishing projects? How do you deal with it?
Thanks for reading….
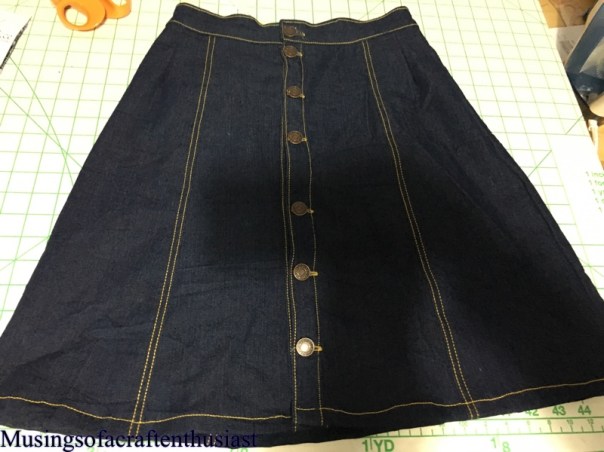
Denim Skirt -Simplicity 7995 (sort of)
After cutting out two pairs of birkin flares, I had just enough fabric left to cut out a denim skirt, I knew I wanted one with buttons up the front, but I also knew I had this pattern (Simplicity 7995) a size smaller thatn I usually wear, but it was stretch fabic that should work fine.

I have already made view 3 so knew that the skirt came up ridiculously long on me, so I started off by shortening it by 7 inches which should get it just above my knee, similar to the picture on the pattern envelope. I picked view 1 because I wanted the top stitching, but as you can see the front panel is cut on the fold, which I didn’t want, I wanted buttons not a zip, so I cut it in two peices and cut two lengths of fabric for the button bands.
The skirt was pretty easy to put together, having made the Birkin flares made it easier as I had already had a lot of practice with the top-stitching and putting on the buttons,also I used the same method of attaching the waist band as that in the Flares.
There was discusion with Simon as to whether there should be top stitching on the side seams, we agreed that it would probably look better with out, I had been toying with the 6-7 inch one you get on jeans but thought it might look iffy.
Here is the finished look