Category Archives: Ultimate Dress Book
New Dress For a Funeral
Denise had some definite ideas for our funeral attire, black with a teal or pink accent colour. I didn’t actually own any totally black clothes, if you read to the end of this post I still don’t.
I had a general idea what I was going to make, then I went to Mood Fabrics and came away with a totally different idea., while browsing the aisles I came across some black eyelet fabric and with that a dress was imagined.
Black eyelet fabric over teal for the bodice and plain black skirt, I only had a week to make it so I wanted something not too complicated. So I pulled out Gertie’s Ultimate Dress book pattern sheets and tape measure so that I could work out what size I needed to go up to on the waist, it appeared to be the next size up, so I traced out a new bodice pattern and did the SBA on it and I traced off the new skirt pattern, originally I had decided on the same skirt as for Liz’s dress circle skirt with box pleats but I didn’t have enough fabric for that so I went with the three quarter circle skirt instead.
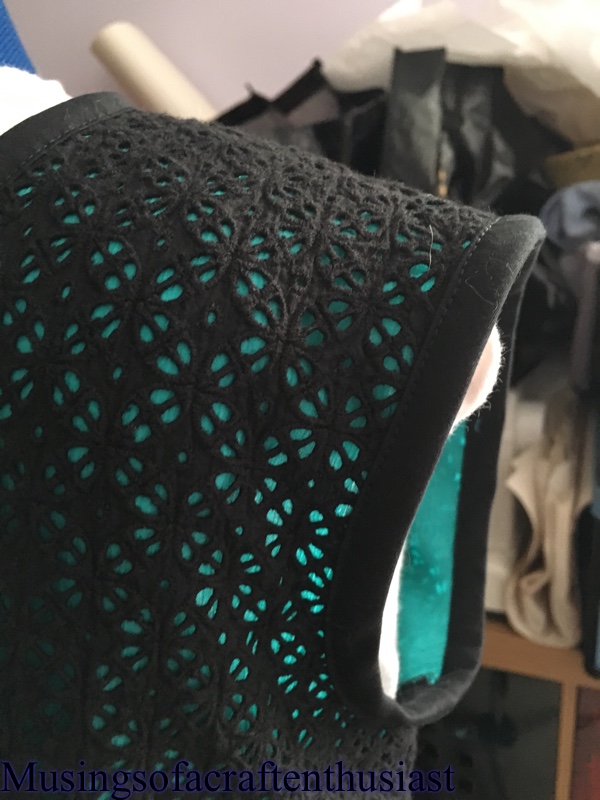
Simon found the ‘Teal’ fabric it was probably the most expensive fabric I bought in Mood, it was silk Crepe, at this point I was thinking about lining the whole dress with it so got 3 yards, I still have just over 2 yards to do something else with.
I knew silk was notoriously hard to work with and also ‘luckily’ realised I couldn’t line the dress with it because of the bodice darts so I interlined it (thank you Gertie)
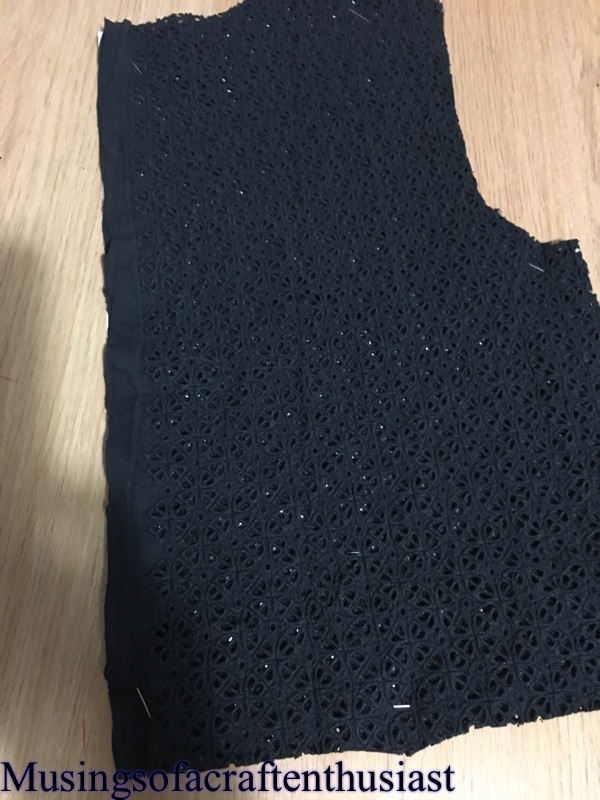

I cut out the eyelet fabric first then used that to cut out the silk, it worked quite well that way.

I basted the two together and put in the darts, and the side and shoulder seams.

Enter a caption
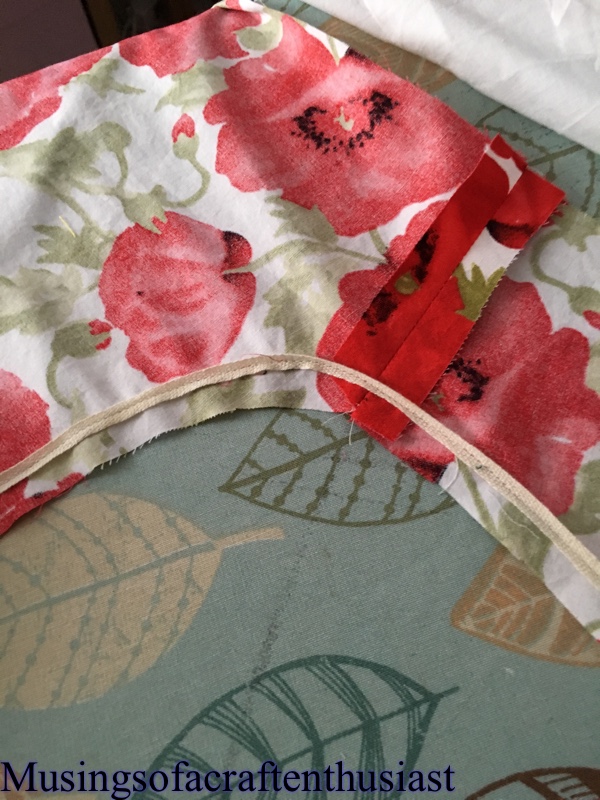
I attached the skirt, there was still something missing the skirt and bodice seemed like two seperate entities, and I wasn’t sure how to bring them together, after discussing it with Simon I decided to use the skirt fabric to bind the neck and armholes.
With a 22inch zip in the back and a small hem done on the sewing machine it was finished with 2 days to spare. I’m assuming that with the holes the islet fabric stretched out of shape as the top didn’t fit as well as the muslin, but I was very pleased with it.

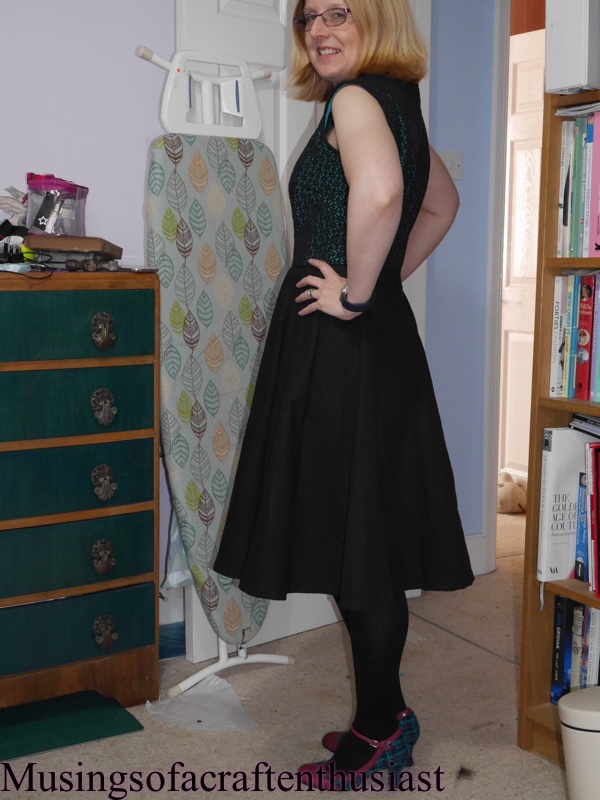
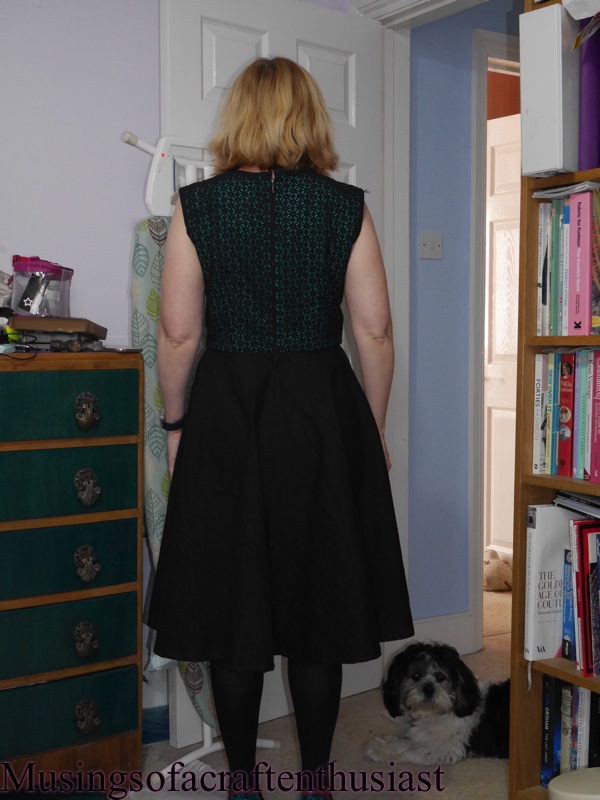
To finish it off I wore my pink and teal shoes. It could probably have done with being taken in at the waist a bit and the front darts could have been more dartier.
more later…..
Gertie vs Tanya Whelan
Hi, here comes the promised review on these two books Gerties Ultimate Dress Book and Sew Many Dresses, Sew little Time: the ultimate dress making guide. They are around the same price on Amazon.co.uk Gertie is £1 more expensive.

I love Gertie’s Blog and this is a extension of that, it is written in the same breezy style, I will admit if it wasn’t for the fact that it was a Gertie book, I probably wouldn’t have bought it, there seems to be little point in having two ‘Ultimate’ dress books, because Gertie didn’t come out until March and I had already got the other one for Christmas.
Both of them having sewing tips and tricks, to be honest I prefer the photography style of Tanya’s book, the dresses look more shapely and there were a few different models, there were more dresses where I thought ooh I could wear that, in particular the halter neck dress. Gertie’s dresses looked a bit shapeless and unflattering.

Apart from the sizing issue on the pattern sheets, Gertie gives you the 3/4 circle skirt, where as Tanya shows you how to draft your own (I’m lazy I’d rather copy one than draft one) also Gertie’s sizes are ready to wear size and she has a different type of line for each one whereas Tanya has chosen to go from 1-12 in some ways this makes choosing a size more accurate as you are less likely to go for the size you think you should be rather than the size you are. Each set of lines are 1-4 is dark grey 5-8 medium grey and 8-12 light grey I’m lucky in that my size falls on the edge of a colour change.
I feel that Tanya gives you a better understanding on how to alter the basic pattern, the book is split up into different areas the first is bodices and she goes through how to manipulate the darts to get a different shape, and what to do with the necklines. the next is collars and so on, each section give you a photo of a dress then tells you where in the book it tells you about the pattern.

Gertie’s step by step is better and, if not for the drafting issues I would recommend it to beginners, Tanya’s book I think will get more use.

Gertie

Gertie
As far as I can work out from the books, Gertie drafts for a ‘C’ cup and Tanya ‘B’ and I had no trouble at all with the FBA for Liz’s dress. if you look at the two patterns together Tanya’s does have more shaping at the waist, of course it always helps if the waist part of the pattern is drafted correctly, which Gerties appears not to have been as it is 2 inches out on the size 6. (see my previous post)
You get four double sided pattern sheets with Gertie but only three with Tanya. If I had to send one of them back today, I would choose to keep the Tanya Whelan book, partly because the waist patterns appear to be drafted wrong, but mainly because I think I could get more out of this book and I like the pictures better. Luckily I get to keep both 🙂


Dress for Liz part 4
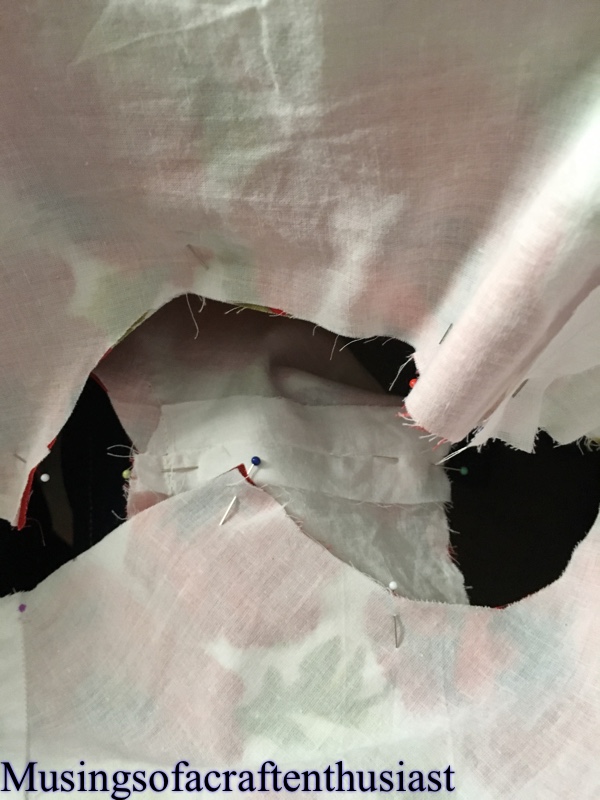
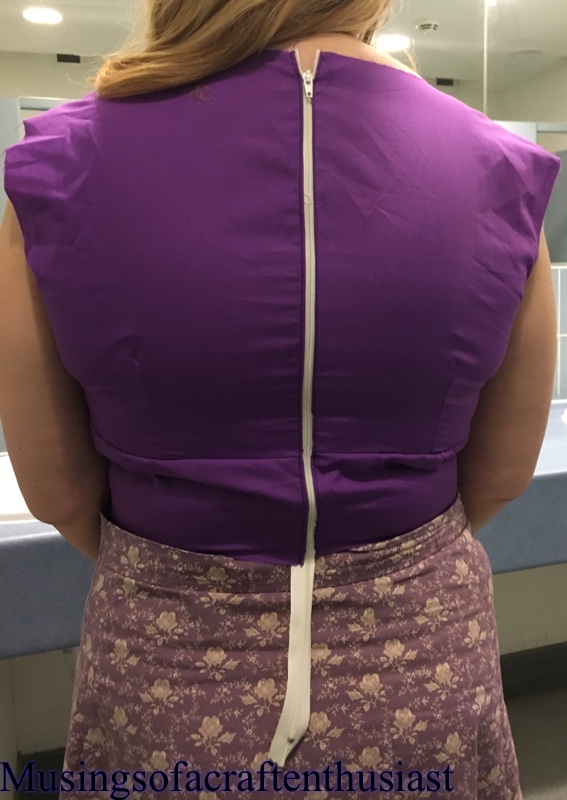
Hi, I’ve done the alterations discussed in the previous post, Simon and I spent one evening trying to turn the bodice inside out through the shoulder seams, before I realised I had to undo the side seams doh.
I took the sliver off the back shoulder seam, and cut 5/8 inch off the front. I stitched the bodice to the skirt,but this time I just stitched the fashion fabric, as I am going to slip stitch the lining to the waist seam. I also put in the invisible zip.
Here is Liz in the altered dress

I don’t know about you but I have a lot trouble with invisible zips, the biggest problem I have is, the darned thing works when I put it in, then by the time I try on the item of clothing the Zip diesn’t work, this is what happened with this one, I unzipped it put it over Liz’s head went to do it up, no matter how much I tugged on the zipper it would not work 😦 the dress is pinned together in these pictures.
After these photos, Liz tried on her net skirt.


I have pinned up the skirt so hopefully this weekend I can get the hem done and a new lapped zip installed.
Dress for Liz part3
Every thing is coming along quite well and I am still on schedule, which is always a bonus. Simon was gigging most of the weekend just gone so I took the opportunity to get some major work done on the dress.
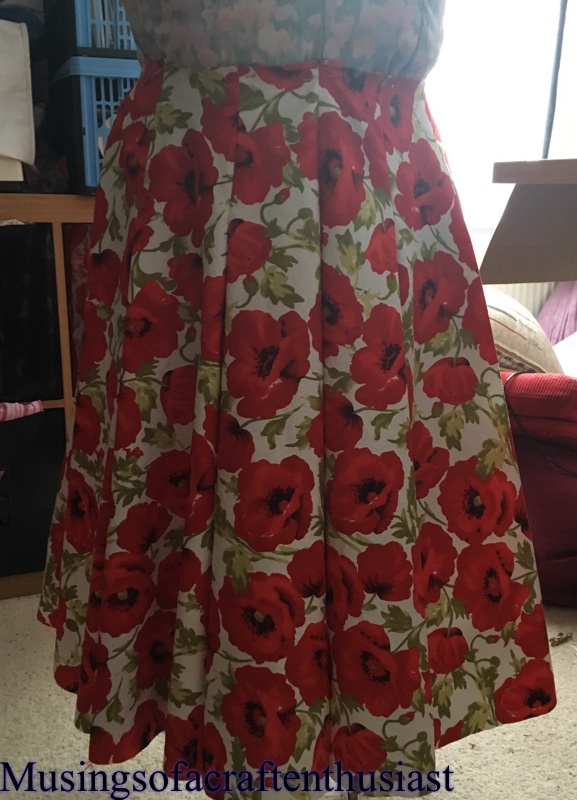
I started by tracing the pattern for the skirt, I traced the largest size, knowing that as it was a circle skirt if the waist wasn’t large enough I could just cut a bigger hole. If I was to do it again I might do it slightly differently, but as we were under a tight time fram this seemed easier.
I used the circle skirt with box pleats, it gives the skirt a bit more body and a lovely shape even without a net under it.
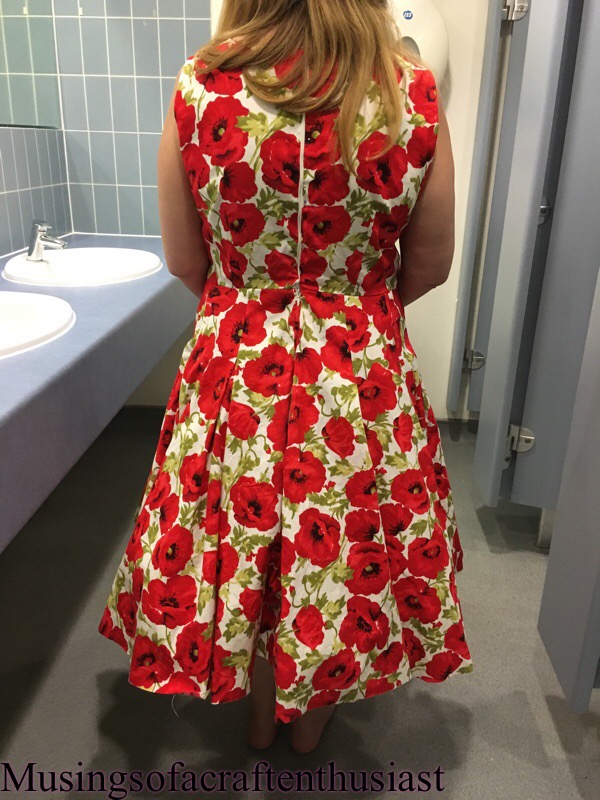
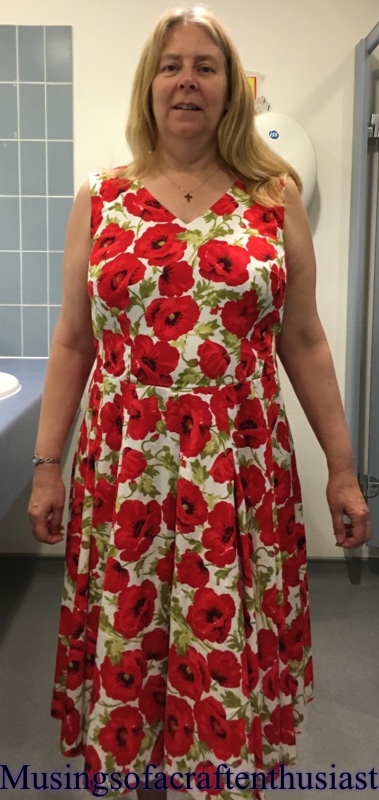
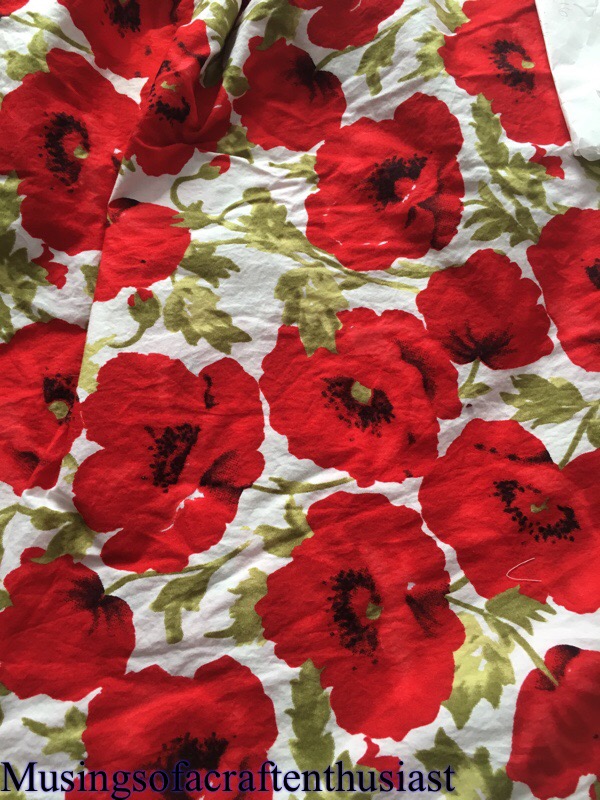
I must admit seeing it sitting there in its poppy glory I did wonder what we had done and what sort of mess I had got Liz into, but once the bodice was attached it looked a lot better. I padded up my dressmakers dummy with a 2 meters of fleece and used the test bodice as a guide.
I cut the bodice on the fold after remembering to remove the ‘seam allowance’ and I also added 5/8 to the front as it looked a lot shorter than the back.
I ran the stay stitching along the neckline as per the instructions in the book, but just to be sure I attached some 1/4 inch tape I got from my Mum which I assume was for that purpose.
I decided to line the bodice with some cotton lawn I had laying about so that the inside would look nice, I used my overlocker on the skirt.

After both peices got a good iron, and using more pins than usual I attached both peices of the bodice together.

I basted the skirt to the bodice, I needed to take about an inch off the top of the skirt to get it to fit, which is why I should have put more thought in it as the pleats no longer line up with the dart on the bodice.
First dress fitting.

The fabric I added to the front I didn’t need once the skirt was added and there were some gaping on the arm holes on the back.

I’ve pinned almost an inch out of the back shoulder as the front looks good. You can see on the picture below that the front is now too low.
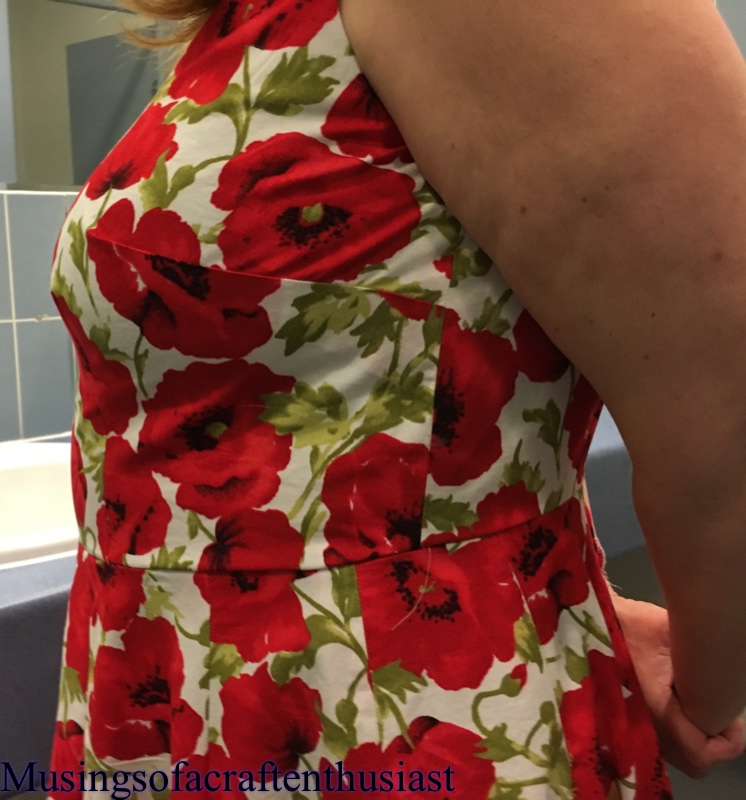
I have taken the bodice apart and done the two alterations. We decided to leave the rest of the issues, like the pulling under the bust, which might be fixed by the other two changes, to be honest I didn’t want to fiddle with that bit too much as I was worried I might make it worse.
More next time….
Dress for Liz part 2
Hi, we completed the fitting for Liz’s dress on schedule, I’d given myself one week to fit the bodice and a little under three weeks to make the dress itself.
It is surprising how you go into these projects with one thing in mind and at the end decide on something different.
In the end I made four bodices in total, the first one just proved what I had thought, that a FBA would be needed, it was also a little small round the waist, which I’ll come to in a minute.
I decided to add a 1inch FBA which made the side dart huge but as I was going to need the extra space across the waist I decide to rotate most of the extra into the underbust dart, otherwise I was going to end up with no shaping at all under the bust. Liz tried this one on Monday, the fit seemed almost perfect apart from some pooling at the center back at this point it didn’t have a zip in it so this was guess work.
As I was pretty happy with the fit at this point I decided to make up the bodice of ‘our’ choice, it was at this point I discovered that when I had traced off the front bodice piece I had missed off the cut on fold, oops. This explains why the original bodice had been way too small I had taken out 1 1/4 in out of the front.
So that week I then made up the bodice with a 1/2 FBA,


put a zip in the one Liz had already tried on and take a 3/4 inch horizontal sliver out of the back

 and also made up the style I thought would look best.

Liz tried them all on and it turns out that the second bodice with the center seam and the 1inch FBA looked the best, so that is the one we are going with.
More soon……
Dress for Liz
I am quite excited about my next project, I have offered to make a dress for one of my best friends to wear to her nieces wedding at the beginning of July, when I say the beginning I mean July 2nd, and Liz and her family are leaving for Wales on the June 30th which leaves me with only one month.
We have picked the fabric and have had one bodice fitting, as Liz is a completely different shape to me I have a whole load of fitting issues I haven’t had to tackle before.
Issue one she has a lot more chest than I do, FBA here I come, and proportionally her waist is larger, but her hips are in the same size range as her bust.
We have decided on a pattern from Gerties new book Gerties Ultimate Dress book (well I think I talked her into it, but I’m not sure) it’s sort of the boat neck dress, but not, Liz isn’t keen on higher neck lines, so I was thinking the V neck from the basic pattern, with either a circle skirt or a pleated skirt.
Liz is very keen on the 50s type vibe in a dress, I also figured that at the bodice was going to be the hardest for fitting issues I worry about the skirt later.
The first bodice I made up was 14 on the shoulder and bust and 16 on the waist, it fitted beautifully across her shoulders and upper chest but needs about two inches added across the bust as it bought the side seams forward.


For ironing out the fitting issues I’m using the basic bodice as I think this will be easier to fit initially and then the changes can be transferred to the pattern I want to use.


