Blog Archives
Goals for July
Going into July the house is still in a bit of a mess, the new flooring is going in next week, hopefully after that the posting schedule will be back to normal. I do have a couple of goals for this month, I’m going to a Wedding 1st August so I want to make a new dress, I have the pattern and fabric, I know that there will be some fitting issues so that will have to be sorted first. view b.

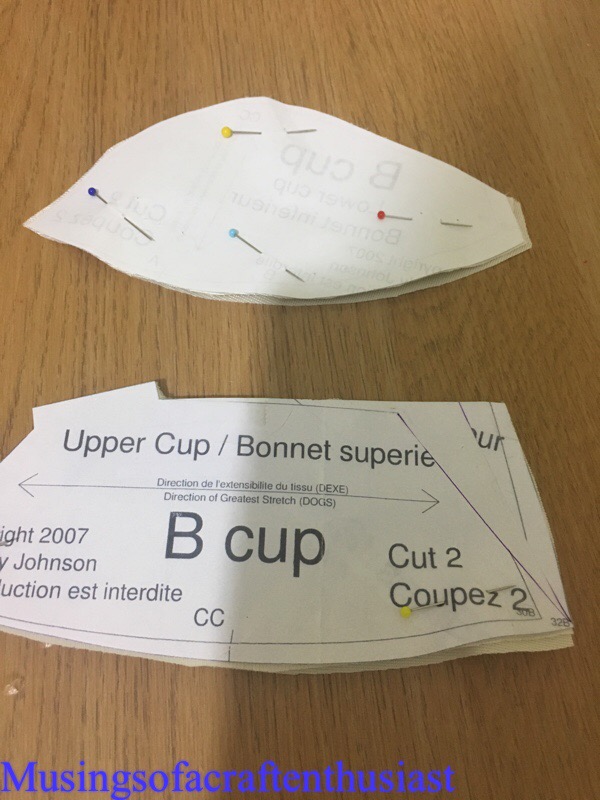
I am looking at the bra class again and am determined to sort the fit out on this, I don’t actually wear full cup bras but until I sort out the pattern for this I can’t go ahead to complete the other two classes I bought which take you through foam cups and altering the bra pattern for different designs.
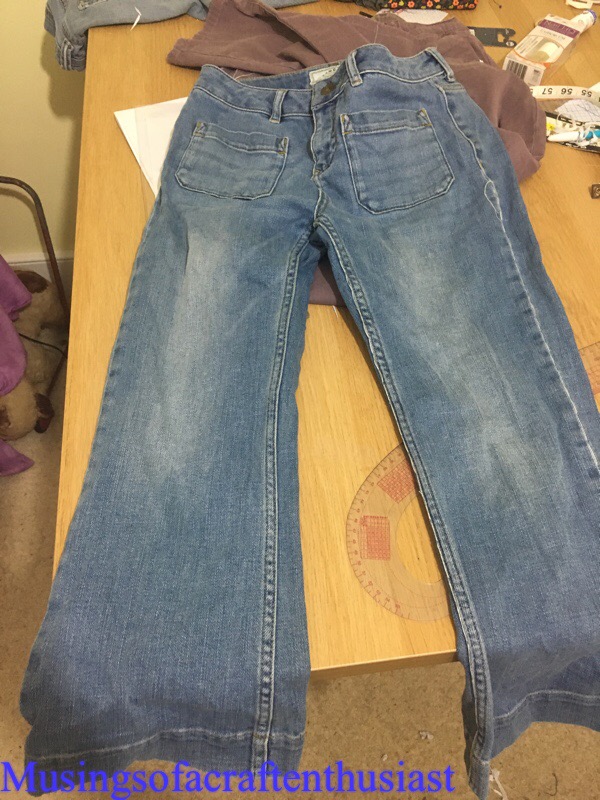
The third goal or goals three and four are to take patterns from these two pairs of trousers. I love these trousers but I wish they had a boot cut hem, they are prepared and I am just waiting for the organza to take a ‘rub off’. I do have some organza already but with everything boxed up I’m not sure where it is.

The other trousers are these cut-offs from fatface, they are so comfortable but they are just a little bit too long so I have to wear them with the bottoms turned up. I have an off cut of denim that should be just the right length.
More soon….
March – where did you go?
March sort of ran away from me and now it is April 😦
unfortunately a combination of training course (getting up 2 hours earlier) and having work done on the house has removed most of my stitching time for March and looks to be taking over April as well.
I have a couple of part way projects I can show you but nothing finished.
The first project is view 2

I think this is the first time I have ever done all views of a pattern, this is going to have a better fit, fingers crossed than the other two versions, these I took extra fabric from the side seams this time I have shrunk the pattern and done a small bust adjustment.


The top half of the pattern is one size too big but the waist and hips are perfect, so I turned to my trusty printer and scanned the front and back bodice pieces then I printed them out at 95%, you can just see on the bottom of the two photos how much I lost, it was about 1/4 inch all round. Then for the SBA there were a few things I needed to do

the first thing I had to do was reinstate the 5/8 seam allowance, then decide where I was going to move the bust dart to on the side.

I closed up the underbust dart and moved it to the side

added a piece of paper to the now side dart.

I then cut up from where the original dart had been to bust point then across to the arm hole, and swung that piece over 1/2 inch, taping the top part down

you can see from the above photo that the centre seam part which hasn’t been changed is now longer than the side seem which has been changed, so you slice across from the middle and shift the centre piece up until it matches the side piece, because the chest is smaller than expected for the pattern there is too much fabric going over the bust and this removes it.

The last step is to move the side dart back to the under bust, slice up the middle of the added paper and the area where the underbust dart was and close up the side dart creating a new smaller dart, add a piece of paper under this to fill in the new dart.
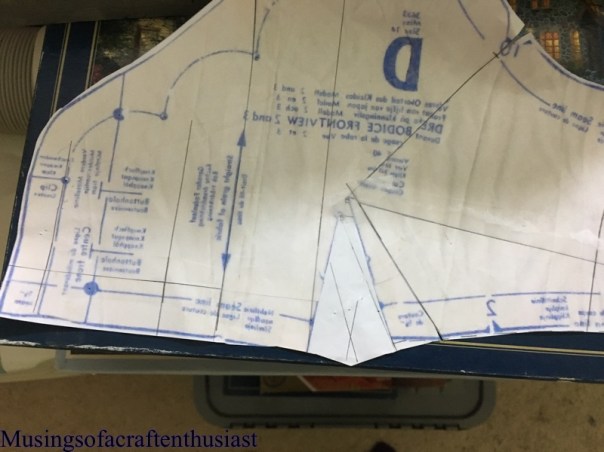
as you can see by the drawn in seam allowance (pencil) this dart is far smaller than the original, all that left to do is to make up a bodice and check the fit.

for a full length bodice it is better to add a skirt to check this, but as all I needed to do was to check the fit around the bust I left it at this.
more hopefully soon
Project 3 January part 2
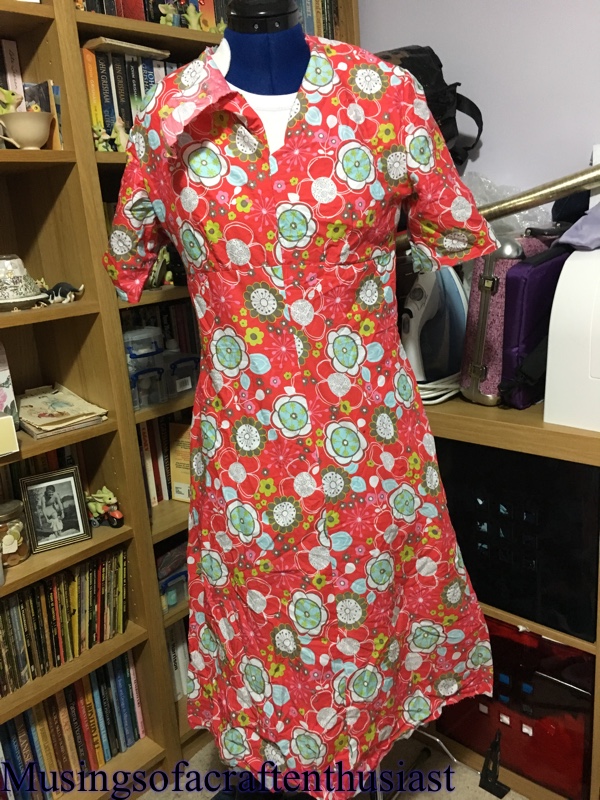
Hi, just a quick post to show you the finished version of project no. 3


The model on the packet has buttons down the front of her dress but I’m not sure if this needs it, the other thing it could have is the lowered belt, still not 100% convinced about that either, I don’t think that the fabric needs any other decoration.
Four items finished on time, hopefully this is how the rest of the year will carry on.
Project 4 – January
This is probably the item that is going to cause me the most problems, but to be fair it is going to be my own fault.
For Project 4 I’m going to take this dress
And turn it into this dress
The original dress fitted fine as long as I didn’t want to move my arms or anything practical like that.
I had two attempts at making the top half of the dress, which gave me enough to do the main bit of the front bodice, I needed to do some pattern matching for the straps, I am very please with the result.
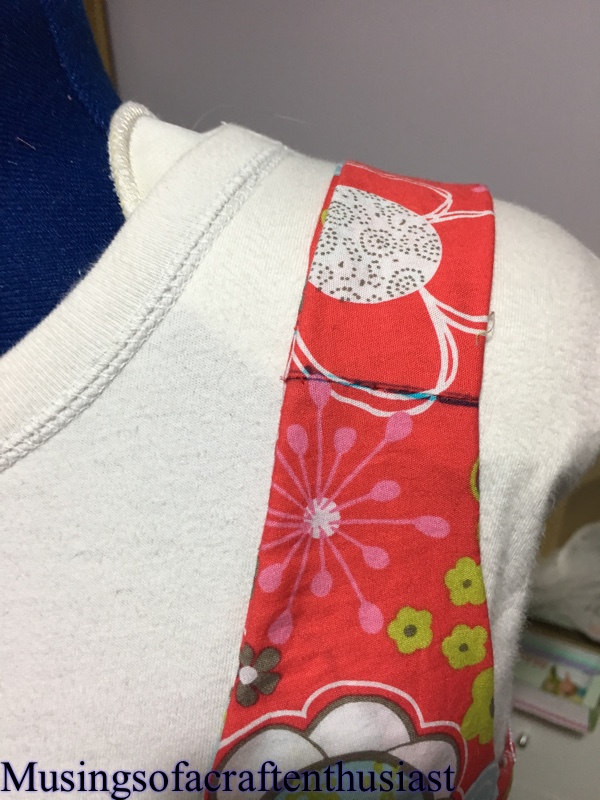
I needed to do a bit of patching on the front skirt pieces, luckily it was where it folded under to make the button tab that was short otherwise i would have had to found another plan for the fabric.

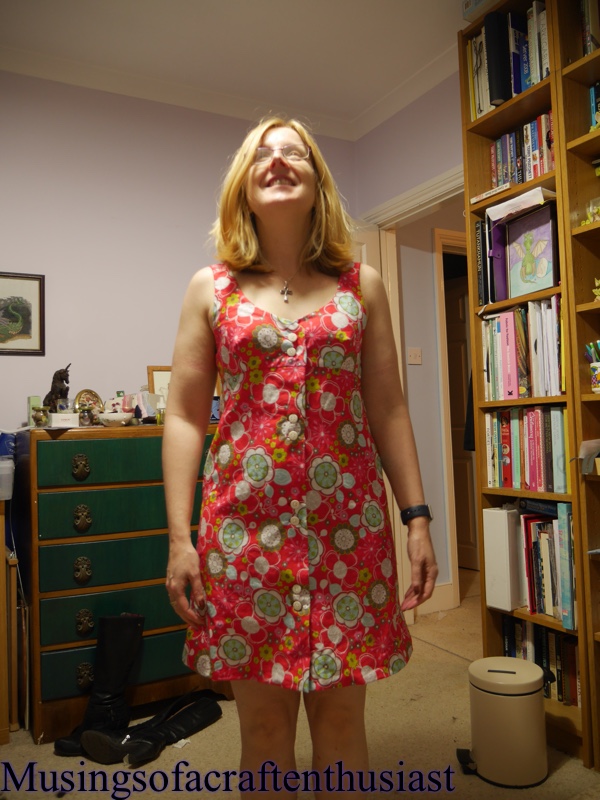
I probably should have sized down the top as I needed to take and extra 1/2 inch off the side seems and bring the front seam in an extra 1/4 inch, I’m thinking I might make the shorter version with the shorts and the halter neck so watch this space.
The dress came together very easily and if I had started with a length of fabric, it would only have taken a couple of hour to put together.
I wasn’t sure about its double buttons but I think they look alright you do need the hook and eye at the seam otherwise it gapes.


more later
Project 1 – Part 2 Finished
I have my first finished Dress of the year and my first Dress for Florida, yes unfortunately you can expect two weeks solid of posting about Florida again.
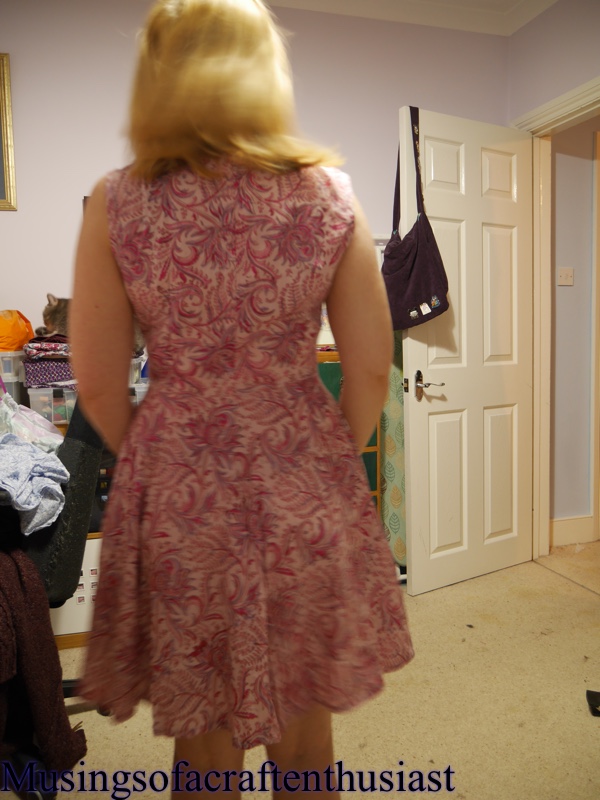
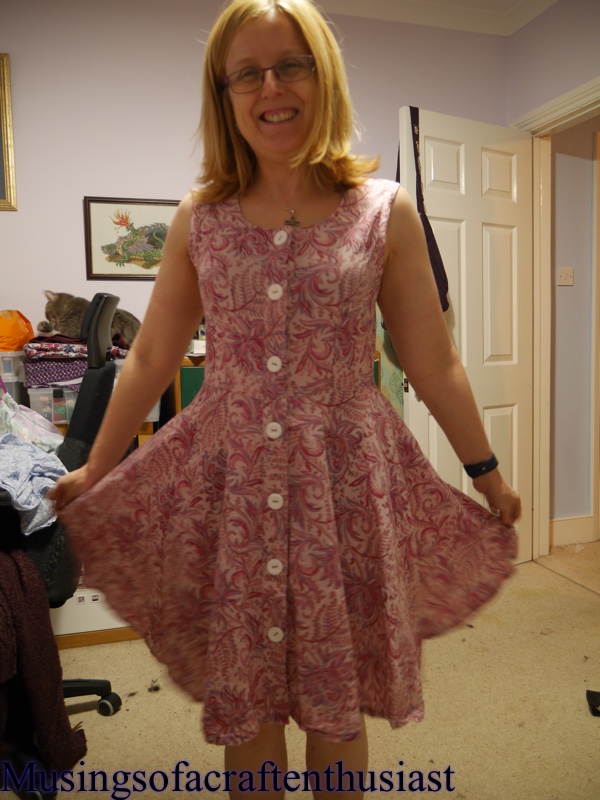
I am very pleased how this dress has turned out, the bodice fits perfectly, the white buttons add just enough interest to the front to stop it being too boring.
I used self made bias binding for the arm holes and skirt hem, as i had been a bit tight for length I didn’t want to use too much on the hem.
One of the arm holes doesn’t lay quite right under the arm, but I have already had the binding off once and it doesn’t look much better. I’m wondering if I cut it slightly wrong as I freehanded taking off 5/8 of an inch. If you look closely at the inspiration dress I think that the binding is on the outside.


Project 2 new bra doesn’t really warrant it’s own post, it has come together really nice it is still slightly too tight across the right cup but it looks a lot better.
Project 3, January
Here is project 3 for this month, once I had shrunk the pattern, it is actually a very quick make.
To shrink the pattern I traced it off on to x and dot paper, I used to use the burda tracing paper but I find it just a bit too flimsy for this type of thing. I shortenend it by 3/4 inch first then cut it into five strips, each strip I overlapped 1/8 inch and stuck it back together, I had been using pritt stick, but I managed to pick up write on able scotch tape before christmas so I used that, it is quite a lot easier. The next thing I did was a SBA of 1/2 inch.
I checked the measurements before laying it out and decided that I needed to put the two inches removed from the top back at the hip it’s a pity I didn’t realise this earlier as it would have meant I didn’t have to change the bottom half.
The fabric is a beautiful purple with a white ‘flower’ design, I layed the pattern pieces out and drew on the extra 1/4 inch to the outside seam cutting out immediately, the last thing I wanted to do was forget what I had decided.


I actually put the dress together as per the instructions which meant hand stitching all the hems, the main problem with that is the ‘skirt’ pieces need to be hemmed before they are attached to the shorts.


basically you put the top half together with the darts, facing and zip, for some reason at this point you don’t touch the sleeves, then you put the front shorts together and add the skirt overlay then repeat for the back, then finish making up the short and attach to the top half, once it is all cut out, even with the hand stitching it only takes about 3 hours to put together.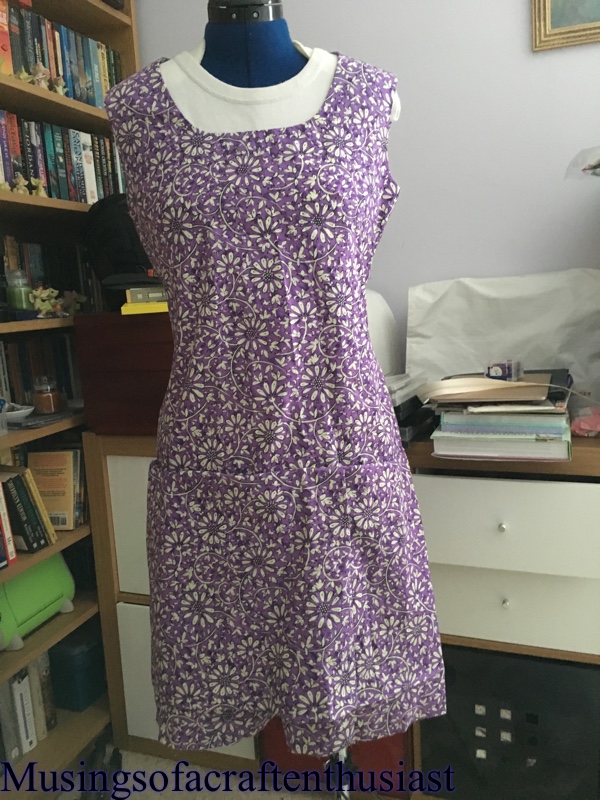
more soon…..
Biba Part three
This will be the last post on this I promise, I went back to the exhibition today and I took my proper camera I have taken some closeup shots of the clothes.


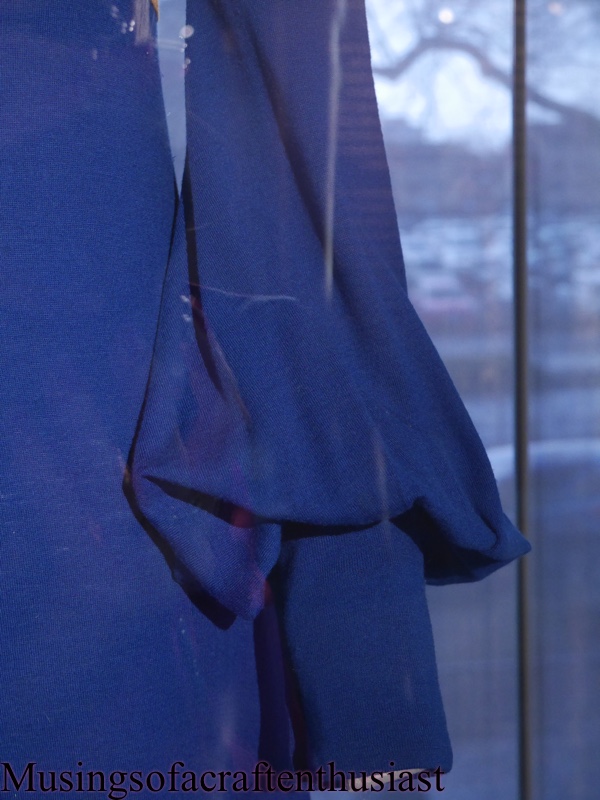
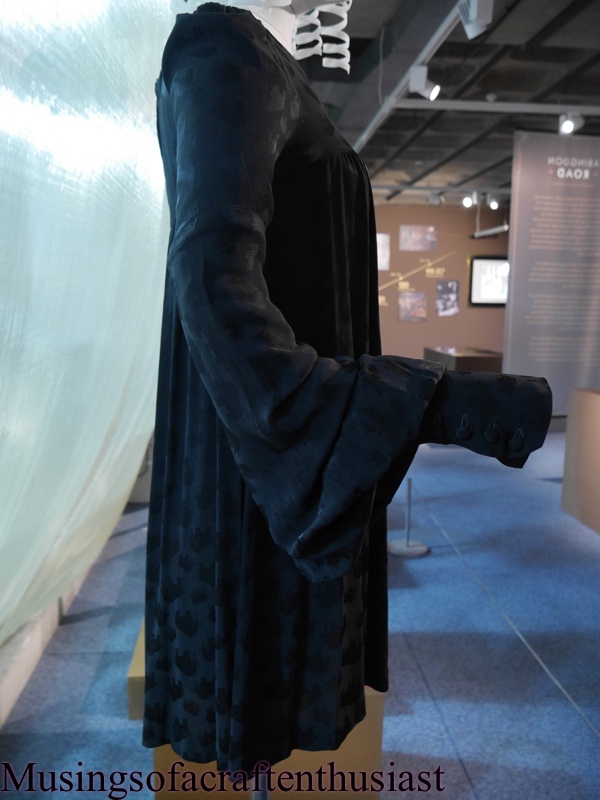
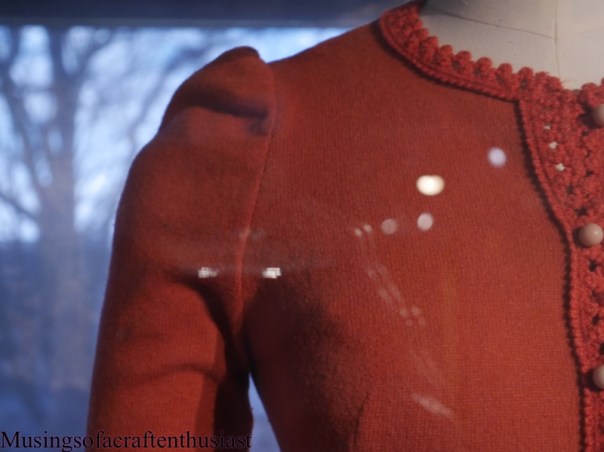
Biba seemed to like these bell sleeves with the long tight cuff, I would assume that the cuff would go some way to stop you dropping your sleeve in your soup.
This dress was also available in red, which I think I prefer, colourwise.
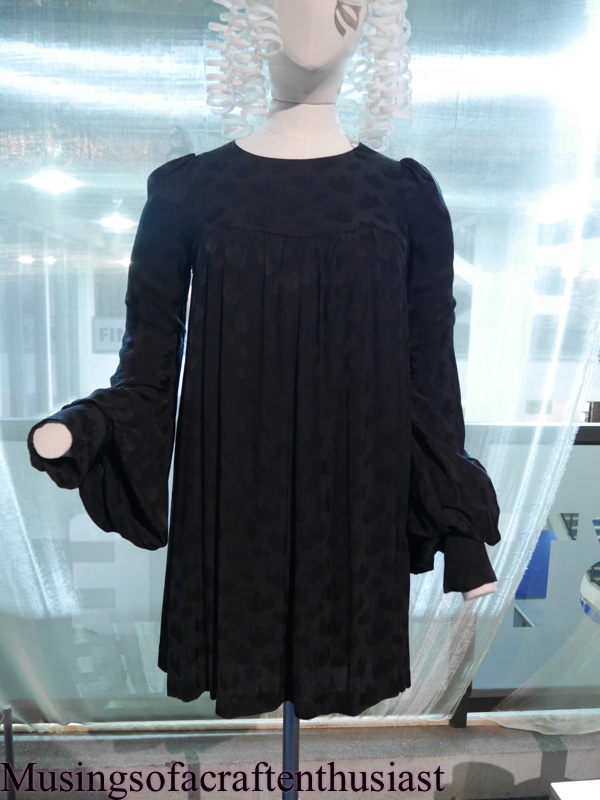
As you can see in these shots the shoulder and sleeves are very similar, gathers at the shoulder going into the Bell sleeve.
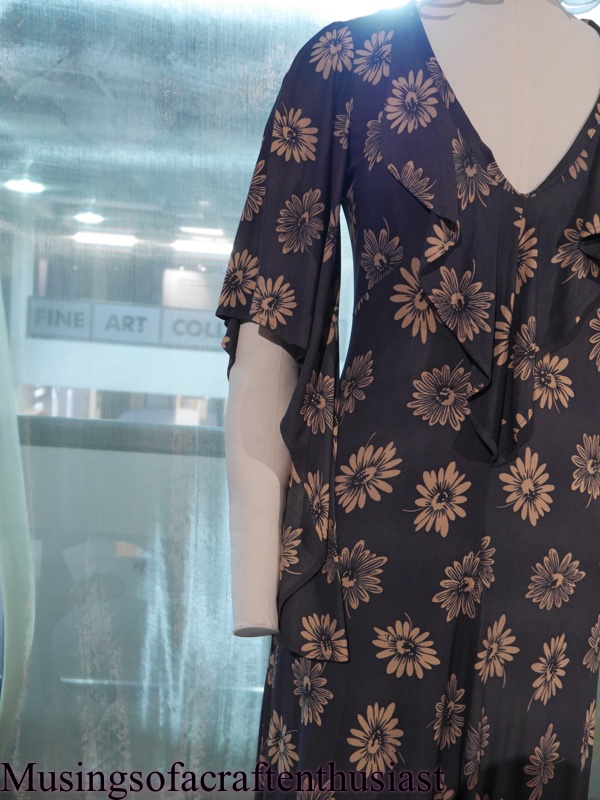
The yoke and gathers across the bustline give it a very soft look, I’m not sure that the sleeves really go.

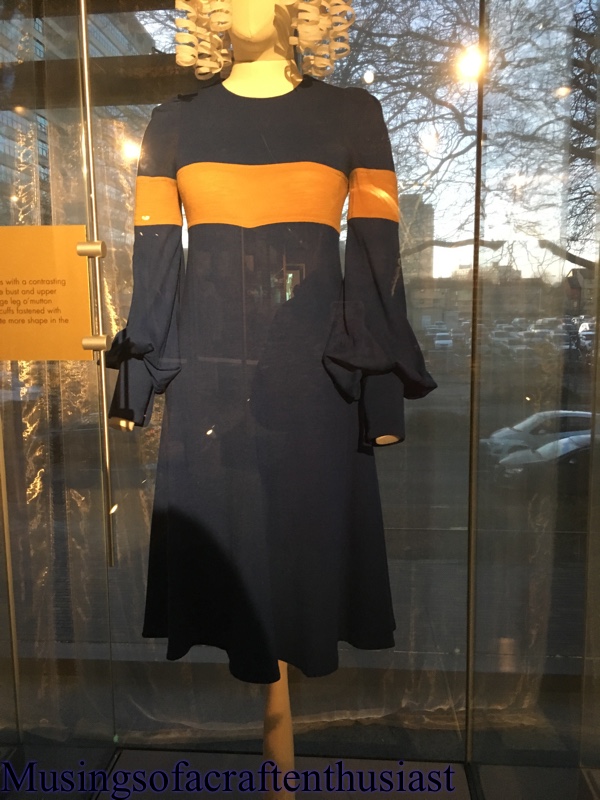
This is a completely different look for sleeves we appear to be having a hi-lo moment, I’m not sure that they would stay out of dinner, it has a very nice soft draped neckline.

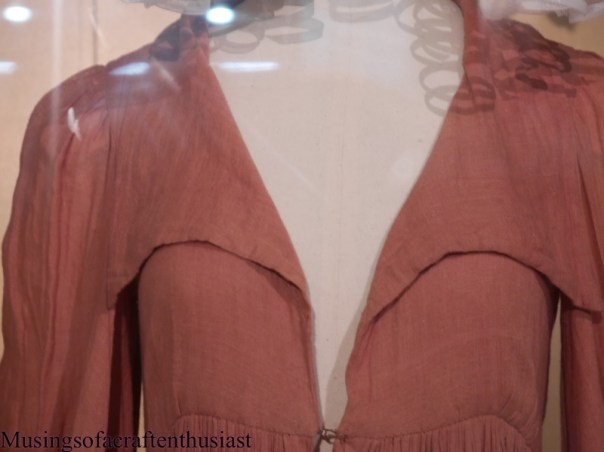
I love this wide drapey collar but not sure about the neckline it’s self
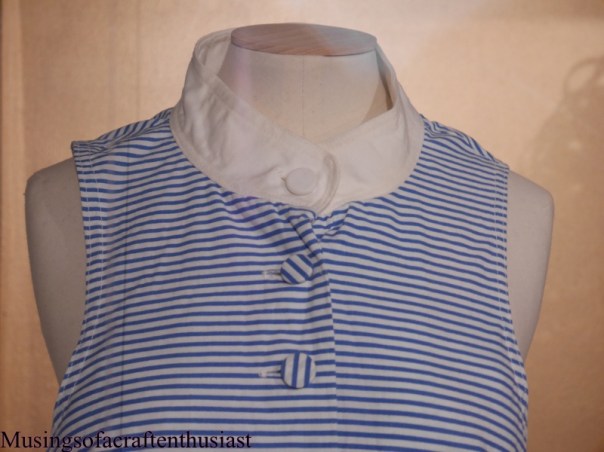
Look at the collar on this one the contrast white collar and dark blue is very striking.

I missed this little white collar the first time I looked at the dress, it wasn’t until I read the gold card attached to it that I saw it.
This has a funny right angled under arm bust dart, I know they were aimed at the mainly flat-chested but I’m not quite sure what this achieved.

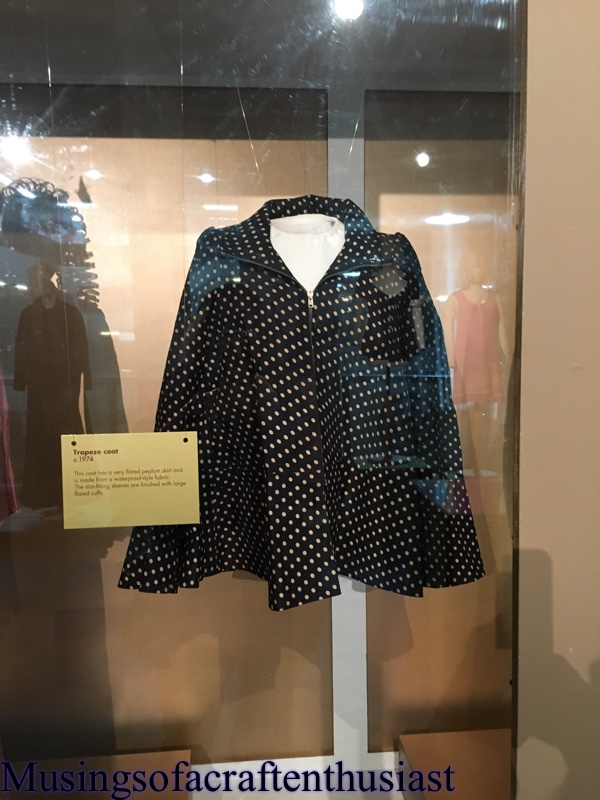
I love this coat, with the princess seams on the back and the big collar, I’m pretty sure that it would be unwearable in the winter, the sleeves don’t look wide enough to wear it over anything bulky and I’m not sure you could get it over the bell sleeves of the the first two dresses I showed you.


Biba was definitely all about the sleeves

look at these buttons aren’t they great?

I love the look of these cuffs, a lot of the 50s patterns have the contrasting collar and cuff but I haven’t got the nerve try it yet, maybe I can use this for inspiration.

I promise this will be the last post on Biba – for the time being.
next up will be my plans for the new year……..
Biba an Exhibition
Hi, now I will confess I hadn’t heard of Biba, I think it is probably because of my age, I would have been 7 when it closed 1975. My local museum and the Beecroft gallery have been showing an exhibition since the middle of this year and it is going on until 14 January.
Biba was a Fashion brand that originally ran from 1964 – 1975 there has been a couple attempts to revive the brand since then which don’t appear to have been successfull the latest being House of Fraser
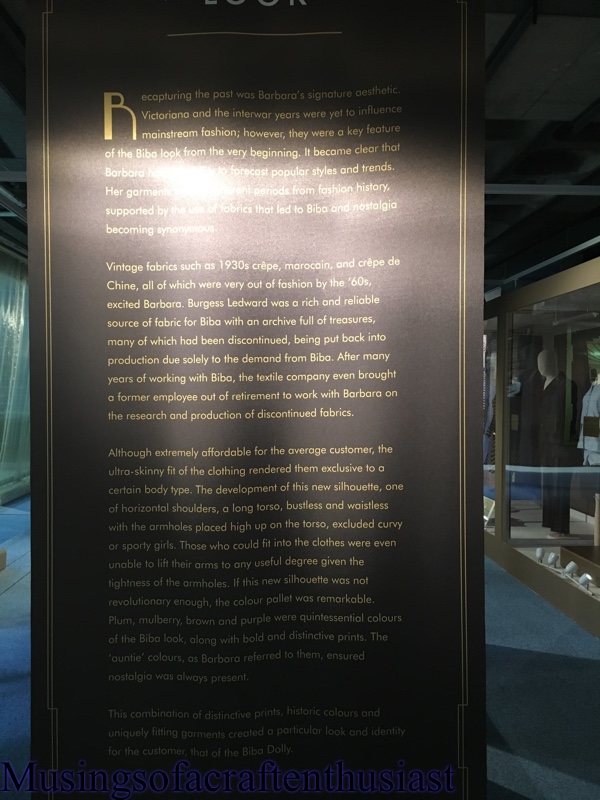
The Beecroft Gallery which is now housed in the old Library has a small display of clothes, this is going to be a very picture heavy post, the photos aren’t that good, they were taken on my phone with no flash so there is quite a lot of reflections going on.


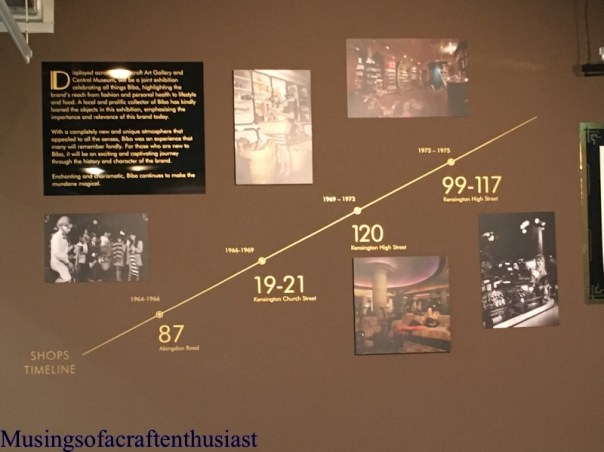
There were a lot of boards up with little pieces of information on the the brand.

I’ll have the next half tomorrow….
Simplicity 8833 pt 2
hi, this should have been posted Sunday but had camera malfunction, i forgot to charge the spare battery oops.
I was so impressed with this, that I actually finished it, no, I hear you say that never happens 🙂
apart from adding the sleeves, I also added a couple of long fisheye darts to give the front a bit of shape, it totally changed the look of the dress from ‘meh sack’ to ‘ooh not quite sack’.
Here are some pictures of me wearing it, another rare sight…..


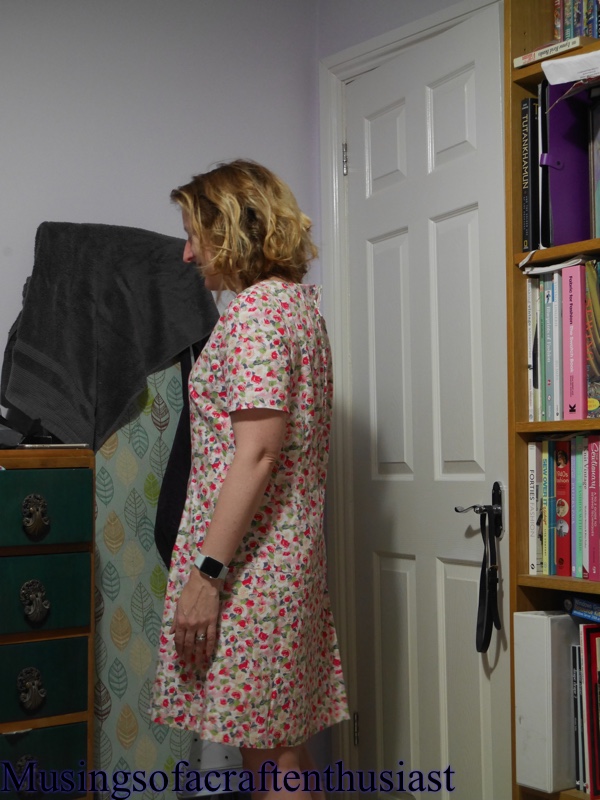

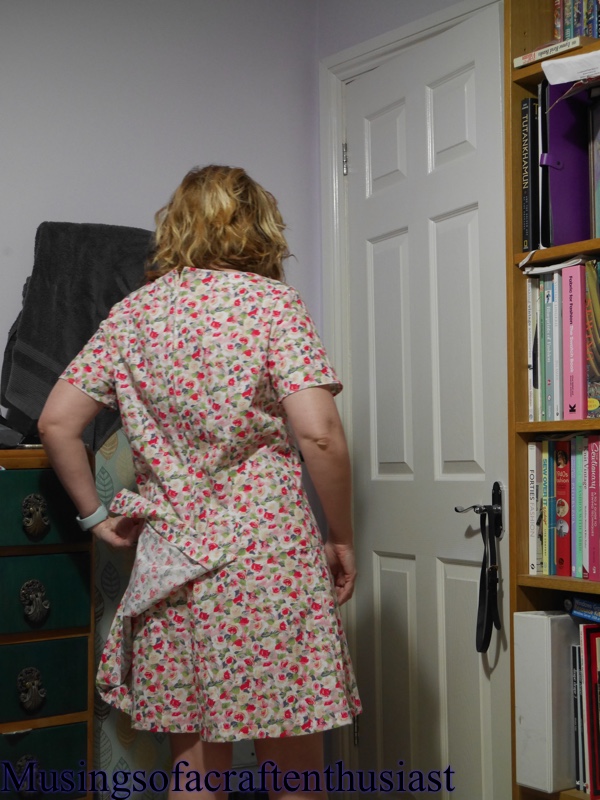
When I make it again, I think I will remove an inch from the back and front, I might have to add some of that back at the hips, but it is definitely too big across the top half.
Looking at these pictures I might need to increase the back waist shaping as well, the arm sync also needs raising, I run the risk of cutting myself in half with the shorts every time I lift my arms.


More soon
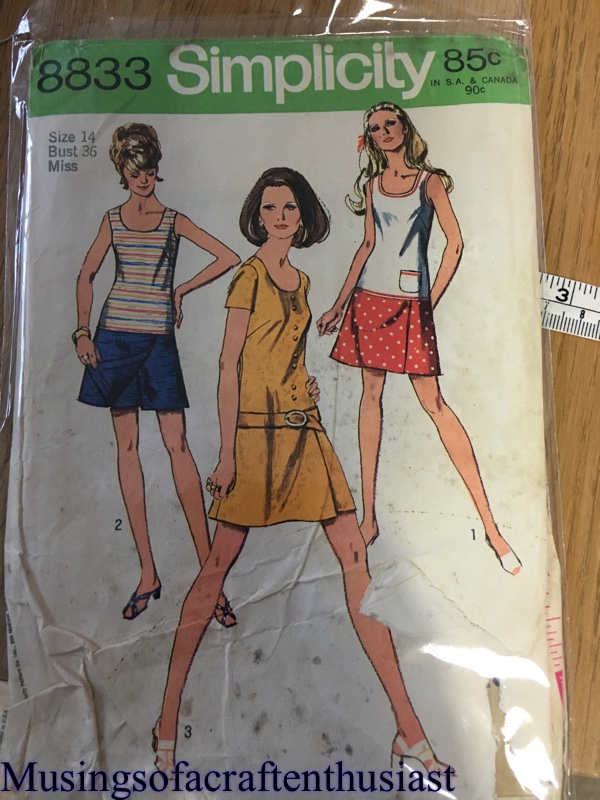
Simplicity 8833
Hi, I didn’t mean to have a month off blogging, it just happened, to tell the truth i haven’t done anything much since the last post, but here is a brand new stitch, this is in the muslin phase and not what I was expecting when I made it.
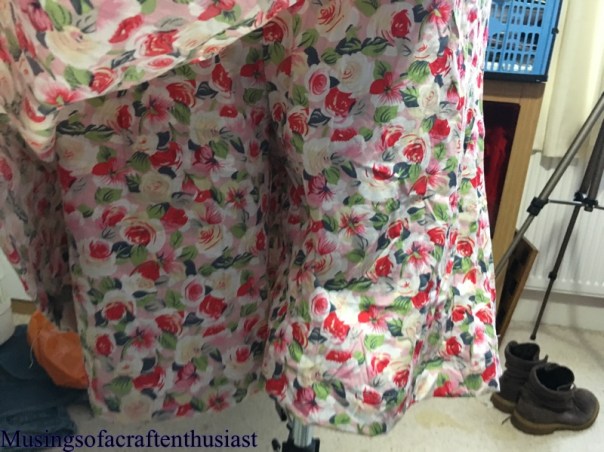
Simplicity 8833 is classed as a mini-pant dress, I suppose what it is, is a playsuit with two skirt flaps, I managed to get hold of a pattern in my size, I shortened the top by and inch and the skirt/short pieces by an inch, I think I should have shortened the top by another 1/2 inch.
The top half of the dress would be good just as a simple summer top to wear with jeans or shorts.

The major issue I have with this dress is the ease in the top half and the fact you have to take it off to go to the toilet, also these ‘minis’ never turn out as short as they look on the packet, even allowing for at the fact I’m just over 5 ft 2 inches.
This pattern goes together very easily, you stitch the top together, then you stitch the front shorts together and attach them to the front skirt flap and do the same with the back, attach the front to the back then sew the whole thing to the top.


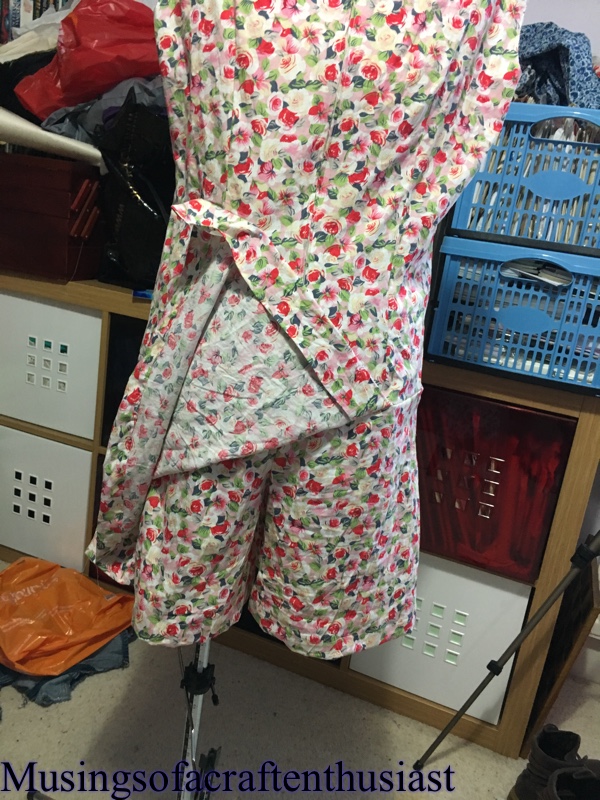
As this is just a test run I haven’t done all the finishing off or attaching the sleeves.
I love the idea of this ‘dress’ I can have it short without the risk of showing everyone my knickers, but the practicalities might just outweigh that peace of mind.
This is the first time I’ve used the trouser part of my dress makers dummy, it is quite a faff because the support post goes up inside one of the leg parts, you have to straighten the stand, feed it through the leg hole on the garment, then put the stand back into the outwards/support position.
sorry for the state of the photos, but I was worried if I took the time to tidy up and get my camera sorted out I might lose the posting momentum…..


