Category Archives: dress making
2016 trip to Olympia
This year we went to Olympia by coach, we were picked up on time, and after driving round half of Essex for an hour and half, we then spent an hour trying to get from Tower Hill to Olympia due to the road works.
Once at Olympia we went straight for cup of tea, as it was 12:00 it was time for lunch. After lunch we started over in one corner and methodically worked up and down the stalls, Mum was looking for wool and I was looking to spend my birthday money on fabric.

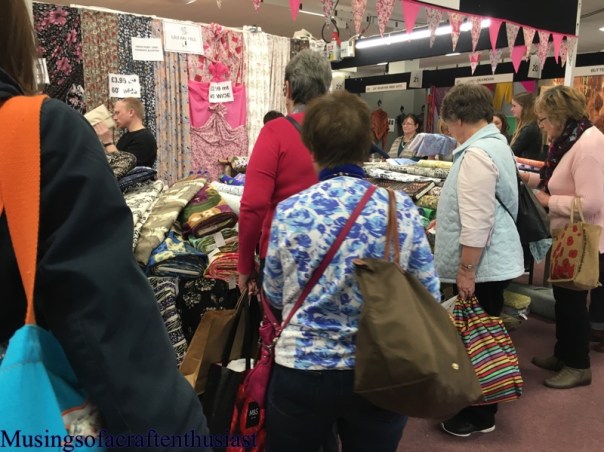
We had been told that the show was smaller than in previous years and that was correct, also this year the show is mostly fabric and wool, over the last few years it has gradually moved from cross stitch and paper craft to knitting and patchwork/dressmaking.
For the first couple of hours I held on to my money, not wanting to run out before I got to the end of the show. But once my purse was opened the money just flew out.
Most of the fabric I bought was cotton and one bit of stretch jersey,

I could have bought a whole load of this fabric in all colourways but I picked just these two, I have enough of the blue/grey for a Cheyenne shirt and the red/blue for a dress. I’m not sure about the mauve yet.

This is for another shirt, this might be a Granville or depending on how the Cheyenne goes maybe another one.

I thought maybe a a couple of dresses.

I wasn’t sure about the jersey, until I realised that the lady on the stall was wearing a dress made of the fabric and it looked pretty good.
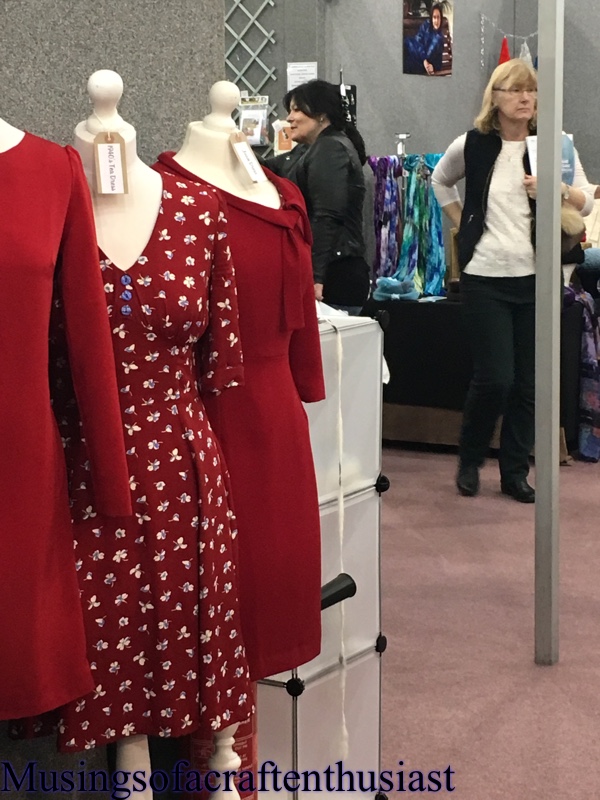
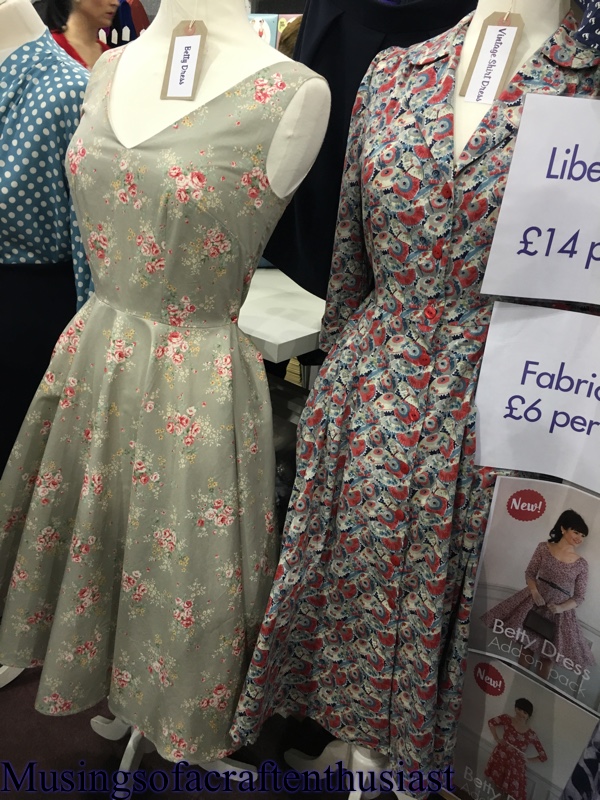
I also bought a pattern.

I bought the sew over it vintage shirt dress, to be fair I haven’t been overly impressed with the dresses on the Internet but after looking at the it on the sew over it stall I might even buy the 1940s tea dress.
Bye for now
Anna Dresses BHL
Here is the promised post on my Anna dresses, neither are completely finished but both are beautiful in their own way.
The first one is a viscose (rayon) which is very slippery and after the last time I worked with viscose I swore I would never do so again, but this was cheap and pretty…..
Those by Hand London girls sure draft for some very tall Ladies, I loped 7 inches off the skirt before I even started. The other changes I made was to do a small bust adjustment and to bring the neckline up an inch, I tend to find that deep V necklines do nothing for me and they gape something terrible.
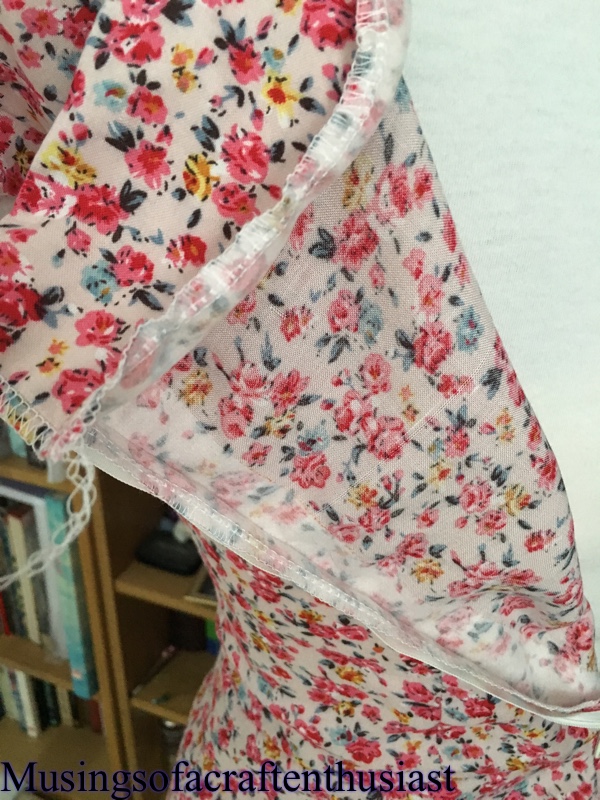
I did French seams on the skirt and overlocked the top mainly because I wan’t 100% on french seaming the underarm.

It still needs ironing and hemming, over all I’m quite pleased with it. I will admit though I wimped out on the thigh high split.
I used a small bit of interfacing where the zip is, not my idea I read it somewhere when I was researching the Anna Dress.
The Second Anna is made out of a Robert Kauffman London Calling Lawn fabric, I bought in the Craftsy fabric sale before christmas, It is very nice and light and floaty.

here are the full length photos.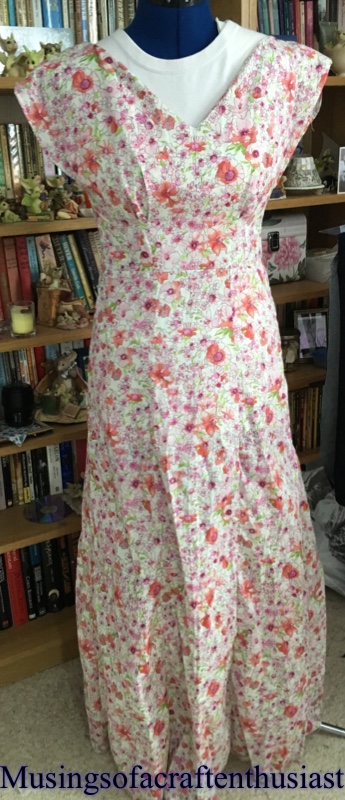
Stretch fabric
Now that I have spent some time with knits, I can now say that although I don’t love them, I do realise that they are not as scary as I first thought. Off the back of the stretch Craftsy class I have decided to try and replicate one of my tops, the result, while unwearable has a lot going for it.

I laid the top I wanted to copy out on my table and also traced off the t-shirt pattern from my class, my top has pintucks in it and a yoke at the back which means that the shoulder seams are forward.

To start with I modified the neck line to mimic the lower scoop of the original then I took 1 1/2 inch off the front and added it to the back piece, because of the pintucks I slashed my new front pattern piece and added in the extra for the pintucks. After redrawing the new front, I checked it against the original and added length and width.

I then moved on to the back piece, I sliced off the yoke and added the seam allowances on.

Fit wise it looks great, I had to take a bit off at the hips as they seemed to have a life of their own, and was standing out in a most ungainly way.

As I said it is unwearable, the unwearability of it is tied up in the front placket and the neck treatment, the fabric is too thick for for the front placket to four layers, if I had checked the original I would have realised this as they have replaced half of this with what looks like ribbon, and also I’ve rather messed up the curved edge of the neckline, however the basic shape is there I just need to tweak it.
Bye for now.
Birkin Jeans – Baste and Gather
Hi, I’m having a busy year so far, I’ve made a lot of things but not finished them, if you read this blog I think that you will find this is a recurring theme, However I do have something to show you that is finished.
My first pair of Jeans, and they look lovely, I cheated top-stitching wise, my fabric is Black and so is my top-stitching but never fear I’ve started on a new pair which are dark blue with red top stitching, a photo at the end of this post.
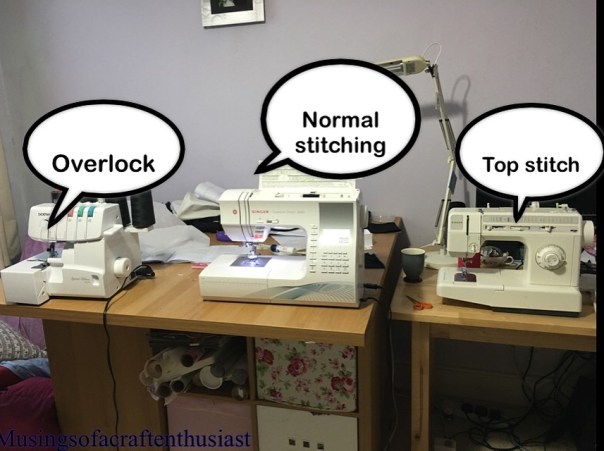
I do have two sewing machines which make assembling this pattern a lot easier, my usual machine is set up with the normal thread and my older machine with the Top-stitching thread.
I bought the fabric from eBay, it was the cheapest 10 oz denim I could find, when it arrived, I wasn’t too sure about it, it was quite stiff, but after washing it, the fabric softened up a lot.
This is the first PDF pattern that I have downloaded that you can pick which sizes to download, this is genius everyone should do it. It makes it easier to to grade between sizes and you don’t get all the confusing bits where all sizes congregate in one spot. I printed 26 and 27, in the end I just made a straight 26, I took 3 1/2 inches out of the length, looking at the sizes I should have taken out 4 inches but I’d rather they were too long after the next wash than too short. With shop bought jeans I sometimes find they keep shrinking into the second and third washes.
The instructions were brilliant and I would say that as long as you know your way round a sewing machine, you should have no trouble making a pair of jeans whatever your skill level.
The back goes together first, I put a couple of lines of stitching on the back pocket, just to give it that ‘authentic’ jeans feel

The fabric is a lot blacker than it looks here, but at least the highlights are showing off the stitching.
after this you start working on the fly, I would say that the instructions for this is better than the instructions for the Sewaholic Thurlows, but it does use a lot more photos.


one thing this fabric does do is attract the cat hair :-(, here are some photos of the front made up.
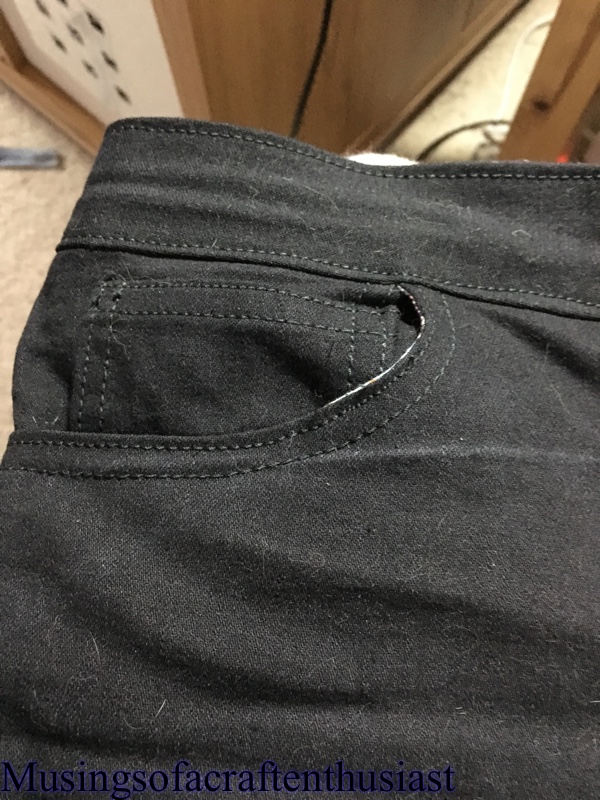


I am very pleased at how they have turned out, the only bit I am slightly disappointed in myself is that there is a tiny bit of pocket lining showing on the curve of the pockets, but that’s what a black sharpie is for.
As promised a shot of the pair I am working on now.

I decided against patterning the pocket as I thought it might be too much red, but now I sort of wished I had.
I used a different foot for the top-stitching the first one was done with a 1/4 inch quilting foot the second pair of jeans I decided to use the stitch guide foot, which I’m finding a lot more accurate.
bye for now…
2016 is shaping up to be the year of the indie pattern
Usually I stick with the big four, well actually two, Butterick and Vogue I have occasionally gone to Newlook, to be honest I’m a bit confused as to why they are called the big four as they all appear to be now owned by McCalls but who am I to question why.
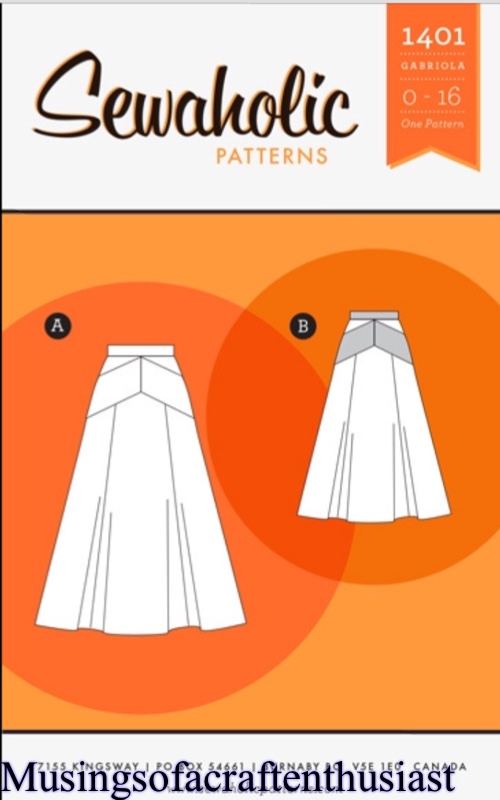
This year I’m going Indie, I already have By Hand Londons Anna Dress, Pinup Girls Bra pattern and what seems to be half of Sewaholics pattern line – Davie Dress, Gabriola skirt, Cambie dress, Thurlow Trousers, Hollyburn Skirt, Belcarra Blouse and Granville Shirt. I have added the Birkin Jeans from Baste and Gather and two patterns from Hey June Handmade, Cheyenne tunic and Lane Raglan.
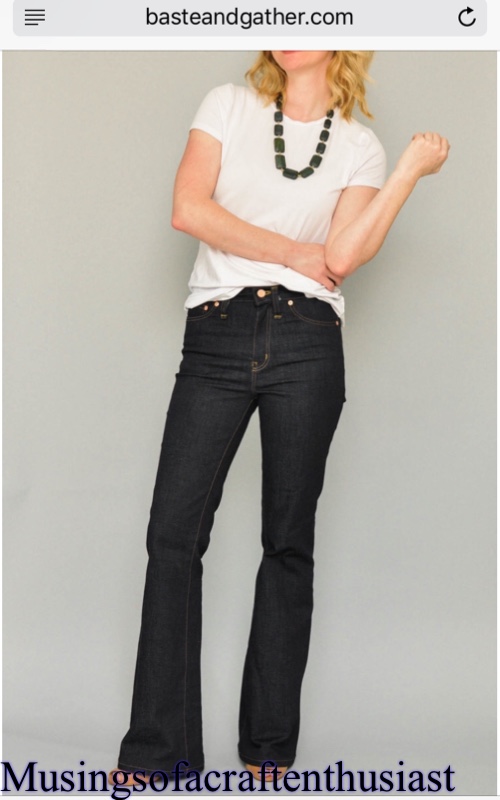
I have always fancied making Jeans but the pattern that seems to be most talked about is the Ginger Jeans, to be honest I haven’t worn Skinny Jeans since the last time they were in, and mostly I remember not being very comfortable especially while sitting down, I know they have bought out a bootcut addon pack but I still find them a bit meh. The Birkin Flares however I love, love all the photos I’ve seen of them and all the reviews seem very favourable.
Of course while I was checking up on the Jeans I came across the Cheyenne Tunic, which is quite close in style to the FatFace Popovers I’ve been buying (in the sale) so I thought why not. I have some very nice stash fabric I can use for it hopefully before I go to Olympia 4th March. I need to stash bust pretty darned quick 🙂


Sewaholic Davie dress
Hi, since my brief look at knit fabrics I have been looking to complete Sewaholics Davie Dress, when I ordered it I hadn’t realised that it was made in a stretch fabric, but I was willing to give it a go. I had some fabric bought from eBay that I wasn’t all that keen on once I had it delivered so it was ideal for my test run.
My first problem is that I’m not a pear shape which is the shape that Sewaholic favours, at 33 27 37 I was alright for waist and bust with a US 6 but my hips are a US 2, what I have done before in this position is just cut a straight US 6 but I have ended up with too much fabric at the hip and it has looked just plain wrong, so I decide to grade down from the waist to the hip size, I used my new hip curve and was very happy with the results.
I did a quick pin to my dress form and it looked alright
My second problem is that I’m short 5ft 2in and I do usually have a problem with princess seam but I’ll cover that a bit later.
Who wants to see the first attempt at the dress.


I would like to say it looks a lot better on the dress form than it did on me and also by this point I had already raised the shoulder seams about an inch. The dress was just too big all over, except on the hip, the other problem was that without raising the shoulder seam by an inch the bust part of the princess seam was way too low, and even with the inch taken out it still wasn’t sitting properly.
Because of the amount of excess I had at the waist and bust I decided to try a straight size 2, after all there are 8 seams so I could quite happily ‘steal’ back 2 inches from the seam allowance. Also by going for a size 2 you already lost 3/4 inch from the shoulder.

What I didn’t realise was how rollyupy the already cut pieces were going to be and ironing them didn’t help 😦 however what I did find was that if I laid it on the ironing board it stuck to the cover like fuzzy felt, I managed to keep it flat enough to cut the new pieces out.
The dress went together very nicely, I used a normal straight stitch as this was only a test dress, zigzag is so hard to unpick, also I don’t like the way it looks on the outside. I might just use my overlocker in future.
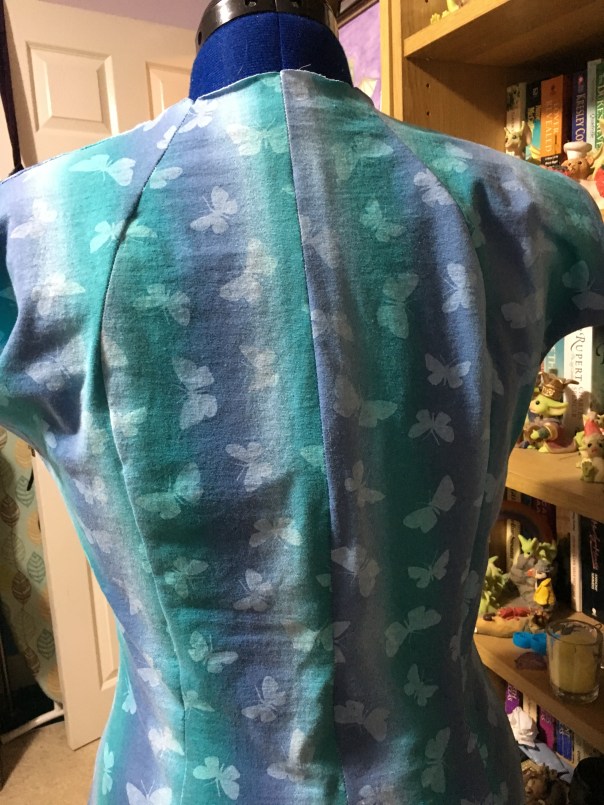
Here is the dress with the basic seams put in it fits loads better.
There is something squiffy going on with the back, but I’m not sure if it is how I standing, the shoulder seam could do with coming up slightly which will might fix this and will bring the bust point of the dress up to the correct position.
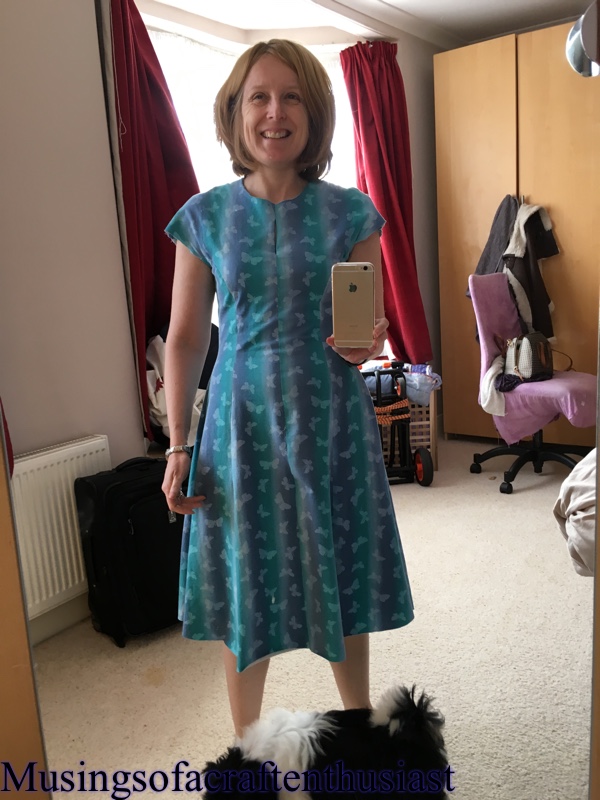
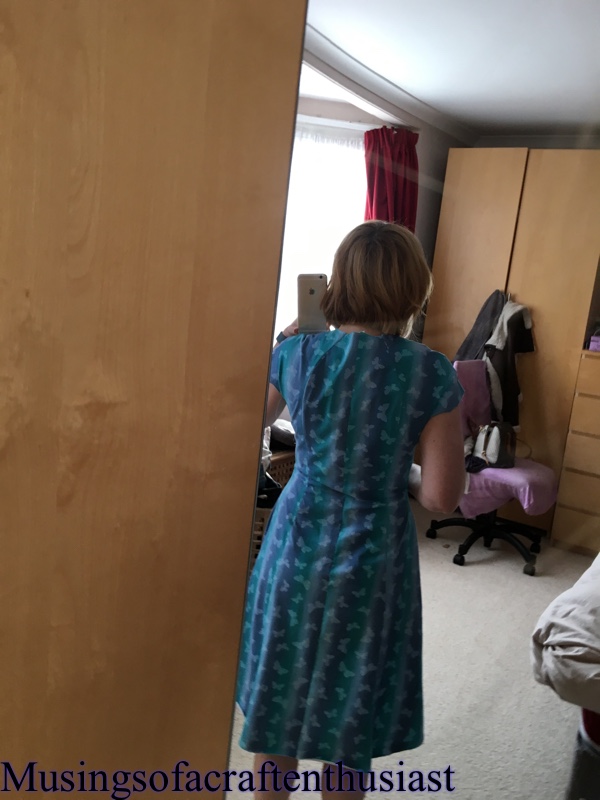
I made the longer length which comes just below my knees, I’m not sure if the shorter one might be just out of my comfort zone.
I’ll be back with the finished article soon, also I like the fabric made up a lot more than just laying in the drawer so this might by my first dress for Florida.
It is a medium weight stretch fabric with a nice amount of body, I used my walking foot which is brilliant and my sewing machine didn’t try to eat it once, bonus!
Also on my cutting table is By Hand London Anna dress, more about that soon.
Simplicity 7995
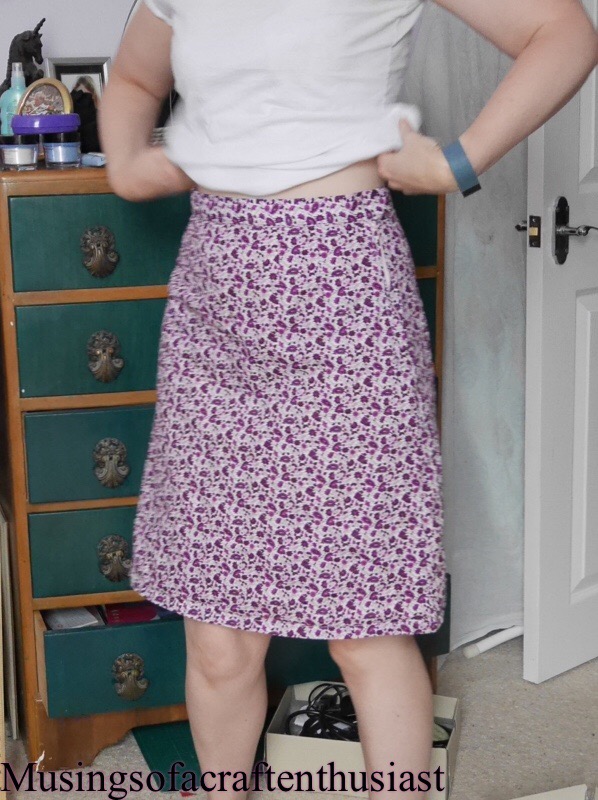
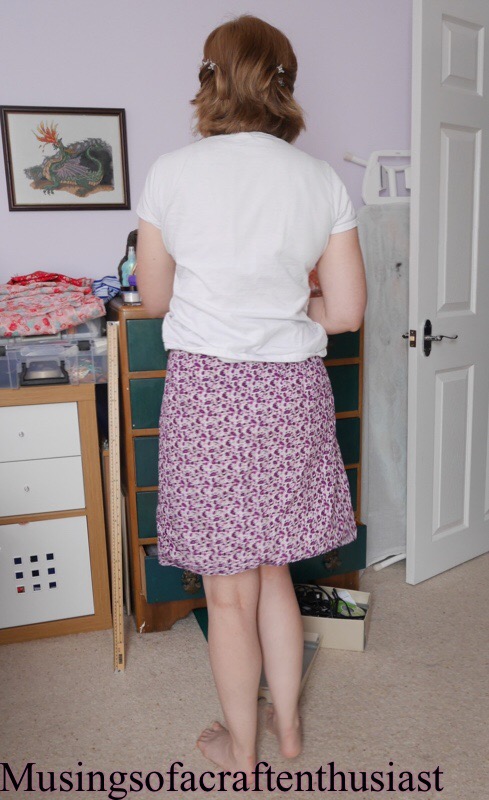
I mentioned a couple of posts ago that I had made this skirt, well I have actually made two (almost).
A couple of weeks ago when the Summer was still sunny, I realised I didn’t have the skirt equivalent of Jeans to wear to dress down Friday, so Thursday evening I looked through my patterns and picked this one
I wanted originally to do view 1 but when I opened the pattern envelope I didn’t have the pattern pieces. 😦
I really, really have to get in the habit of checking things like that when I get new patterns, to be fair I can’t remember where I got the pattern from, it could have said pieces missing on the auction.
So I decided on view 3, which was probably just as well as it is only three pieces and no top stitching, I had this piece of blue cotton I had bought from Kayes on a whim, I had been planning a play suit type thing for the holiday, I discovered that although the bust size was right on the pattern the hips were wrong so the playsuit didn’t materialise, which is probably just as well I’m having serious doubts on the convenience of going to the toilet while wearing one.

Back to the skirt it has four darts front and back, I was sneaky because i knew there wouldn’t be time to wash it first I used tailor tacks, which in general I hate I always get at least one or two that won’t stay in place.
 The zip went in first time and looks good, I think/hope that I’m getting the hang of those now. I used waistband facing for the waistband (obviously) which always comes in handy with the cutouts for folding, to save time I also machined the inside down, which i don’t always do because you get a much better finish hand stitching it. I machined a small hem on it and wore it down stairs to show Simon, we both agreed that it needed a lot off the bottom. infact I took practically 4 inches off it , Looking at the picture I’m not sure just how tall these models are but they ain’t 5ft 2 in.
all in all I think it took me a couple of hours to cut out and put together, so I’ve made another one.

Butterick 7556

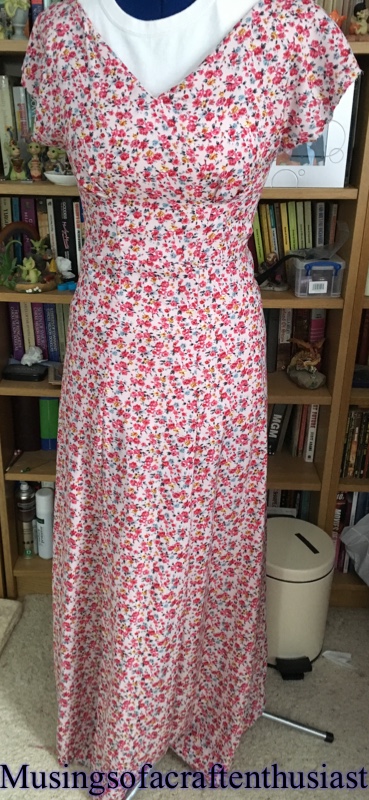
This is another Sewing post, I am in the middle of sewing a second version of this dress, this one was done just before our holiday. It went together so easily and looked really good, I decided to make another one.
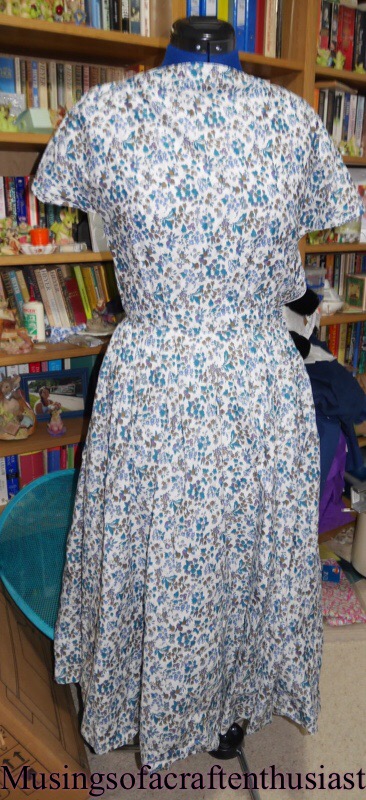
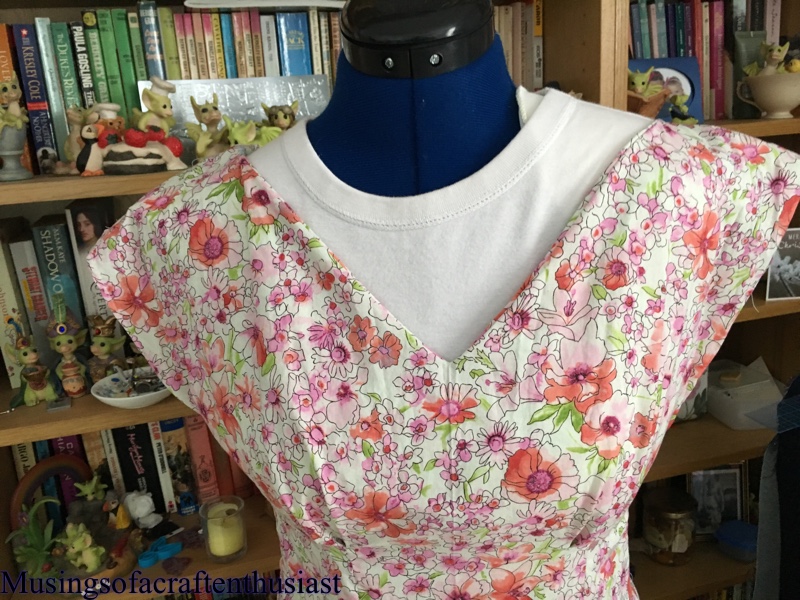
This one was made with a Lawn Cotton, I bought at the Knitting and Stitching Show at Olympia earlier in the year, the stall said it was LIberty, but I haven’t been able to track down the print, it was a good price and the fabric is nice and soft, also cool to the touch, it irons beautifully (which I haven’t done to take these photos).
I wasn’t really sure about the neckline but it does look better on.

After marking everything out, you stitch the four skirt bits together, then baste the pleats in, the skirt closure is different, the dress has a short zip in the bodice but because of the pleats the skirt has a placket, the last pleat on the left side front folds over on to the side of the left side back and is held in place by a hook and eye and two press studs.
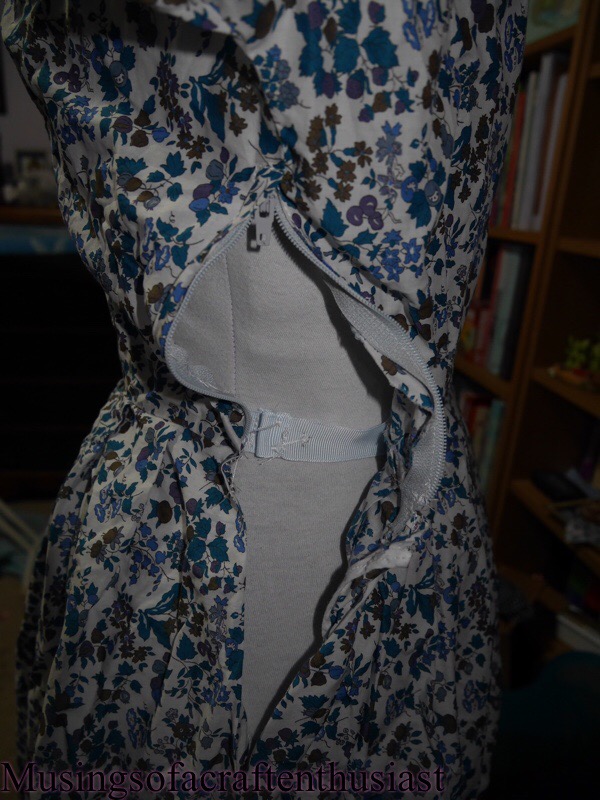

The first time I made the dress I didn’t look at the instructions close enough and didn’t realise there was a hook and eye, as I didn’t fancy relying on two press stud to keep my dress closed I put in a waist stay and a skirt hook and bar.
It is a surprisingly comfortable dress to wear, especially if you get the zipper tab in just the right place, and I got a couple of compliments on it while in the States.
Butterick 7240
This is the ‘companion’ dress to Vogue 8781, they are only companions as the fact I’m making them together.


I also have this pattern, bought while I was in the phase of (what difference is there between a kimono sleeve dress and a set in sleeve dress) I still haven’t laid them side by side, but I’m sure I’ll get around to it sooner or later.
As I stated in my previous post I love this dress, it is totally impractical for wearing to work, especially with the office chairs on wheels, but if it gets hot enough I might just throw caution to the wind and wear it anyway.
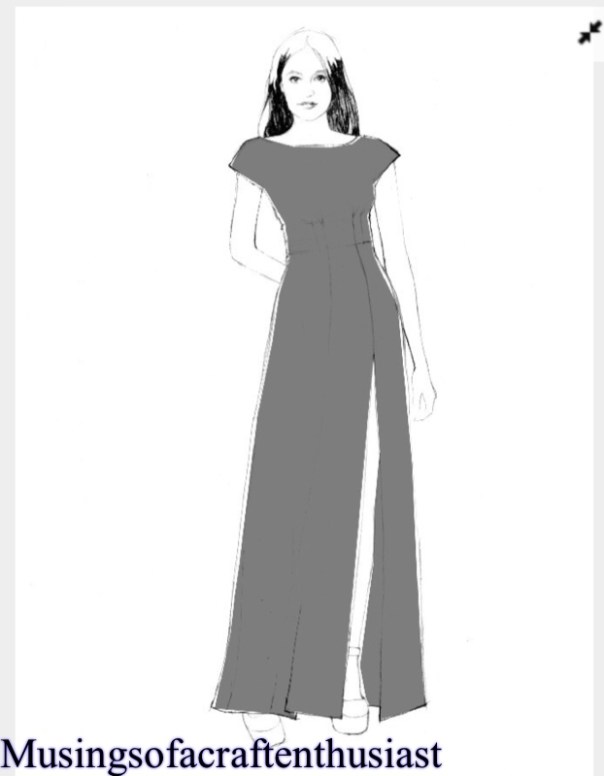
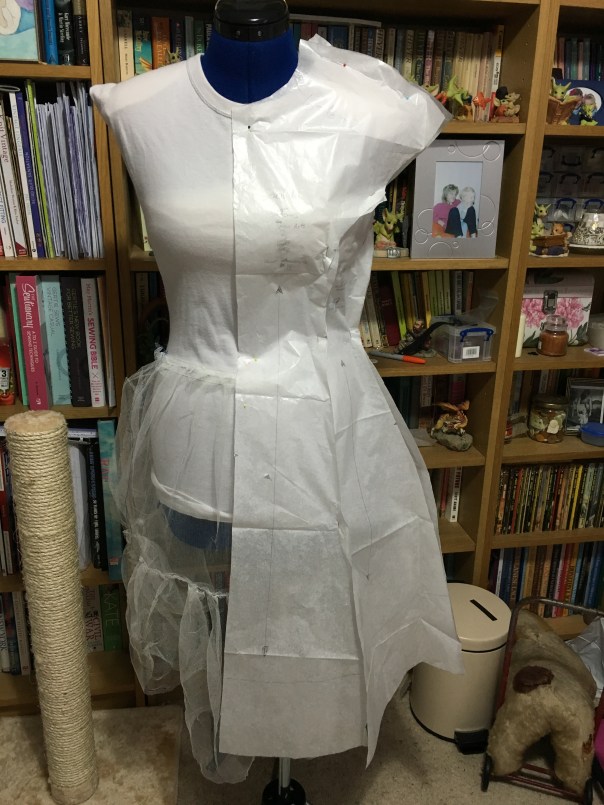
This pattern is advertised on the packet as a long bodied dress, it has a front and back panel which runs the entire length of the dress, and you add two side skirt panels at hip height to give the skirt a lot of fullness over the hip. The back panel has a center zip.


I have machined the two front pieces together and the both the back pieces, I have even put in the zip, (unfortunately that will have to come out, as it isn’t sitting right)
Each side skirt consists of two pieces, they are also stitched together, all are waiting for the iron….

as you can see by this picture the hip inserts are long enough to wrap round my body as is.
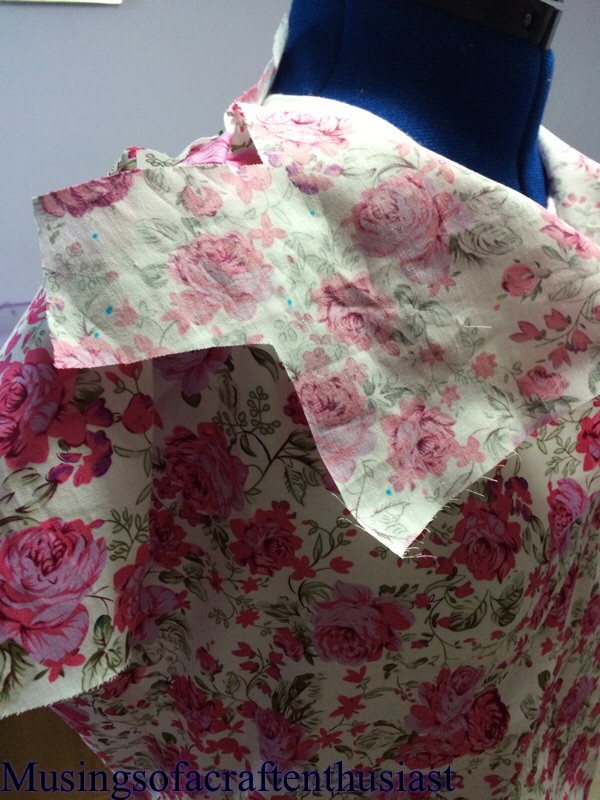
it has one of those collars that is part of the front bodice then wraps around to the back, leaving a small stand at the back and a flappy collar at the front, more photos on that as I make it
We are going to see Mickey Mouse….
It is booked!!! two weeks in May, in Florida I can’t wait, we have a villa, the park tickets, we are swimming with dolphins, just as well we also have another week off after we get back we will be exhausted!!
The main reason for this post is ‘We’re going to see Mickey!!!’ and I need to think about my wardrobe. The temperatures are going to be between 22 and 32 degrees, I’m hoping for the middle to lower end as Simon does not do heat very well.
I’m hoping to create one new item of clothing a week until we go, this might be ambitious as a couple of things I have my eye on are in my Haslam books and as I haven’t completed one of the designs yet I can’t say with any certainty that it will fit properly.
Here are a couple of pictures.

I was also looking at a swimsuit pattern, I don’t do very well with stretch fabric, but I want to look nice for the Dolphins
As well as Gerties book for better sewing I have Gerties Vintage casual, I’ve been looking at the shorts, dresses and shirts. Here are some of the clothes I hope to be able to finish before we go.


