Category Archives: vintage dress making
Hey June – Lane Raglan
To tell you the truth there isn’t much to say about this, it has a couple of options
Elbow length, 3/4 length, long, or long banded sleeves
Curved or banded hem
A hood
Thumbhole wristbands
Chest pocket
A separate front pattern piece with a built-in full bust adjustment (sizing guidelines are outlined in the pattern)
Needless to say I didn’t need the Full Bust Adjustment 🙂 I used the curved hem and 3/4 length sleeves, this was put together on the overlocker except for the twin needle stitching on the cuffs and hem.


The white fabric was bought from ebay the blue was a t-shirt from Primark.
Raglan sleeves are a doddle to put in, to be fair most t-shirt patterns appear to put their sleeves in flat any way but because the raglan sleeve actually incorporate the shoulders as well they are even easier to put in. Then you do the neck treatment, side seams and hemming took me about 2 hours start to finish.
The one thing I did worry about was the curved hem, but I overlocked it first which brought it in slightly and I ironed it in first. I’m very pleased with it and can see a couple more in my future.
February Projects
We have another bonus project coming up, I changed the fabric I decided on for the sewoverit shirt dress, after cutting it out I had enough left over to cut view 3 shorts and a halter neck top.
I did make a test version on the shorts which fitted perfectly. The shorts though straightforward has no waistband, it has grosgrain ribbon instead, this was as fiddly as putting the elastic in the moneta dress.
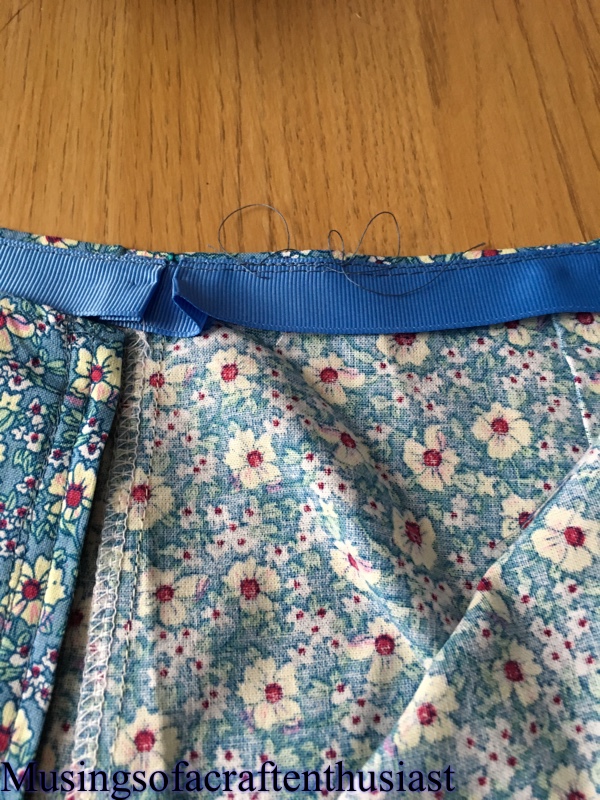
Those little folds at the seams were very hard to keep in place as you stitched them down then you fold them over and stitch in place, you then tack them to the seam allowance I’m assuming it is to give a better fit as it will expand over the hips.
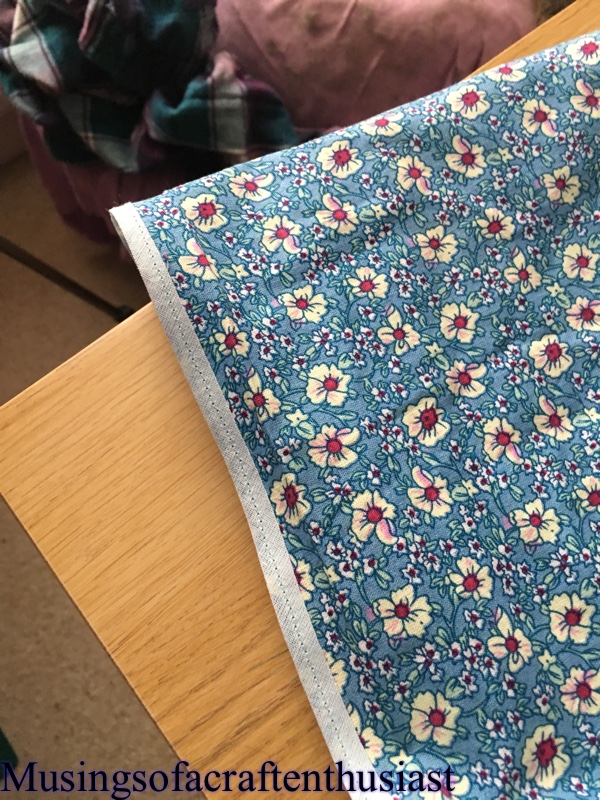 I used bias binding on the hems as instructed by the pattern which does give a nice clean finish as you can in the photo above I used my overlocker on the seams.


I removed 1/2 inch from the side seams and shifted the strap over slightly, once the top had been put together I had to remove a further 1/2 inch if I make this again I will have to reduce across the top pattern.

 Here is a picture of the outfit with buttons
 More soon
Moneta Dress

I’m in two minds about Moneta it is very comfortable and it looks great but it is a pig to put the clear elastic on the skirt and until I put the collar on I wasted a lot of time trying to work out the front from the back.
I bought the fabric from Olympia last year, for some reason I keep thinking it is heavier than it actually is, it is almost t-shirt weight.
I cut a straight size 10, It is what my measurements fell in to but if I make it again, I think I’ll go down a size, it is a bit loose across the chest. The two changes I did make was to lengthen the 3/4 sleeves by another 2 1/2 inches, I measured a dress that I already had to decide on the length and to shorten the bodice by 3/4 inch
Most of the dress was put together on my overlocker, the other problem I had was keeping the seams aligned as they went through the overlocker, so I had a couple of holes that I need to go back and redo.
To be honest one of the problems with the elastic might have been caused by the fact instead of 6mm elastic it was 9mm elastic, I now have the proper elastic so hopefully next time will be easier.


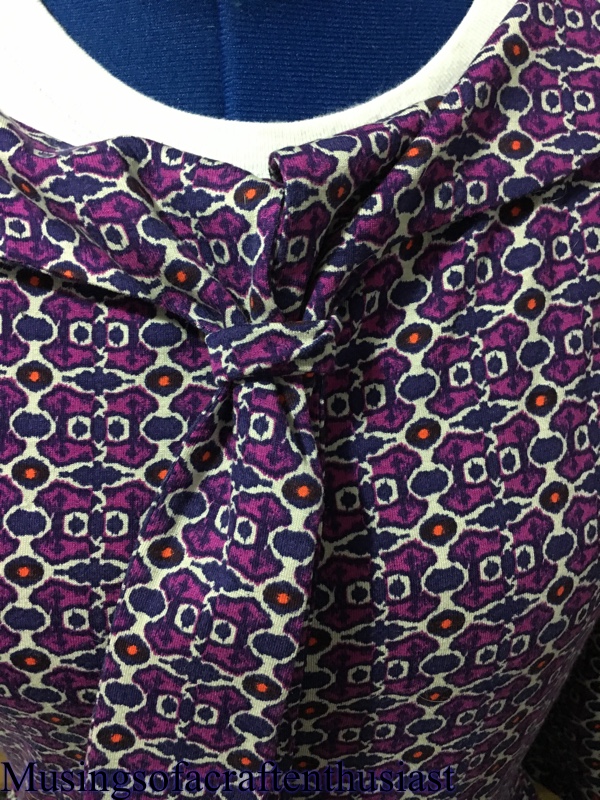
Originally I was just going to have a simple neckline, but with the issue i discovered not being able to tell front from back I decided on a collar, I downloaded the extra collar pack from Colette and picked the tie version, I had now trouble attaching the collar, I wasn’t sure about actually timing it so I made a loop to put both end through.
here are some photos of me wearing it


I can’t decide whether I should wear a belt with it or not.
Sew over it Shirt dress is coming up next, I have changed my mind on the fabric
Project 3 January part 2
Hi, just a quick post to show you the finished version of project no. 3


The model on the packet has buttons down the front of her dress but I’m not sure if this needs it, the other thing it could have is the lowered belt, still not 100% convinced about that either, I don’t think that the fabric needs any other decoration.
Four items finished on time, hopefully this is how the rest of the year will carry on.
Project 4 – January
This is probably the item that is going to cause me the most problems, but to be fair it is going to be my own fault.
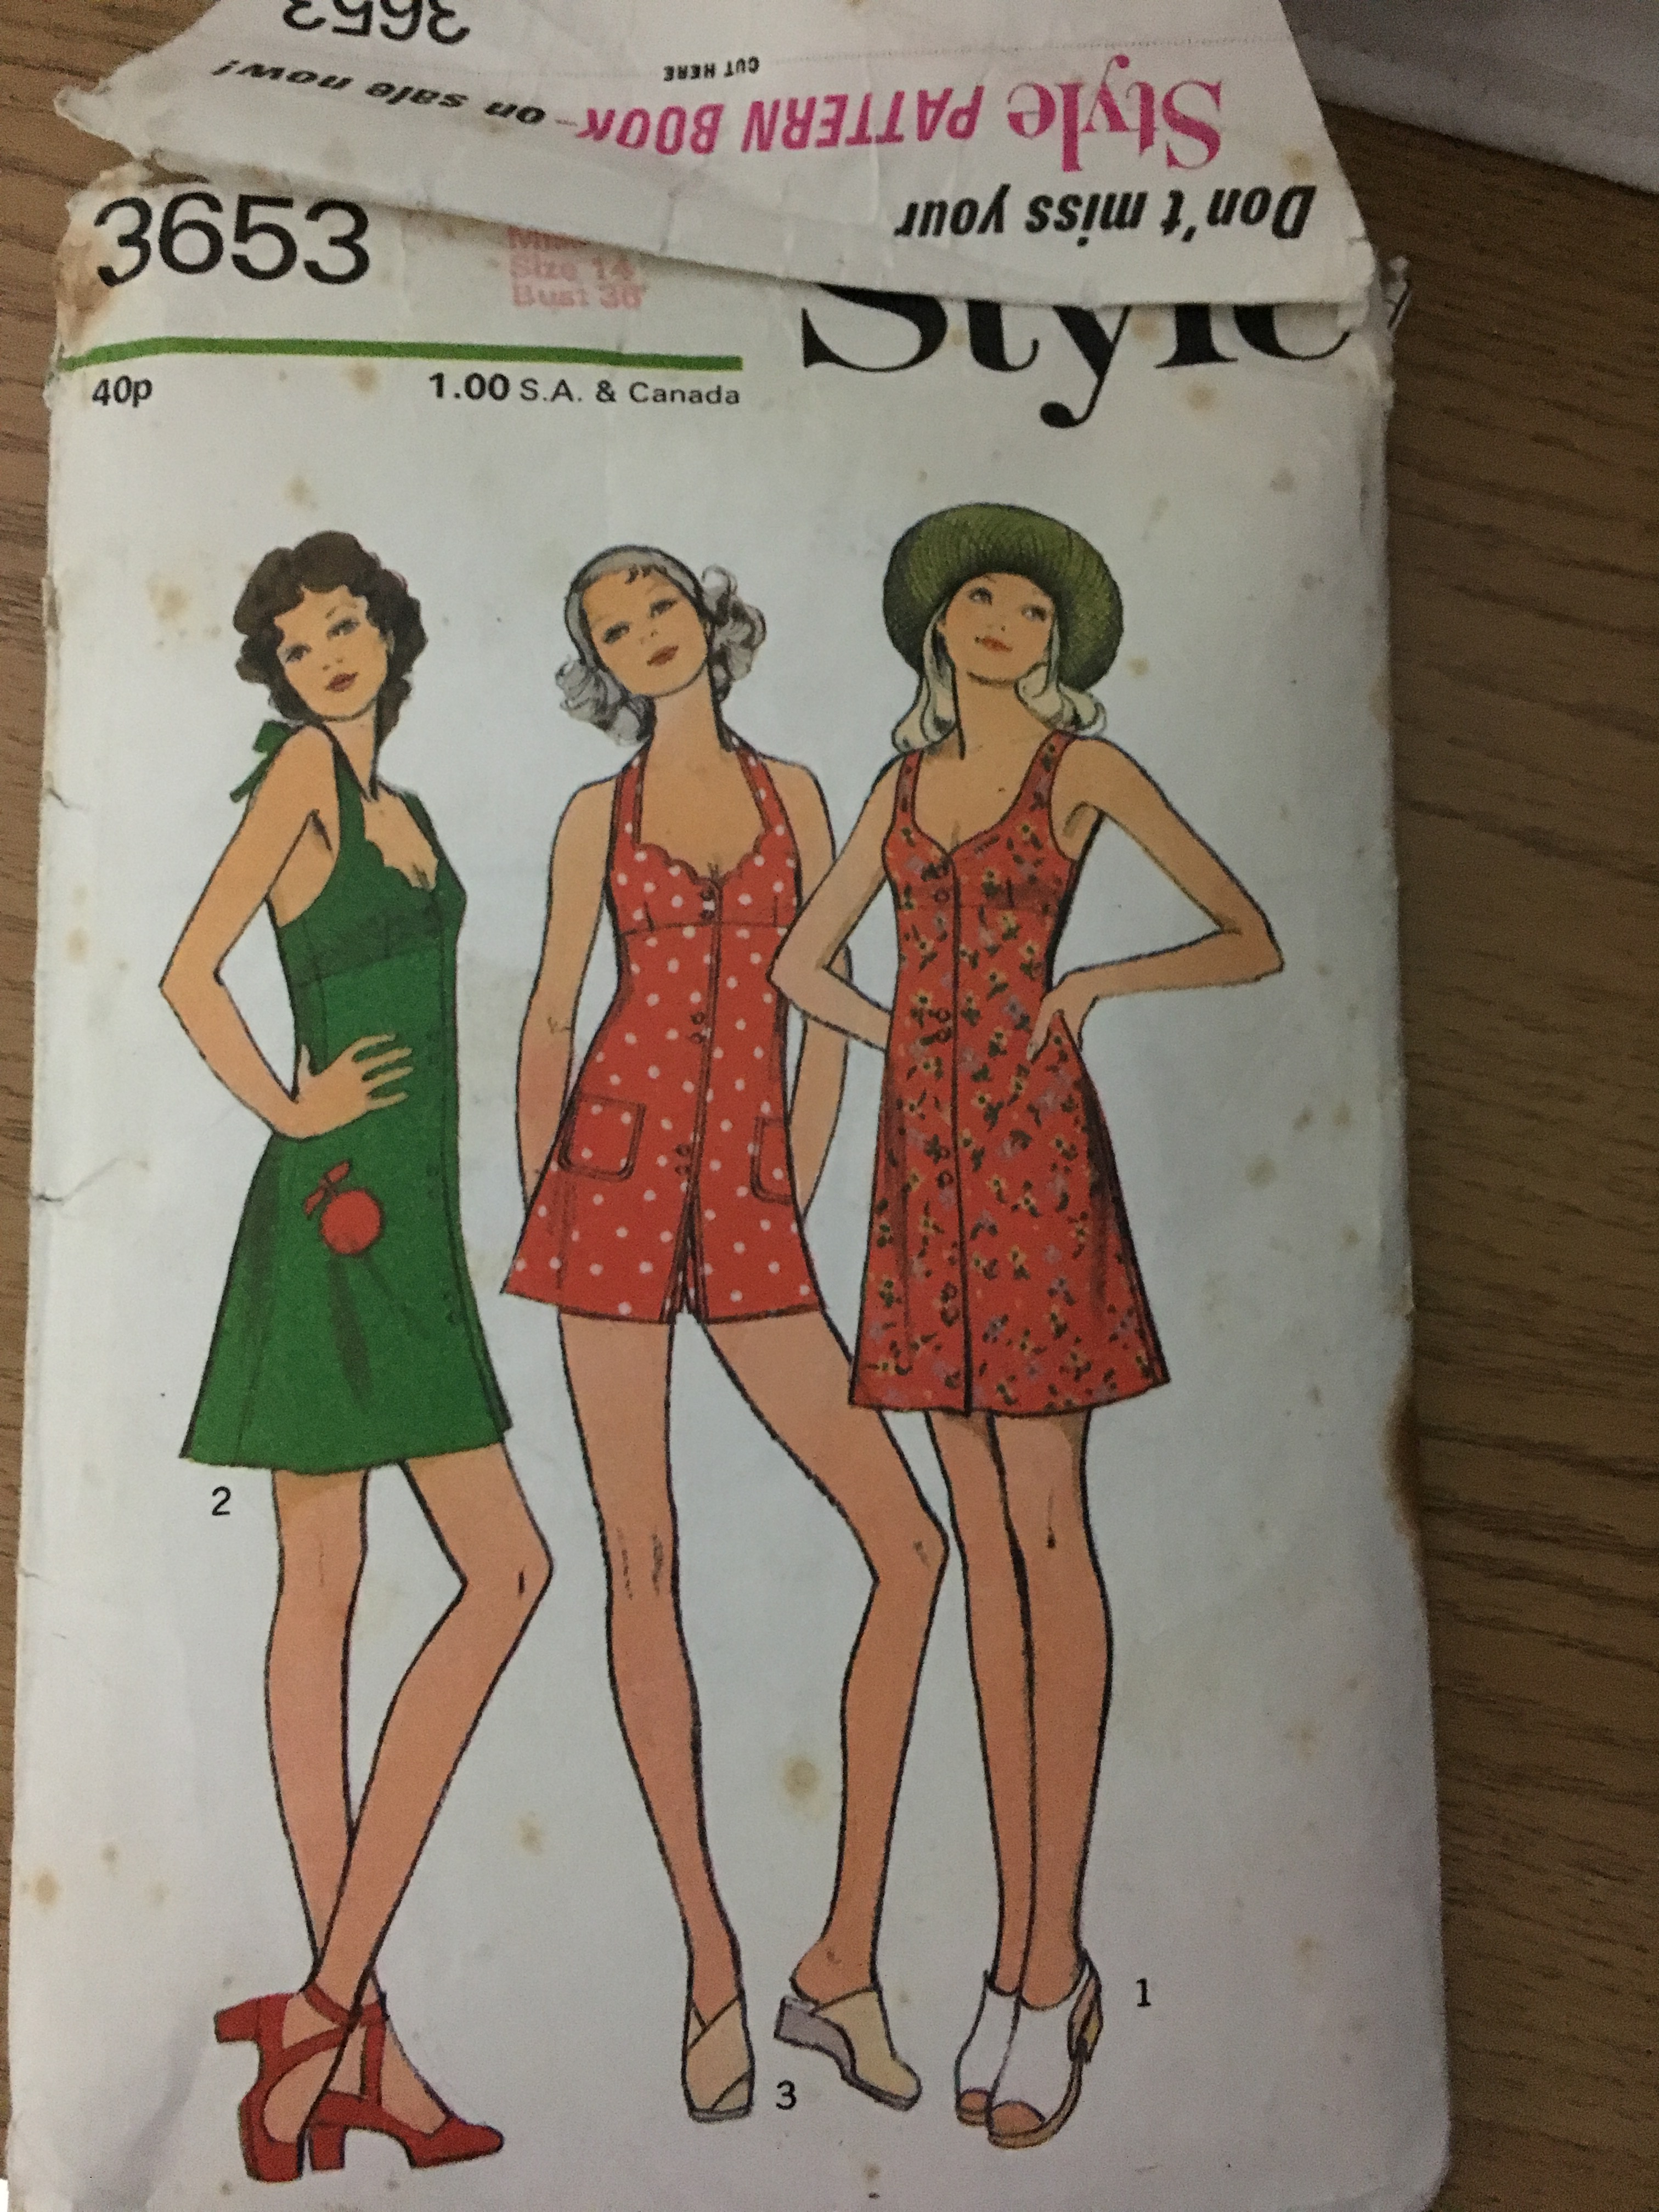
For Project 4 I’m going to take this dress
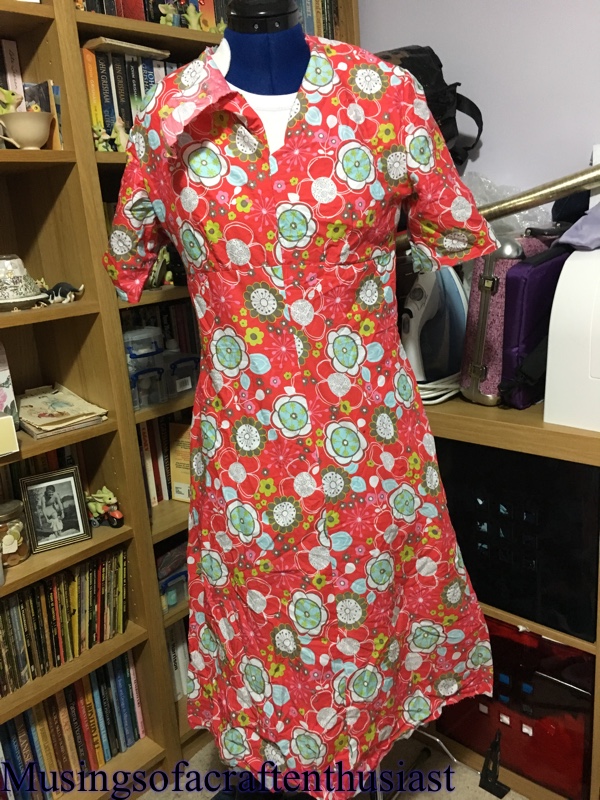
And turn it into this dress

The original dress fitted fine as long as I didn’t want to move my arms or anything practical like that.
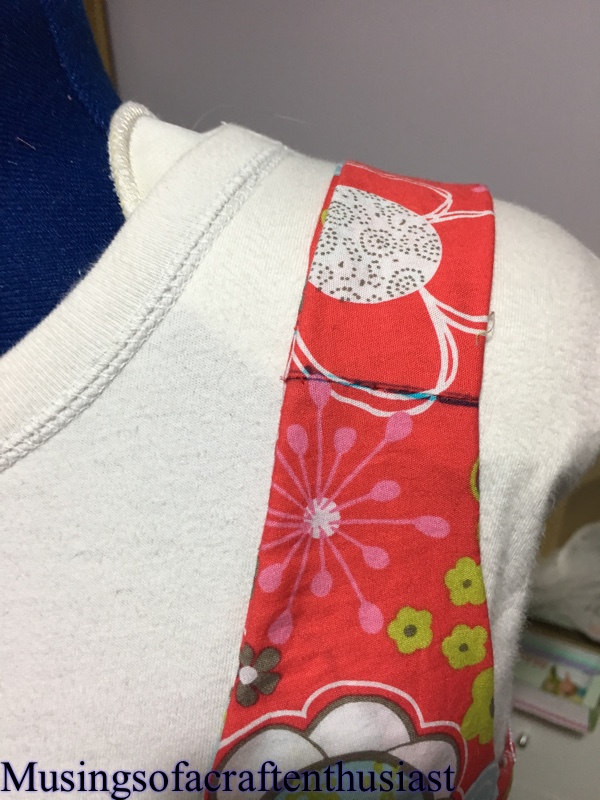
I had two attempts at making the top half of the dress, which gave me enough to do the main bit of the front bodice, I needed to do some pattern matching for the straps, I am very please with the result.
I needed to do a bit of patching on the front skirt pieces, luckily it was where it folded under to make the button tab that was short otherwise i would have had to found another plan for the fabric.

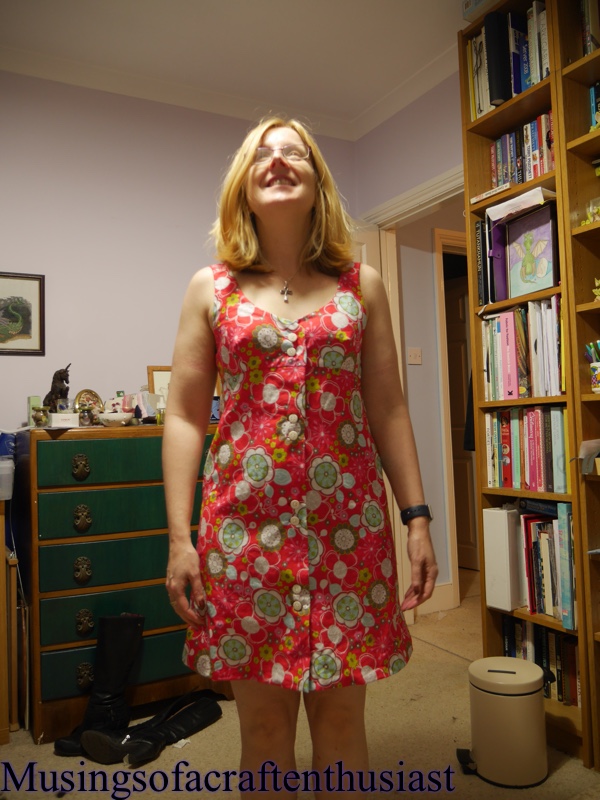
I probably should have sized down the top as I needed to take and extra 1/2 inch off the side seems and bring the front seam in an extra 1/4 inch, I’m thinking I might make the shorter version with the shorts and the halter neck so watch this space.
The dress came together very easily and if I had started with a length of fabric, it would only have taken a couple of hour to put together.
I wasn’t sure about its double buttons but I think they look alright you do need the hook and eye at the seam otherwise it gapes.


more later
2017 sewing challenges
To be honest I don’t usually have the determination to stick to challenges which usually why I don’t officially take part. This year I think that I might need some inspiration and encouragement to complete my sewing.
As of today I want to try to complete #sewwhatyougot, it isn’t as if I’m going to be short on patterns or fabric :-
This is a challenge to Sew 8 outfits, use only fabric you already have in your stash, use only patterns you own now. do not repeat a pattern twice. I found this over at mermaidspurse.org.nz. one of these patterns will be the moneta dress, which will enable me to enter the #monetaparty though at the moment I can’t decide whether to do sleeves or no sleeves.
With my own personal challenge at the beginning of each month I am going to announce four projects to be completed in that month, one will be a UFO, one project can be carried over to the next month if the project gets carried over more than two months I going to dump it.
we have already had January, February is going to be:-
Moneta Dress in this fabric
I bought it at Olympia last year, one of the stall employees had a dress on made in this fabric, which I was happy to see, because I had spotted this first and couldn’t decide whether if would look good as a dress.
I am also going to try the sew over it vintage shirt dress

I want to finish this skirt
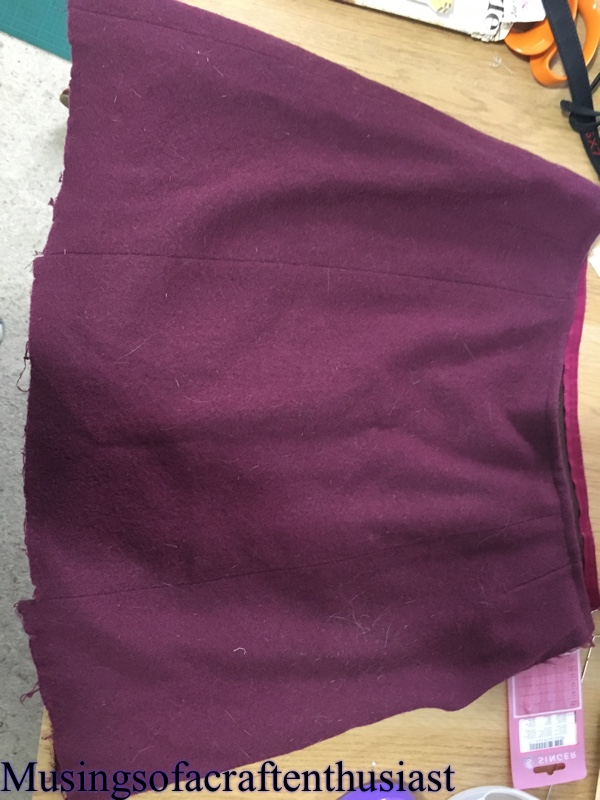
it needs a zip and for me to decide how I’m going to finish the hem.
I haven’t chosen the fourth project it might be Hey Junes – Lane Raglan or I might have a go at this pattern

more soon
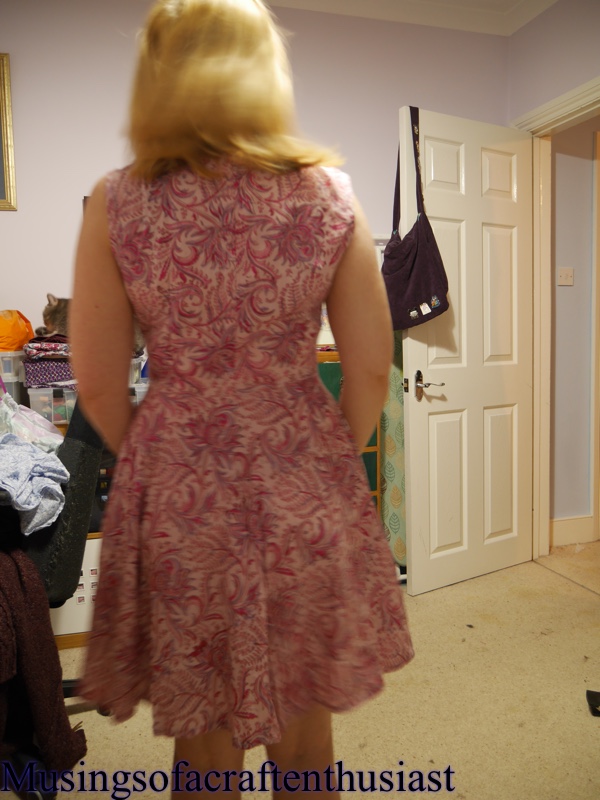
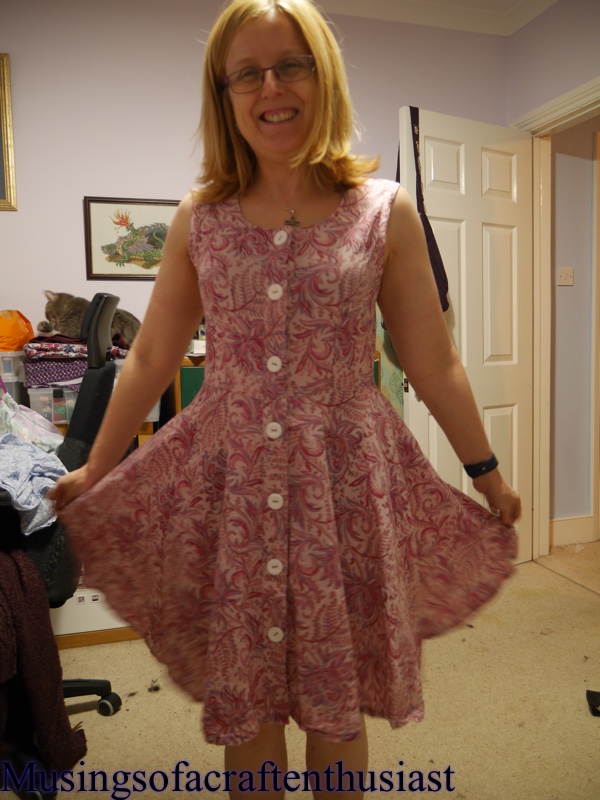
Project 1 – Part 2 Finished
I have my first finished Dress of the year and my first Dress for Florida, yes unfortunately you can expect two weeks solid of posting about Florida again.
I am very pleased how this dress has turned out, the bodice fits perfectly, the white buttons add just enough interest to the front to stop it being too boring.
I used self made bias binding for the arm holes and skirt hem, as i had been a bit tight for length I didn’t want to use too much on the hem.
One of the arm holes doesn’t lay quite right under the arm, but I have already had the binding off once and it doesn’t look much better. I’m wondering if I cut it slightly wrong as I freehanded taking off 5/8 of an inch. If you look closely at the inspiration dress I think that the binding is on the outside.


Project 2 new bra doesn’t really warrant it’s own post, it has come together really nice it is still slightly too tight across the right cup but it looks a lot better.
Project 3, January
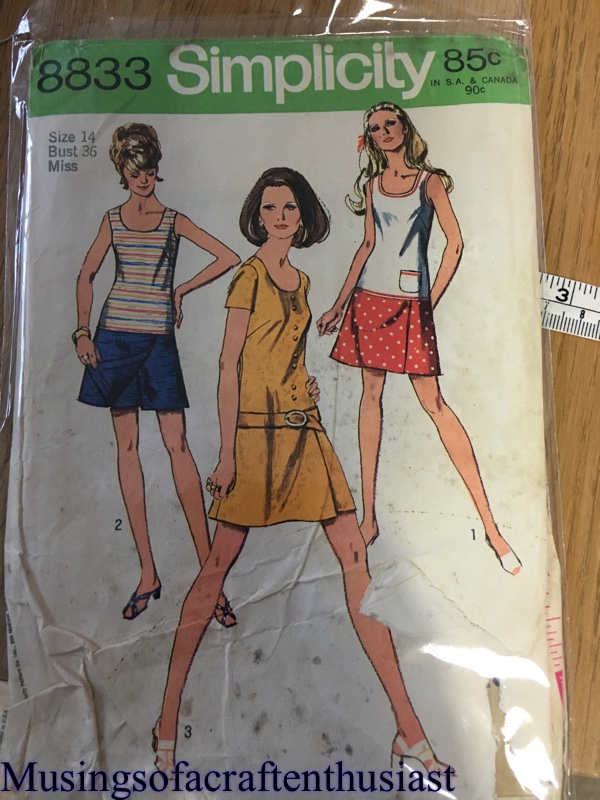
Here is project 3 for this month, once I had shrunk the pattern, it is actually a very quick make.
To shrink the pattern I traced it off on to x and dot paper, I used to use the burda tracing paper but I find it just a bit too flimsy for this type of thing. I shortenend it by 3/4 inch first then cut it into five strips, each strip I overlapped 1/8 inch and stuck it back together, I had been using pritt stick, but I managed to pick up write on able scotch tape before christmas so I used that, it is quite a lot easier. The next thing I did was a SBA of 1/2 inch.
I checked the measurements before laying it out and decided that I needed to put the two inches removed from the top back at the hip it’s a pity I didn’t realise this earlier as it would have meant I didn’t have to change the bottom half.
The fabric is a beautiful purple with a white ‘flower’ design, I layed the pattern pieces out and drew on the extra 1/4 inch to the outside seam cutting out immediately, the last thing I wanted to do was forget what I had decided.


I actually put the dress together as per the instructions which meant hand stitching all the hems, the main problem with that is the ‘skirt’ pieces need to be hemmed before they are attached to the shorts.


basically you put the top half together with the darts, facing and zip, for some reason at this point you don’t touch the sleeves, then you put the front shorts together and add the skirt overlay then repeat for the back, then finish making up the short and attach to the top half, once it is all cut out, even with the hand stitching it only takes about 3 hours to put together.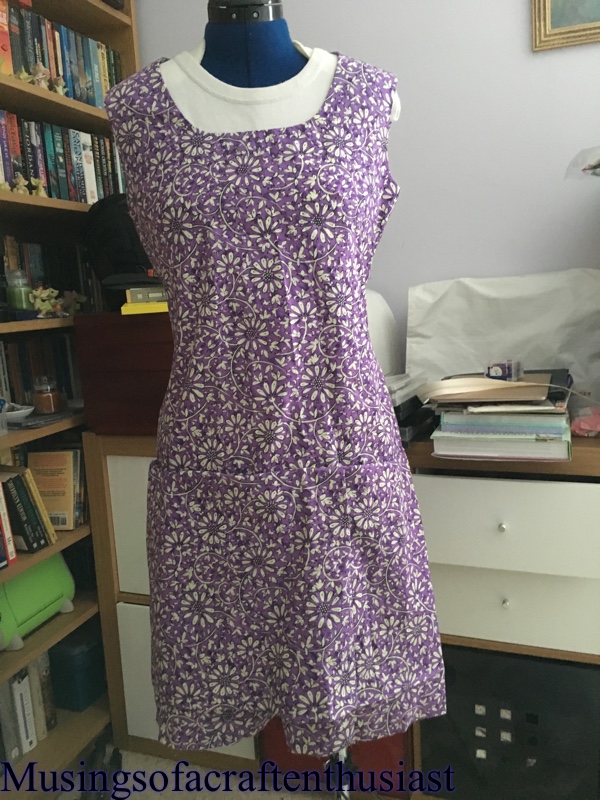
more soon…..
Projects for January
hi, i know this is a little late for my first proper post for January but here goes.
I have four projects I am working on at the moment:-
Corrected bra pattern I altered on the advice of Beverly Johnson, this was coming together very nicely, right up to the point I discovered that the sliders and rings were the wrong size, I have since received a new set of larger sliders and haven’t got around to using them

The next project it is a refashion of this dressI I love the fabric, but even though this was the second time I made this dress, it was unwearable, too tight across the back and the arm hole was too low, not sure what was going on there. I have subsequently taken it apart and I hope to be able to make this dress out of the fabric.
I wanted to remake this dress/pant suit, but I wanted to make it closer to my size so I reduced the pattern to a 34 bust, after cutting out the pattern I realised that the fabric design was totally unsuitable for it, so I decided to use it for my other project which was to create a copy of this dress.

More on these soon
Biba Part three
This will be the last post on this I promise, I went back to the exhibition today and I took my proper camera I have taken some closeup shots of the clothes.


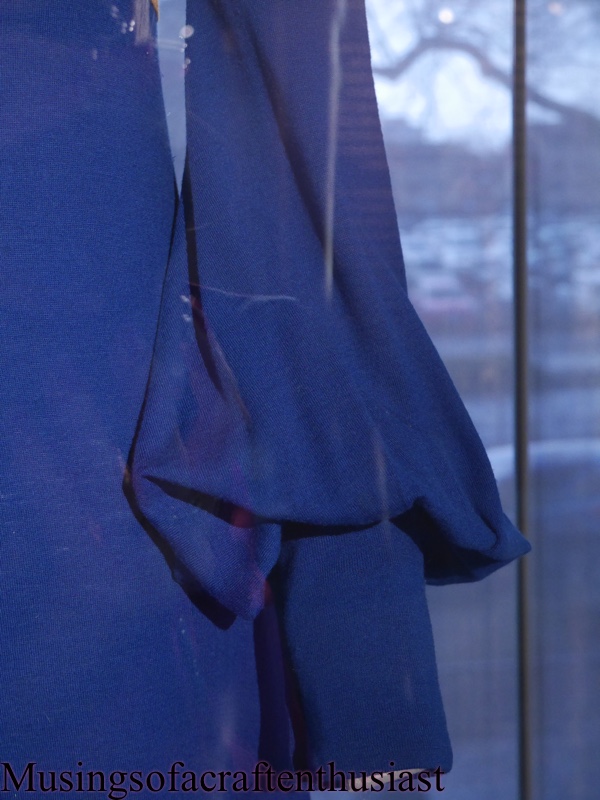
Biba seemed to like these bell sleeves with the long tight cuff, I would assume that the cuff would go some way to stop you dropping your sleeve in your soup.
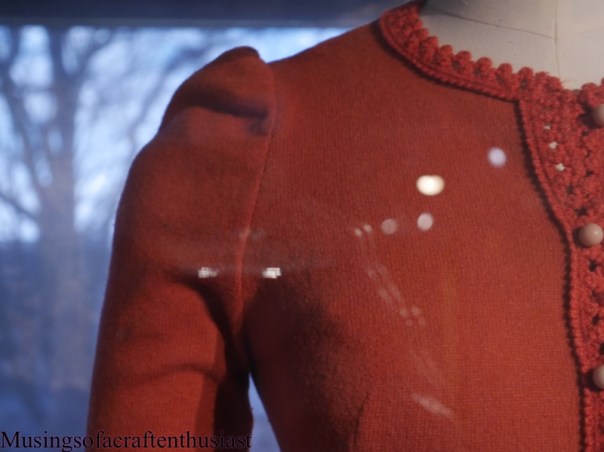
This dress was also available in red, which I think I prefer, colourwise.
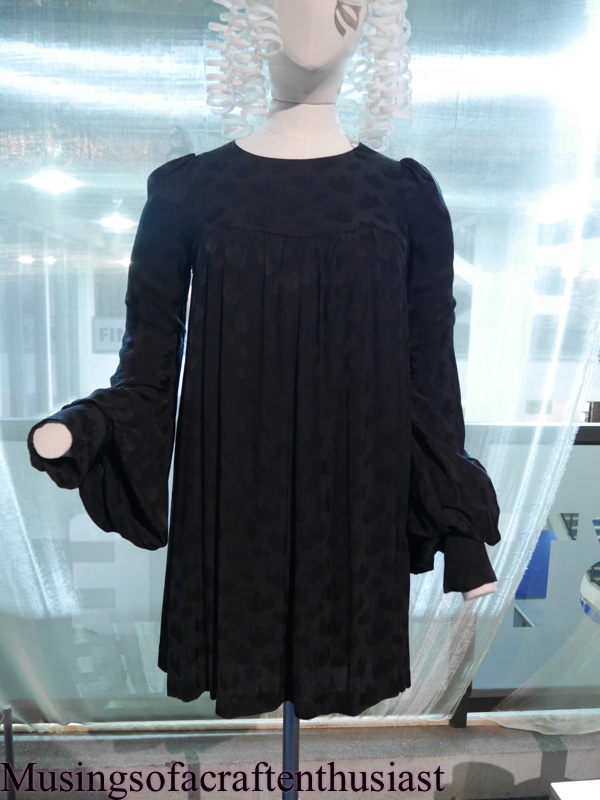
As you can see in these shots the shoulder and sleeves are very similar, gathers at the shoulder going into the Bell sleeve.
The yoke and gathers across the bustline give it a very soft look, I’m not sure that the sleeves really go.

This is a completely different look for sleeves we appear to be having a hi-lo moment, I’m not sure that they would stay out of dinner, it has a very nice soft draped neckline.
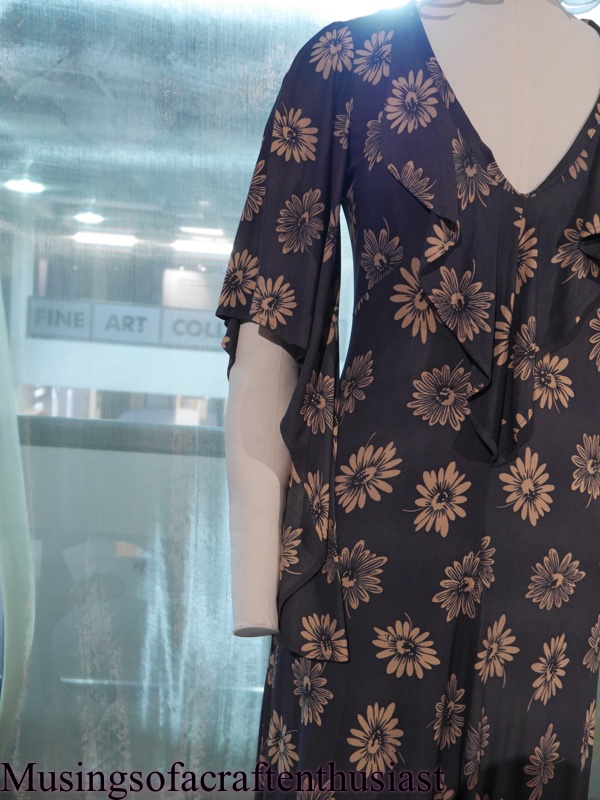

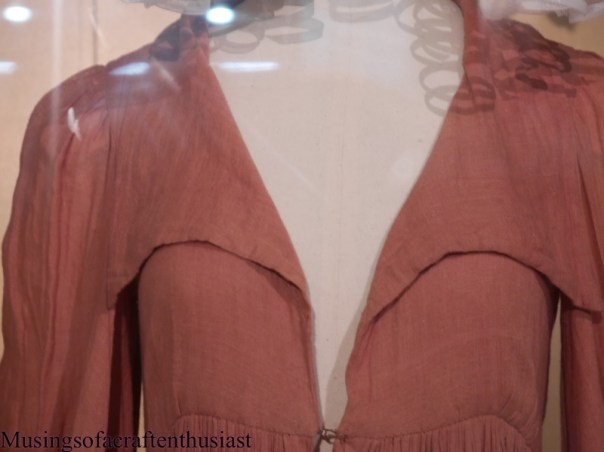
I love this wide drapey collar but not sure about the neckline it’s self
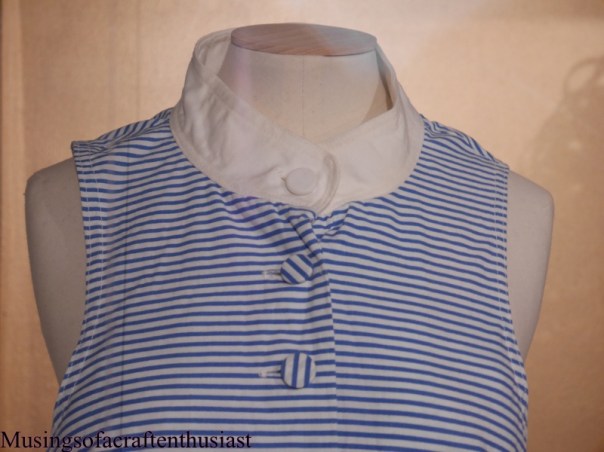
Look at the collar on this one the contrast white collar and dark blue is very striking.

I missed this little white collar the first time I looked at the dress, it wasn’t until I read the gold card attached to it that I saw it.
This has a funny right angled under arm bust dart, I know they were aimed at the mainly flat-chested but I’m not quite sure what this achieved.

I love this coat, with the princess seams on the back and the big collar, I’m pretty sure that it would be unwearable in the winter, the sleeves don’t look wide enough to wear it over anything bulky and I’m not sure you could get it over the bell sleeves of the the first two dresses I showed you.


Biba was definitely all about the sleeves

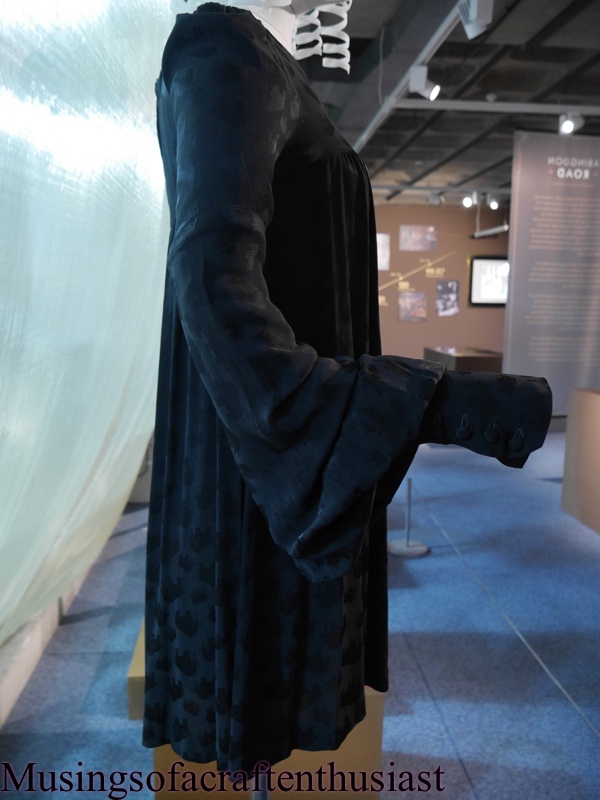
look at these buttons aren’t they great?

I love the look of these cuffs, a lot of the 50s patterns have the contrasting collar and cuff but I haven’t got the nerve try it yet, maybe I can use this for inspiration.

I promise this will be the last post on Biba – for the time being.
next up will be my plans for the new year……..


